
Tanat Valley 3 by Peter Drost

I was very pleased when Dapol announced their intention to produce a series of nine-foot wheelbase wagons, especially as a Gloucester seven-plank based on the RCH 1887 Specification was included in the range. My enthusiasm abated somewhat when I found that the internal height scales out at about 4’5” whereas the greatest number of examples, including all the wagons that I might be interested in, were 4 foot high give or take half-an-inch. Nevertheless, they provide a quick way of obtaining a number of running wagons in ScaleSeven without too much effort.
There are probably several ways of effecting a conversion and perhaps the most accurate way of doing this would be to use the replacement axles that are available from the ScaleSeven stores with Slater's wheels.
An alternative method, which is certainly cheaper and involves only a little effort, starts with removing the Dapol wheelsets and re-setting them to the ScaleSeven back to back (31.3 mm).
Wagon wheels typically have a tyre width of 5 inches whereas the Dapol wheels are equivalent to 6 inches, this presents us with a problem we need to address. However, although Dapol's flanges are deeper than S7 standard (0.88 mm vs 0.68 mm) the converted wagons run through my point work smoothly and satisfactorily.
As supplied the dimension between the faces of the axle bearings is 37.9mm. This leads to the wheel hubs binding on the bearings. To avoid this remove the wheels and, on the non-rocking side of the chassis, remove the bearings from the axleboxes. The collar of bearing itself and both the face of its housing can then be filed to increase the clearance available. Ideally one would remove the bearing on the rocking side too but this I found too difficult to do but (on the example I worked on at least) the rocking side doesn’t have any breakgear and so it is easy to reduce the thickness of the collar of the bearing in situ. We need to increase the dimension between the faces and the bearings to approximately 38.1 mm, but be careful to remove material evenly on each side.
Once that is done, replace the bearings, pop your wheelsets back in, check that they run freely and test run your wagon.
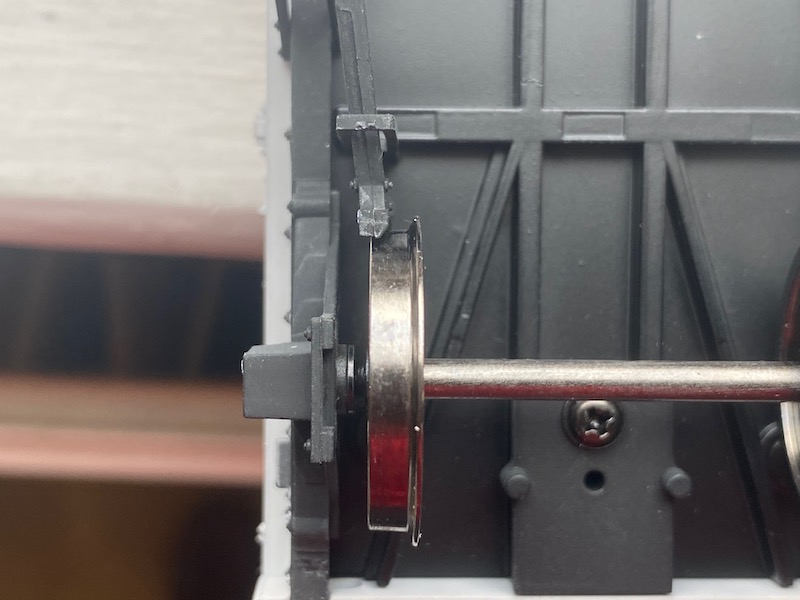
Thankfully, from our point of view, Dapol arranged to place the brake blocks where they should be rather than aligned with the O-gauge FS wheel locations so no action is needed here.
Figure A: As supplied - with wheels at O gauge back-to back
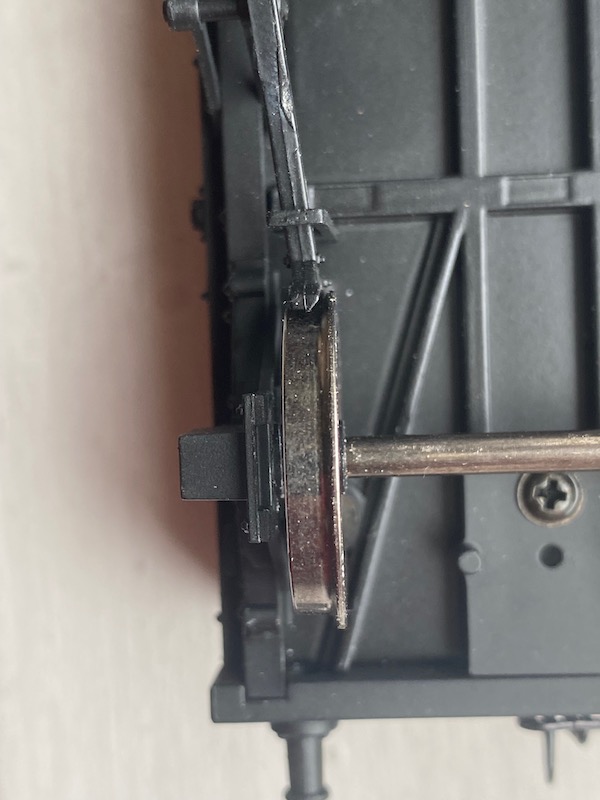
Figure B: As modified - with wheels at S7 back-to-back
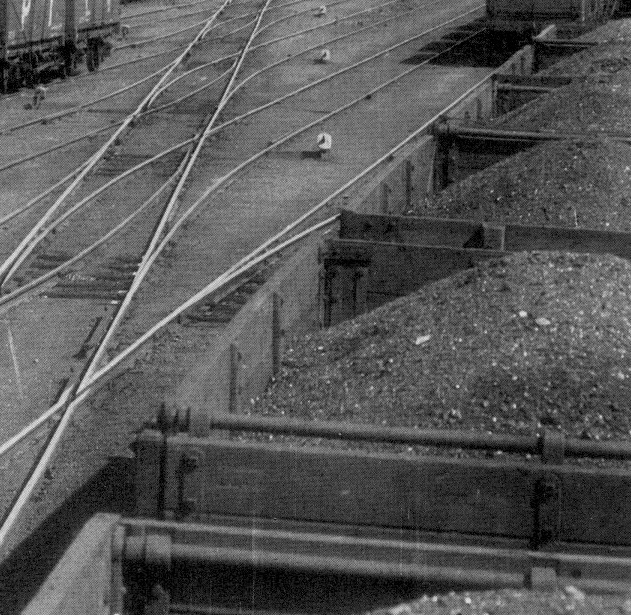
While we’re working on the wagon it’s worth spending a little while to correct a common fault.
In common with many plastic injection-moulded wagons, the Dapol body sides tend to bow inwards. Real wagons, understandably, given that coal wagons had tons of coal tipped into them time after time, bow outwards as can be seen in this view taken in the ‘thirties at Newport.
Figure C: Wagons revealing an outward bow
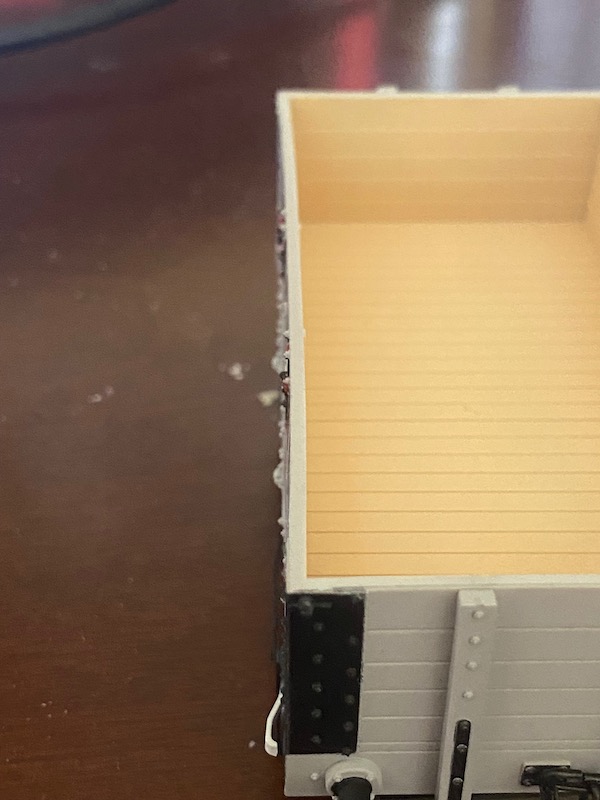
Here we can see a wagon as it comes out of the box (albeit a five-plank wagon, but the same applies to the higher-sided wagons). The inward-bow is quite noticeable.
Figure D: A wagon as supplied
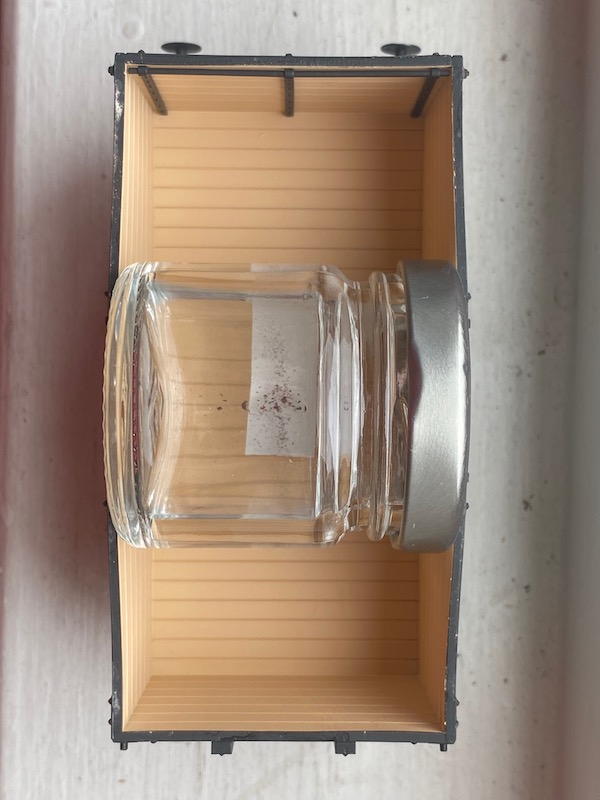
The technique is to place a packer between the sides and warm the wagon, gently but thoroughly, using a domestic hair dryer. Then allow the wagon to cool completely and don’t rush to remove the packer. The packer I used was a jar 51mm tall. Other packers are available.
Figure E: Packing in place and ready to heat treatment
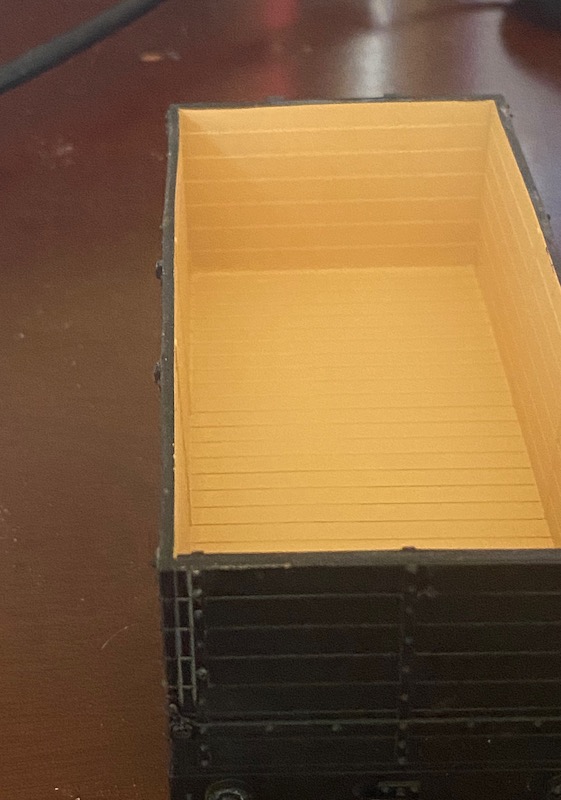
This view shows the wagon after the heat treatment, which I think makes a huge difference to its appearance.
Figure F: After treatment
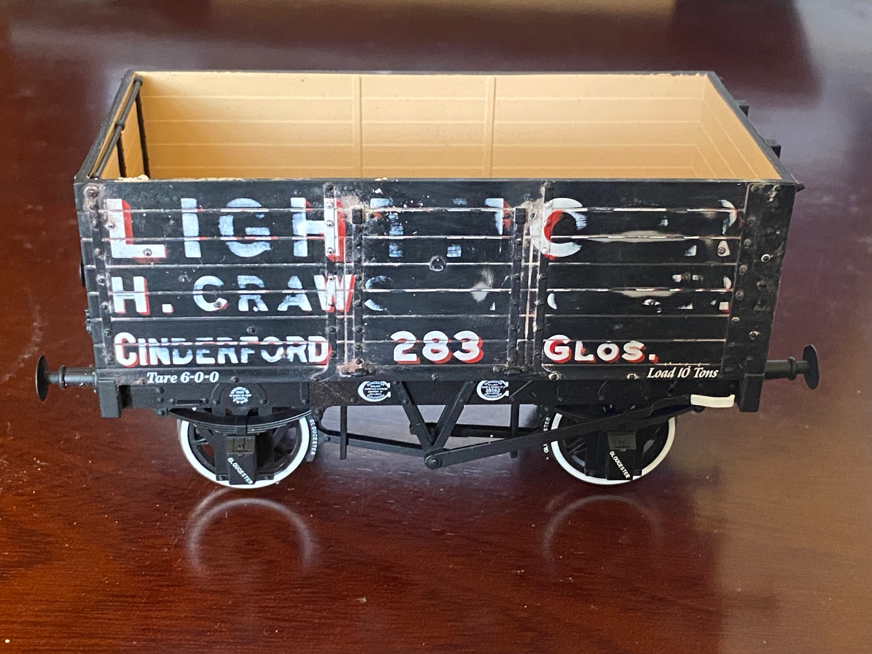
Apart from the conversion to Scaleseven I wanted to adapt the livery of the wagon to something closer to my own needs for Crindau Pill (and hopefully, later on, a model based on Machen)
This required the removal most of the Dapol existing Lightmoor lettering
I started off trying Brasso and a cotton bud but, frustrated with the slowness of progress, upped the ante with glassfibre brush and some Barkeeper's Friend (a fine cleaning/scouring powder). This was the result after an hour.
Figure G: First attempt with Brasso
As you can see I've gone through the paint finish completely in some places where I was over zealous (or inattentive) and a fair bit of work remains to be done to finish off the removal (and I want to ensure that nothing of the old ownership markings show through - but I'd like to retain the Tare and Load markings) and some repainting will be necessary. Not apparent in this pic is the slight glossiness of the surface that will aid the application of transfers.
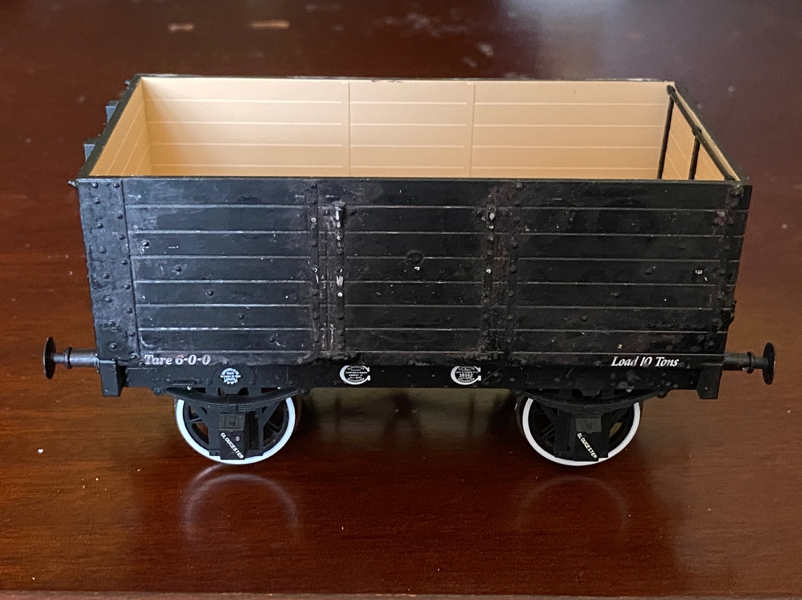
For the second side are used IPA and this is what I got after 40 minutes work with the solvent and a sliced wooden coffee stirrer.
Figure H: Second Attempt with IPA
Certainly, a much-improved result, quicker (and the red came away even sooner) and less likelihood of breaking through the black completely. I did notice though that where the IPA evaporated it left a residue, but this is quite easy to remove.
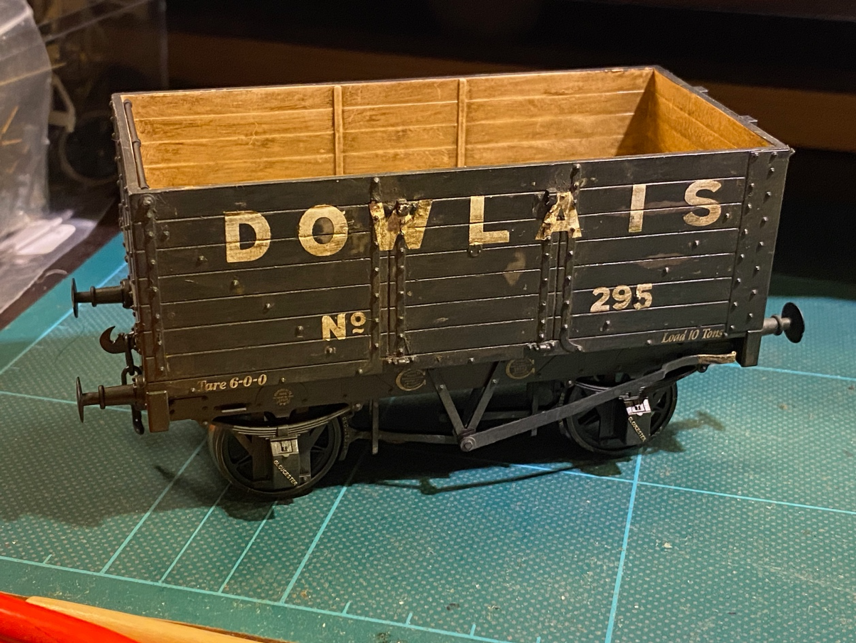
With the removal of the old lettering the way became clear to apply the new, and I chose Powsides transfers.
Figure I: As finished-ish - the brakegear side. Note to self – put the brake rachet back on.
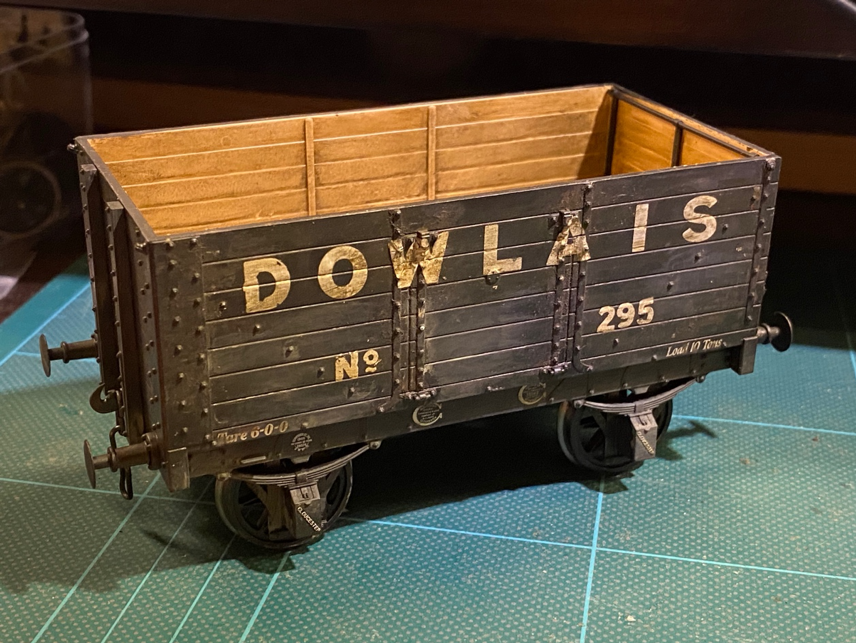
This is the moreorless finished wagon. I’m pretty satisfied with the wagon external finish but the internal, which is unpainted wood, isn’t quite to my idea of what it should look like, which when weathered is often a pale silvery-grey.
Figure I: As finished-ish, the unbraked side.
Tanat Valley 3 by Peter Drost

John Borkowski converts Accurascale hopper wagons to S7

The Story of Reeth by Simon Caygill
For further information on the ScaleSeven Group, or if you have any questions: