

Tanat Valley 3 by Peter Drost
The original Western Thunder article is here MMP BR 35.5T Class A Tank Wagon
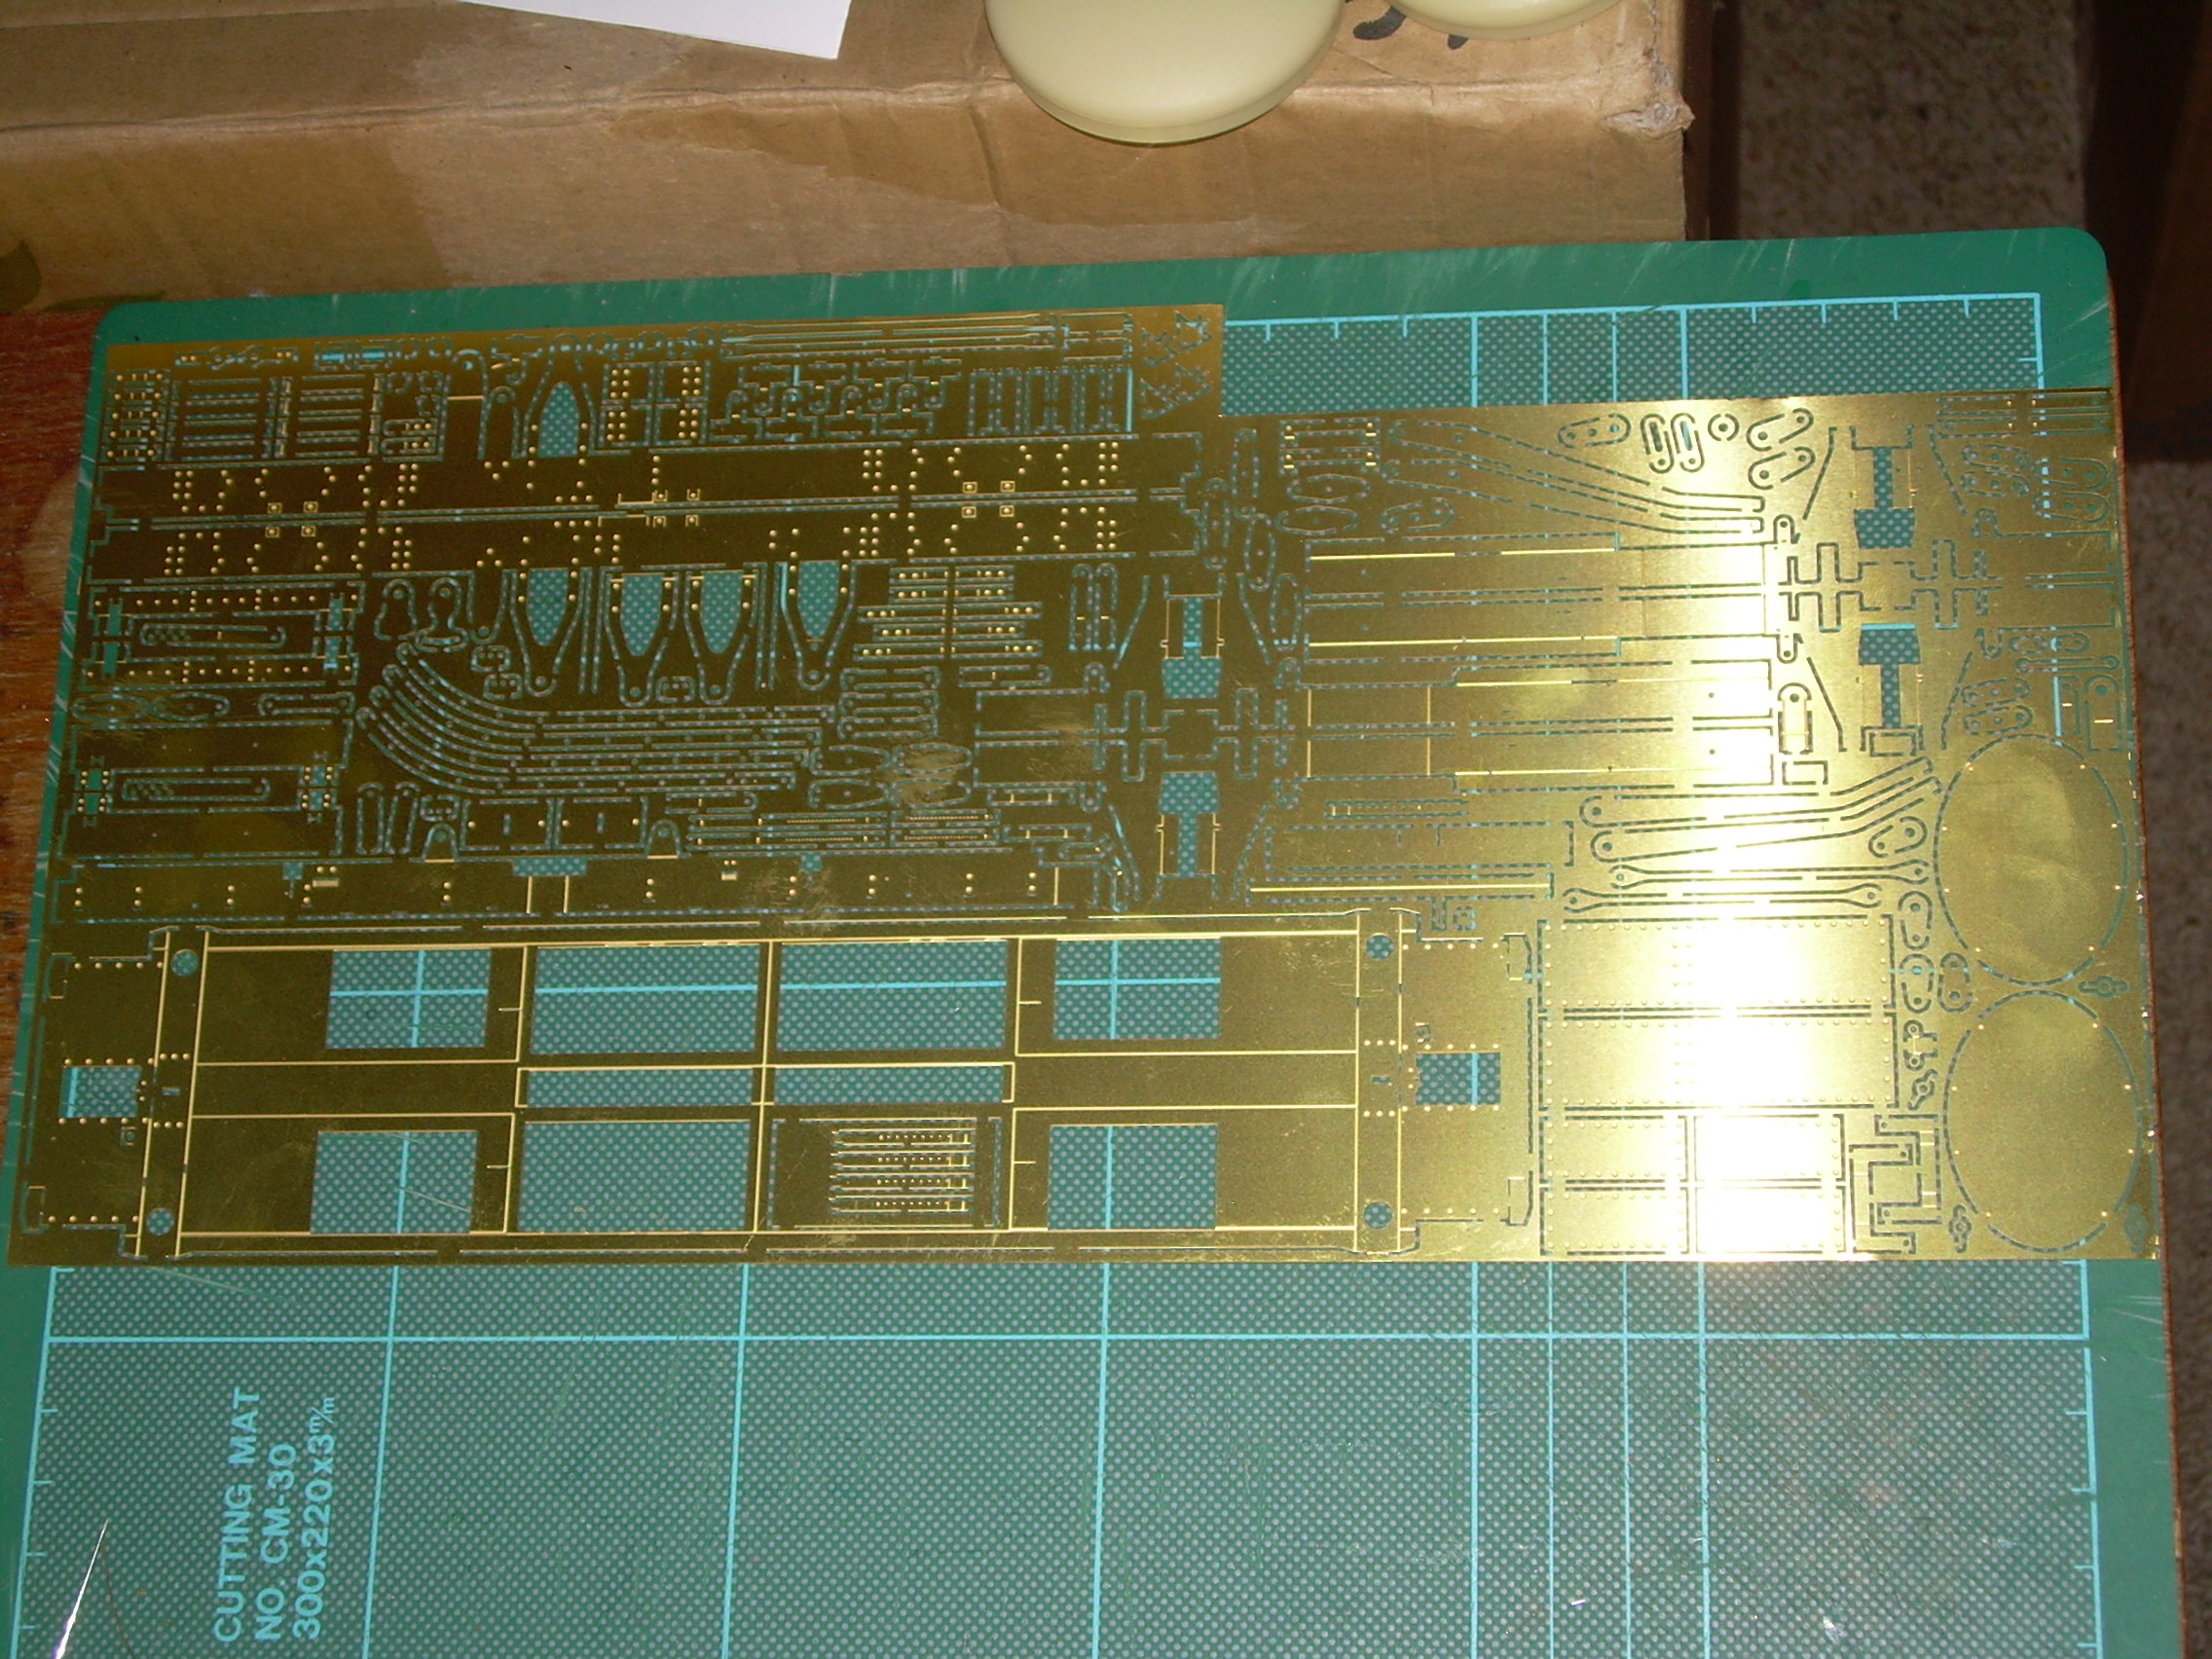
In the last few days I started building BR 35.5 ton Class 'A' tank wagon from MMP and thought I would post a few pictures.
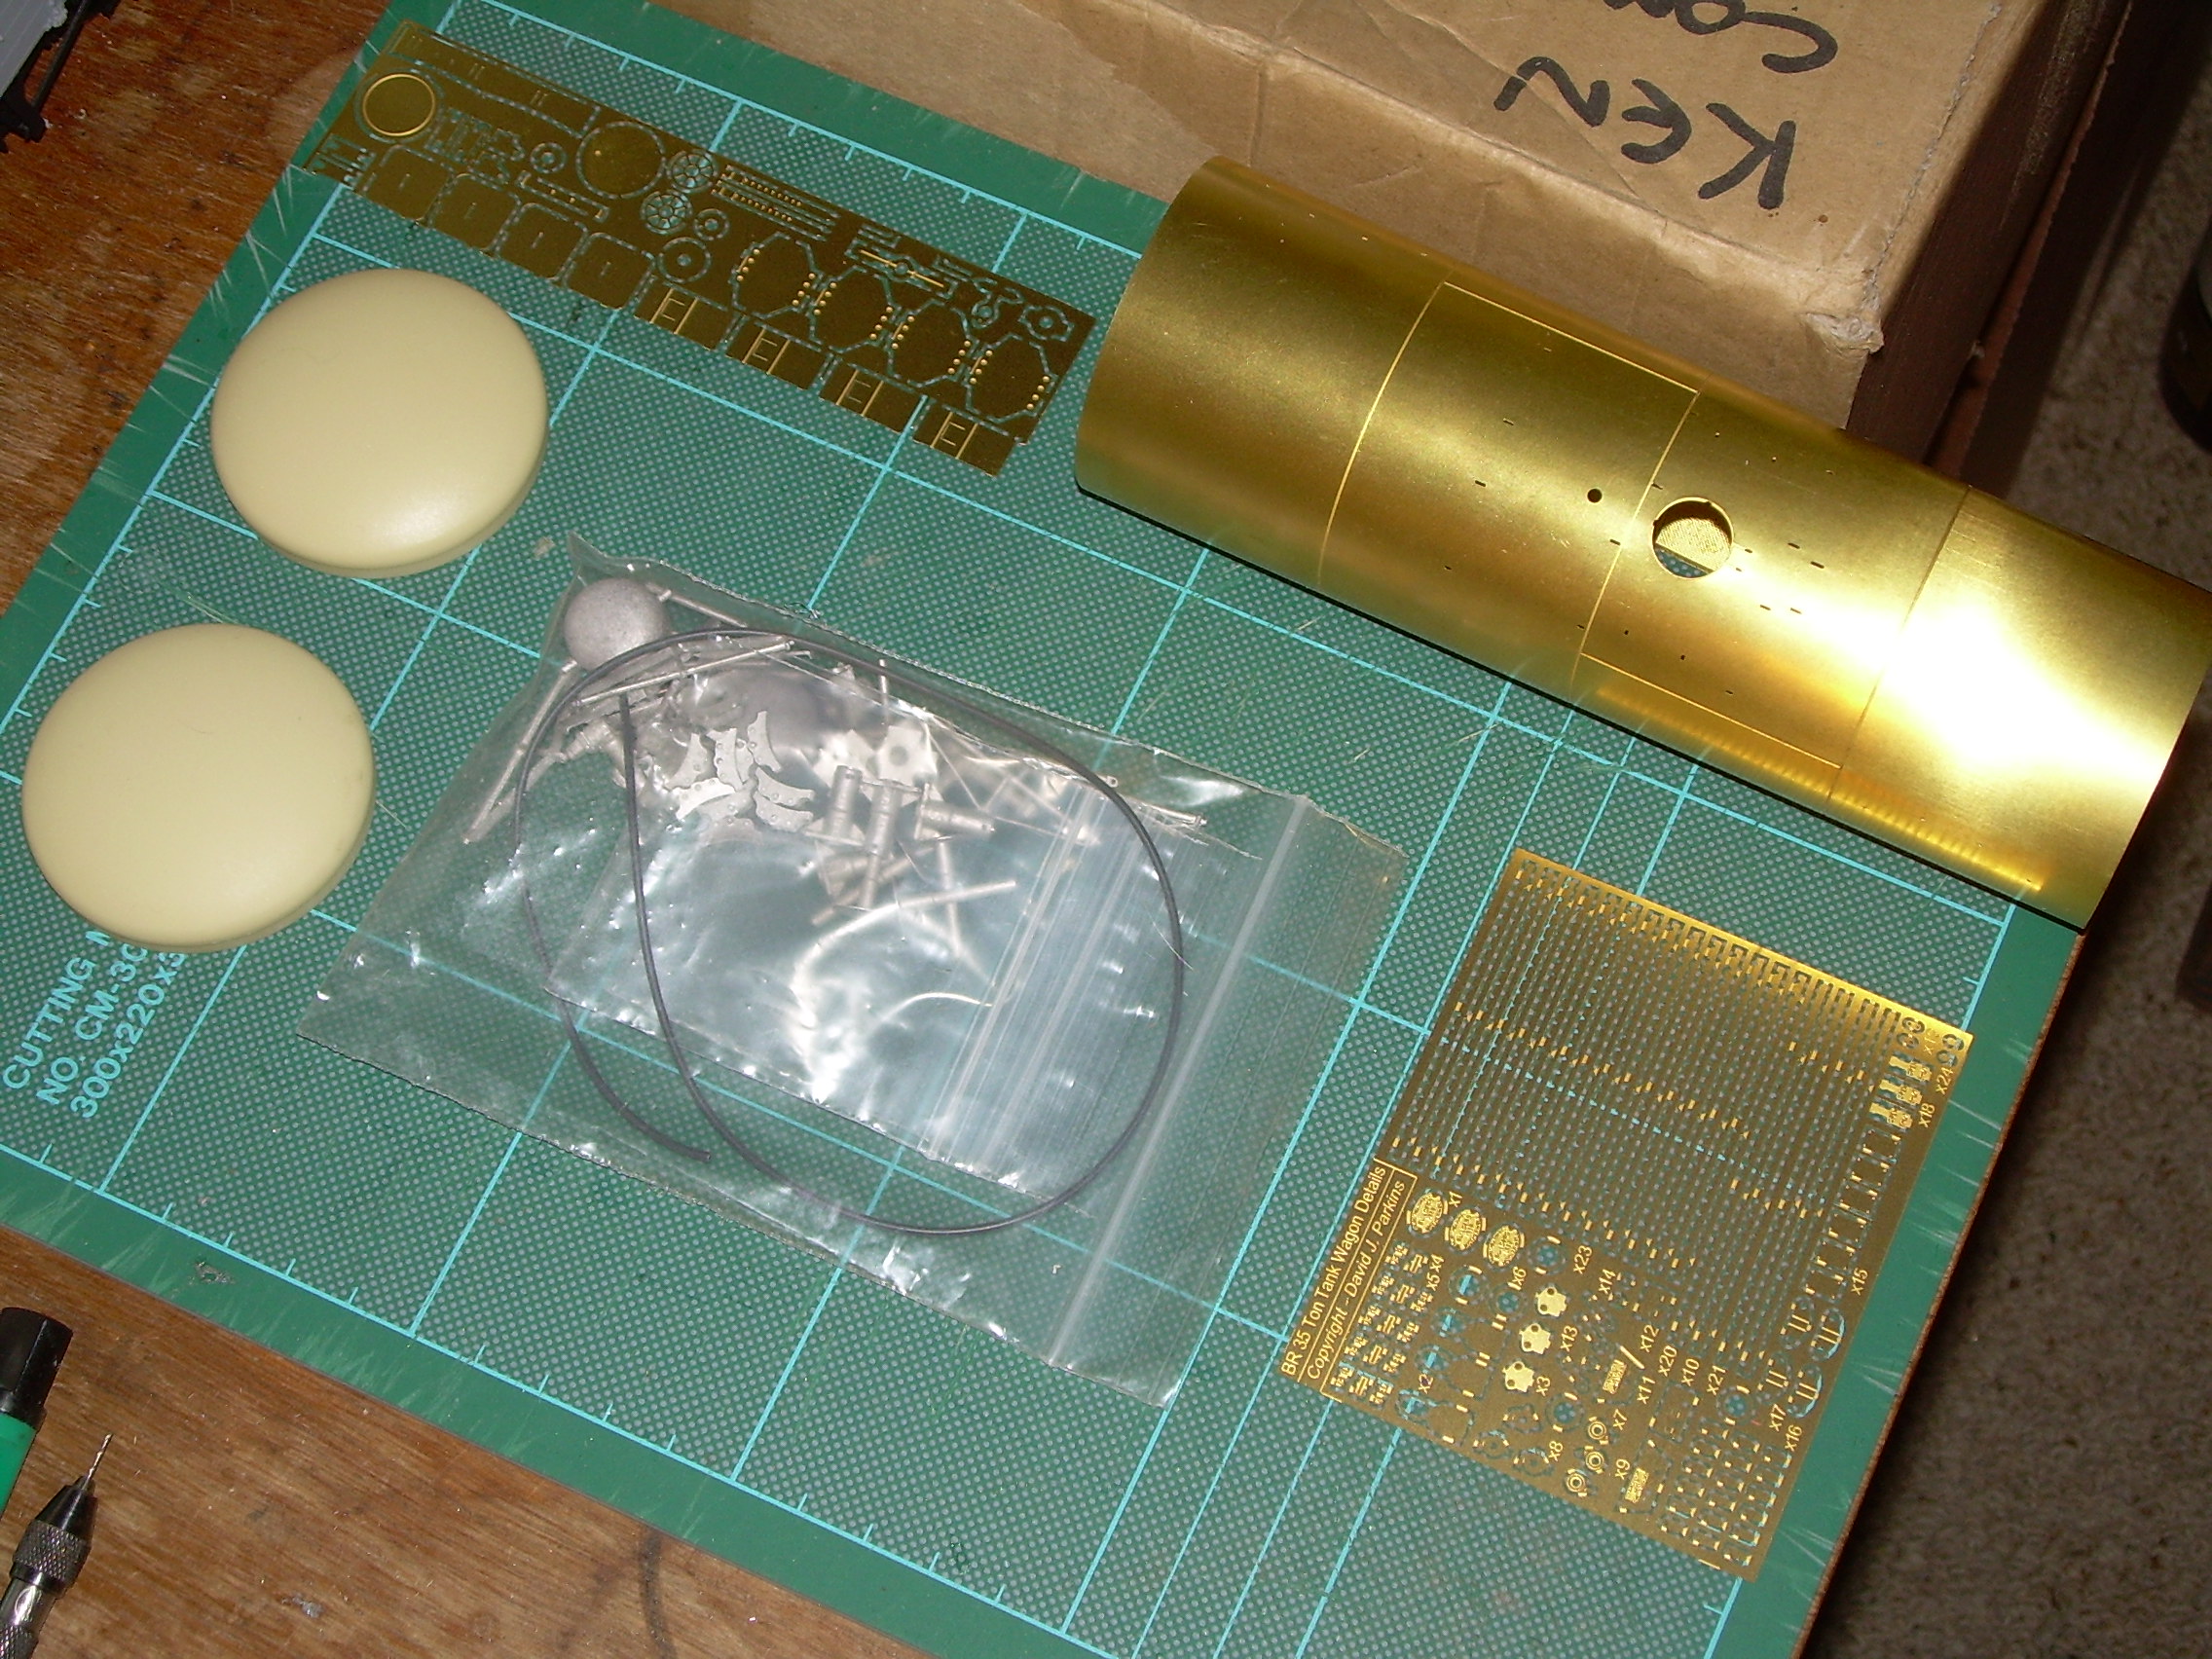
These first two show what you get in the box. I have removed the resin ends which are supplied fitted in the rolled tank with sellotape.
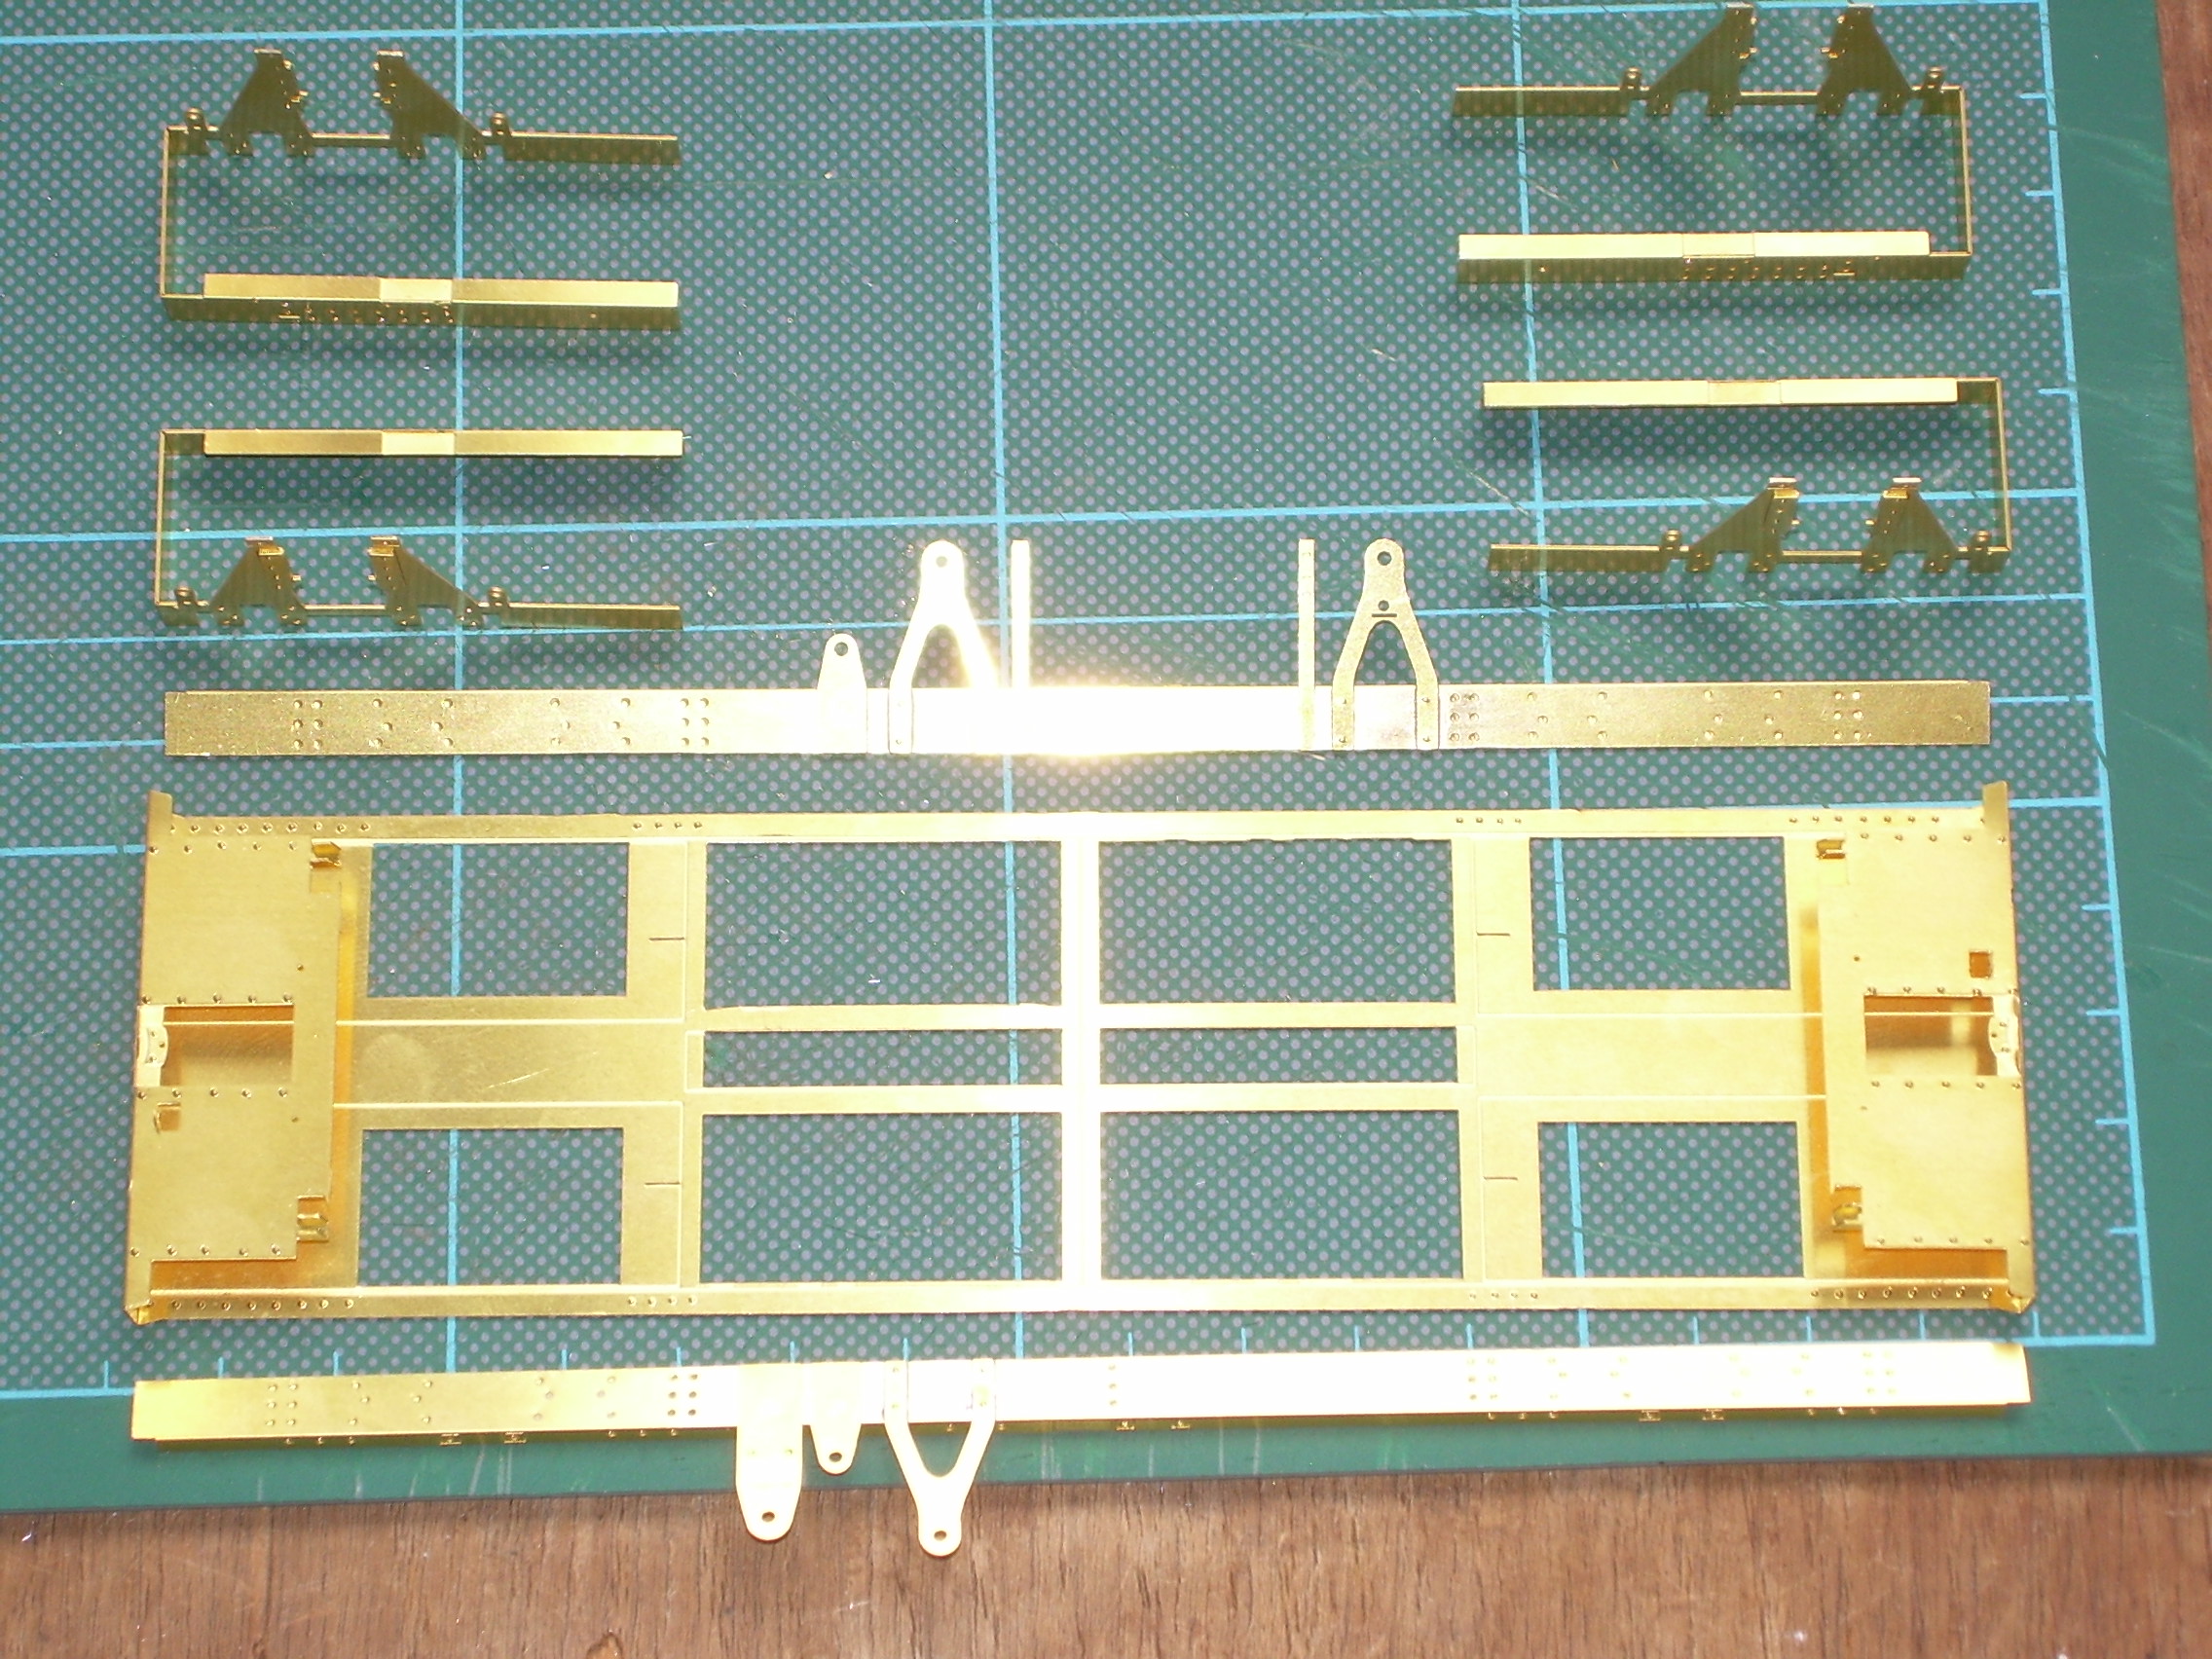
The initial chassis parts cut out, riveted and folded ready for fitting and soldering.
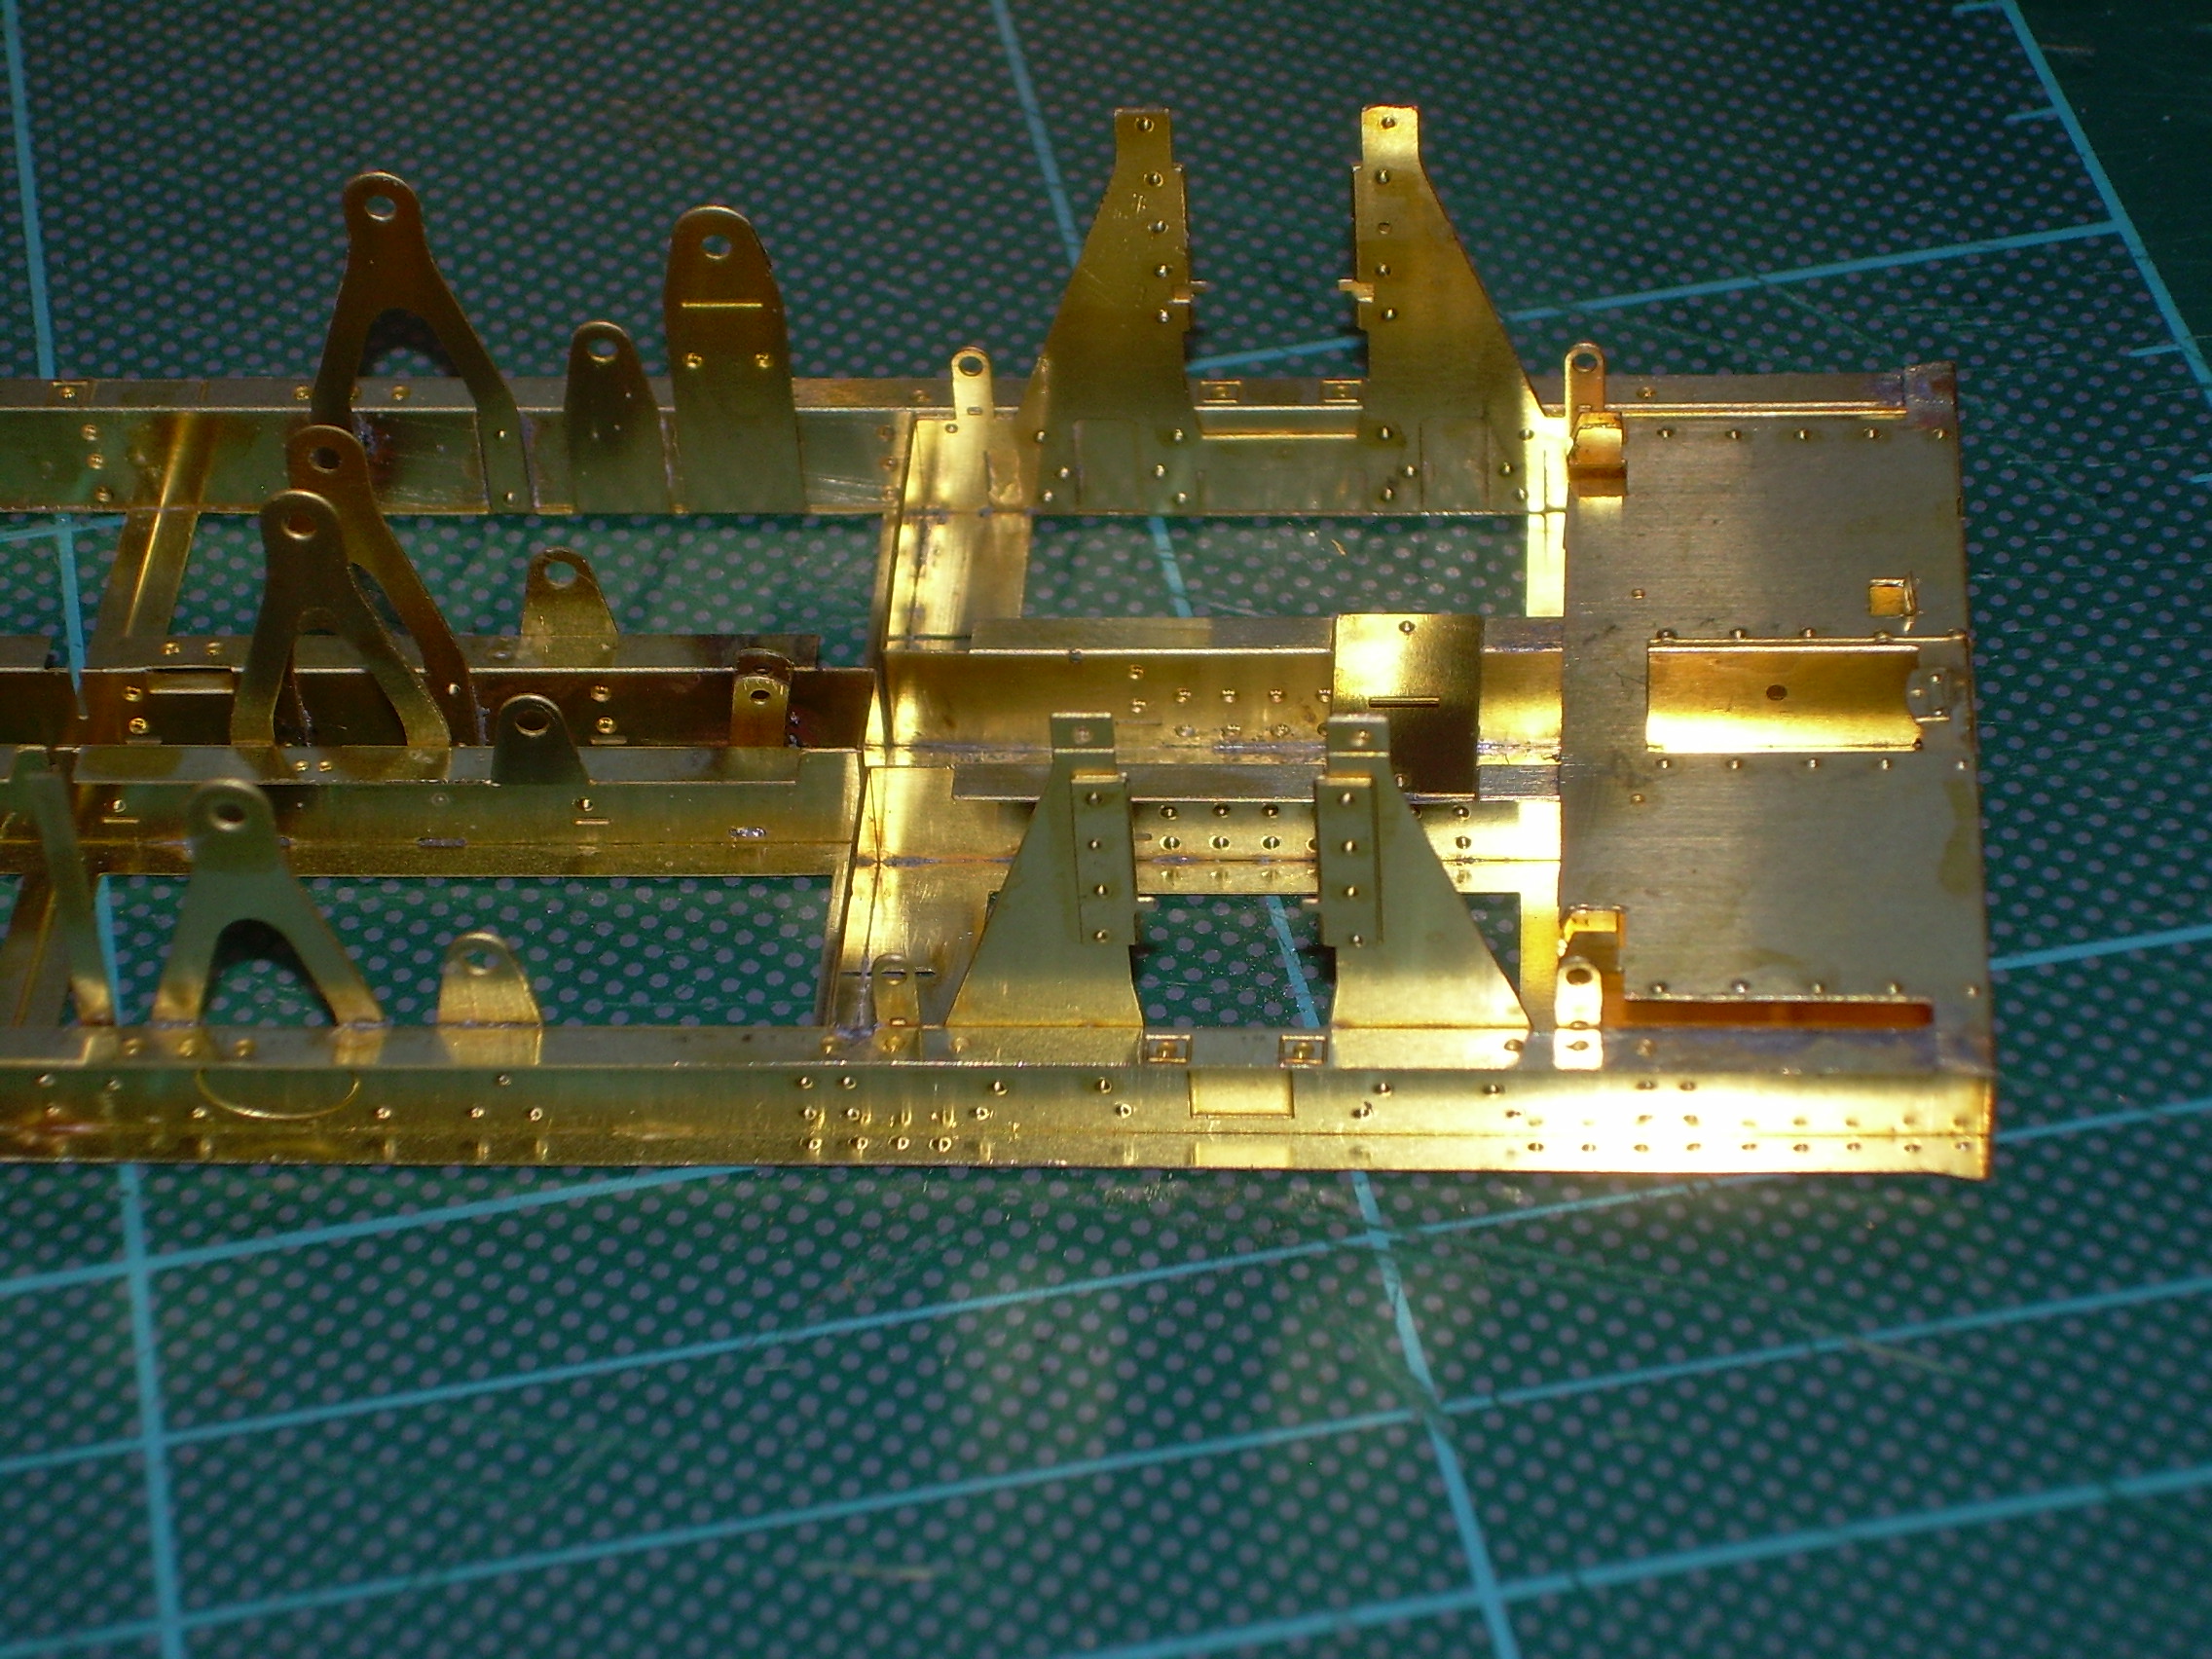
Everything just clips into place perfectly.
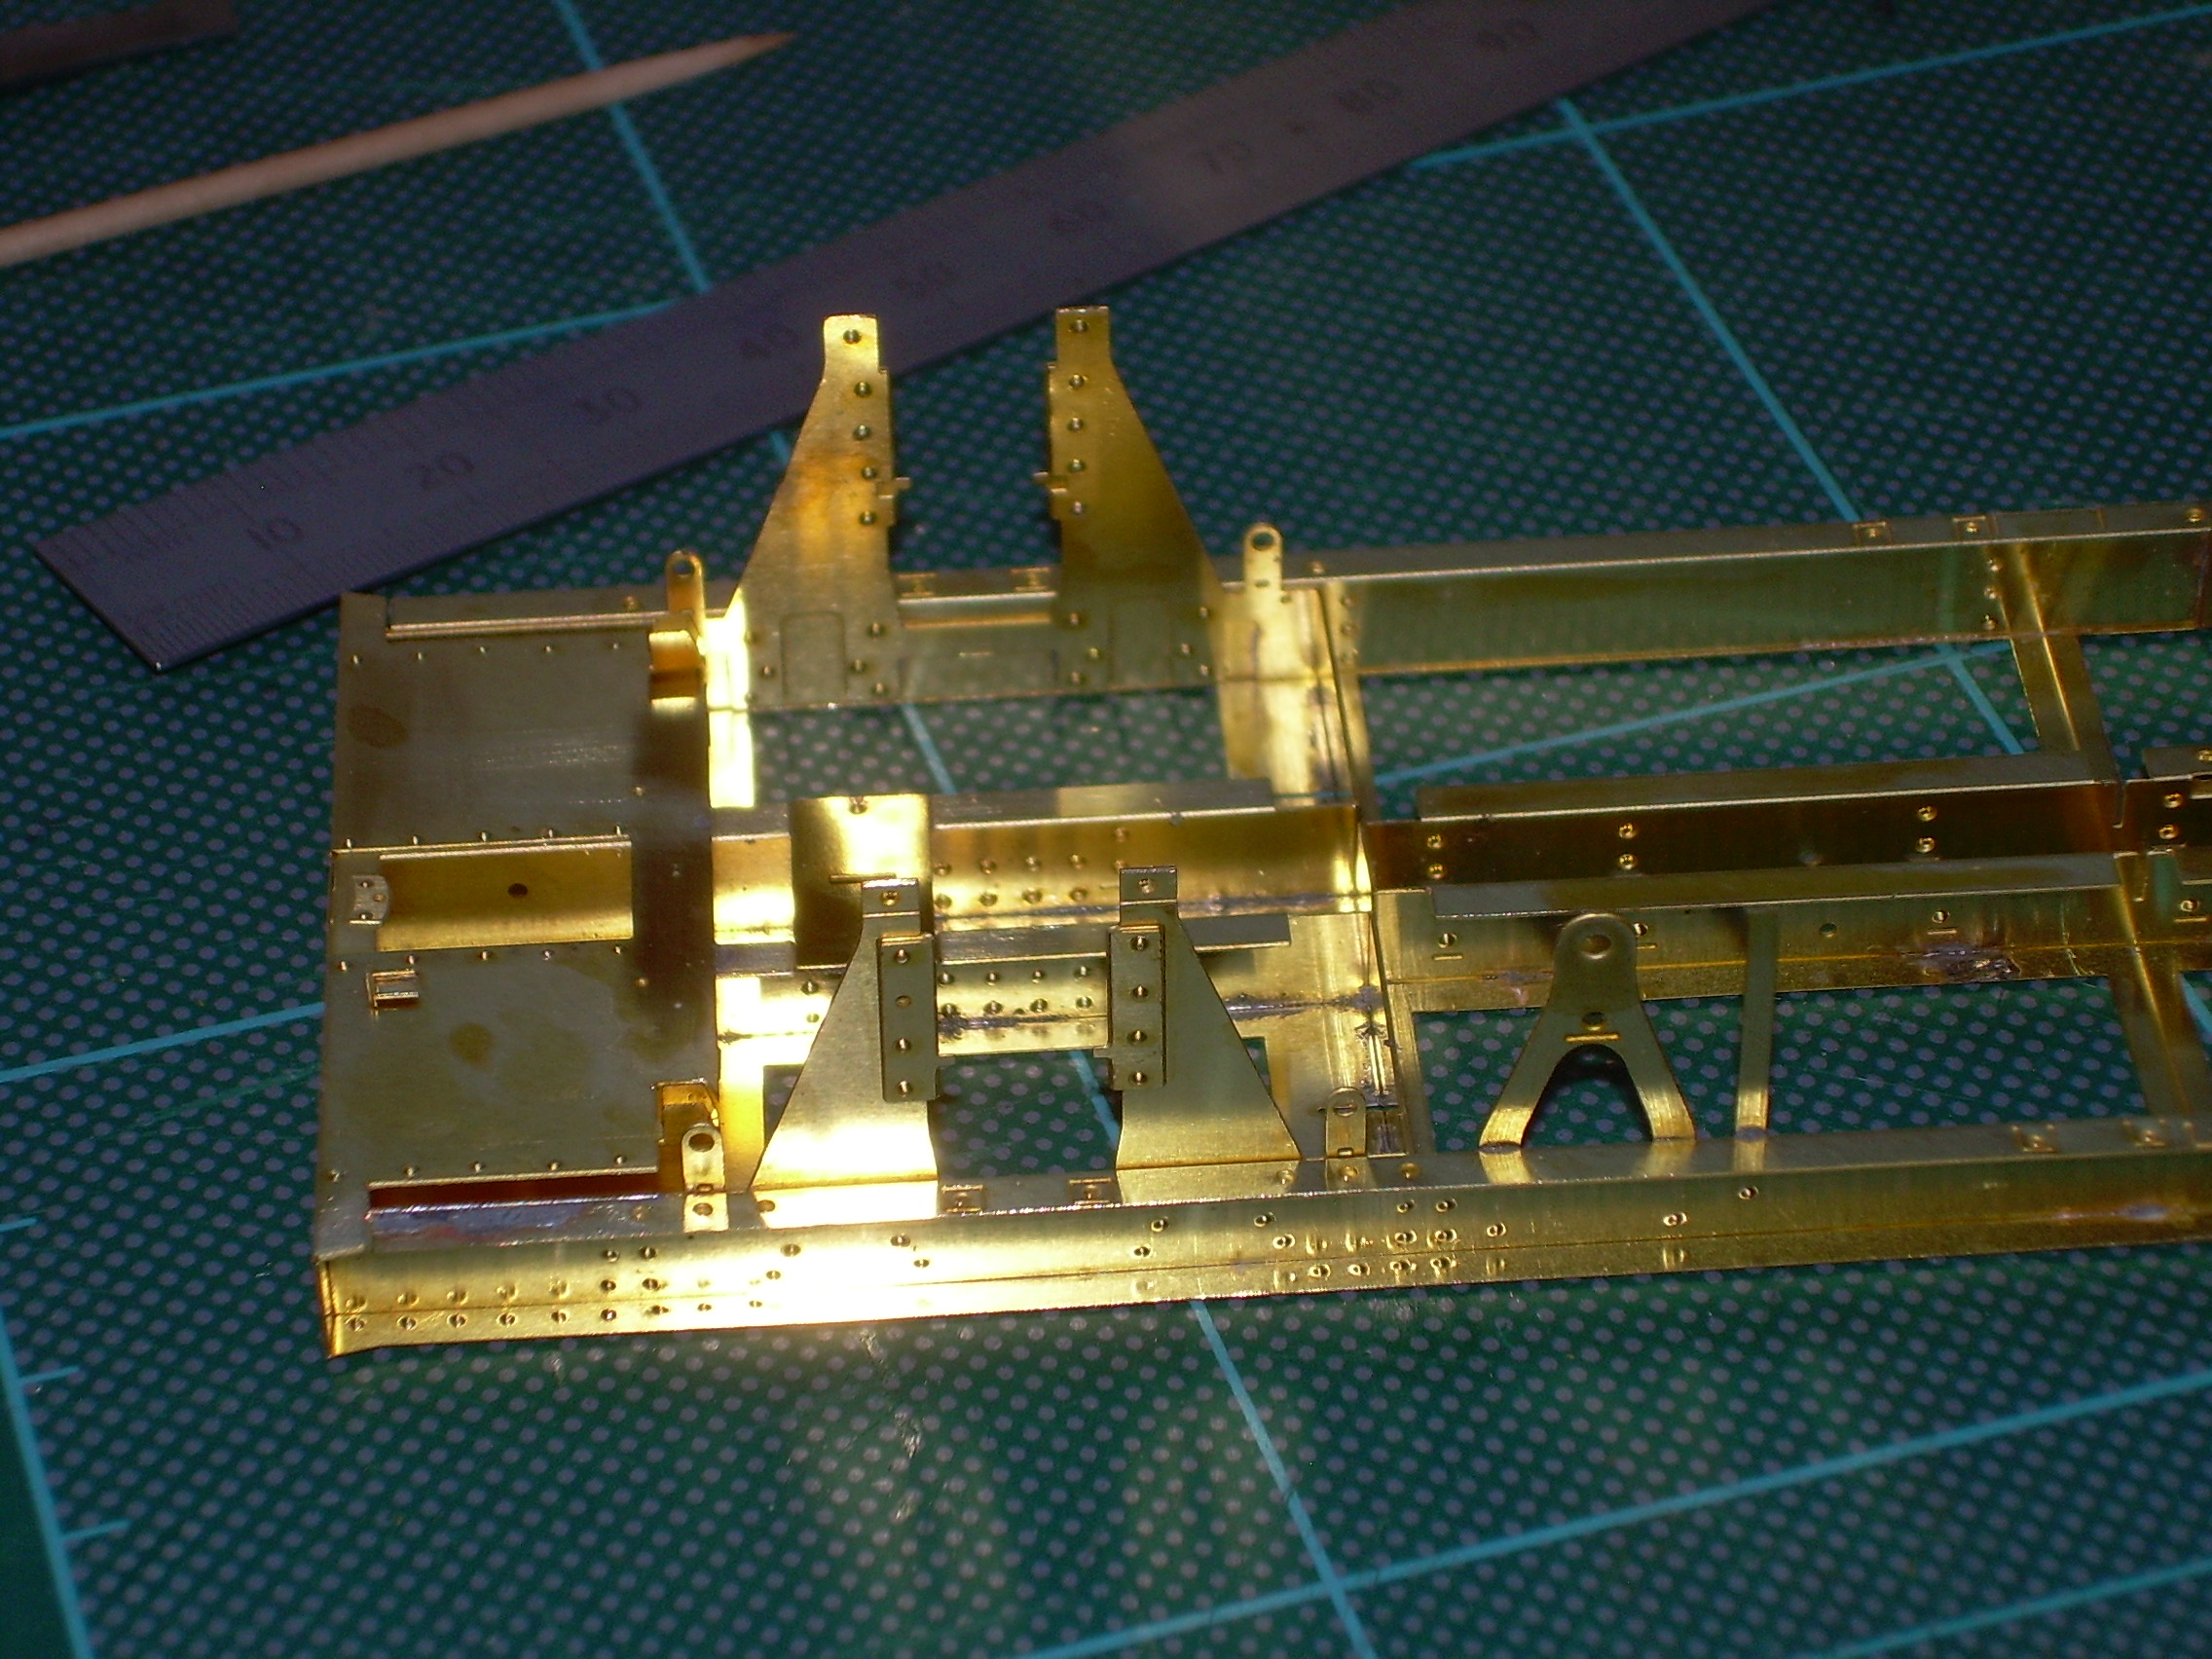
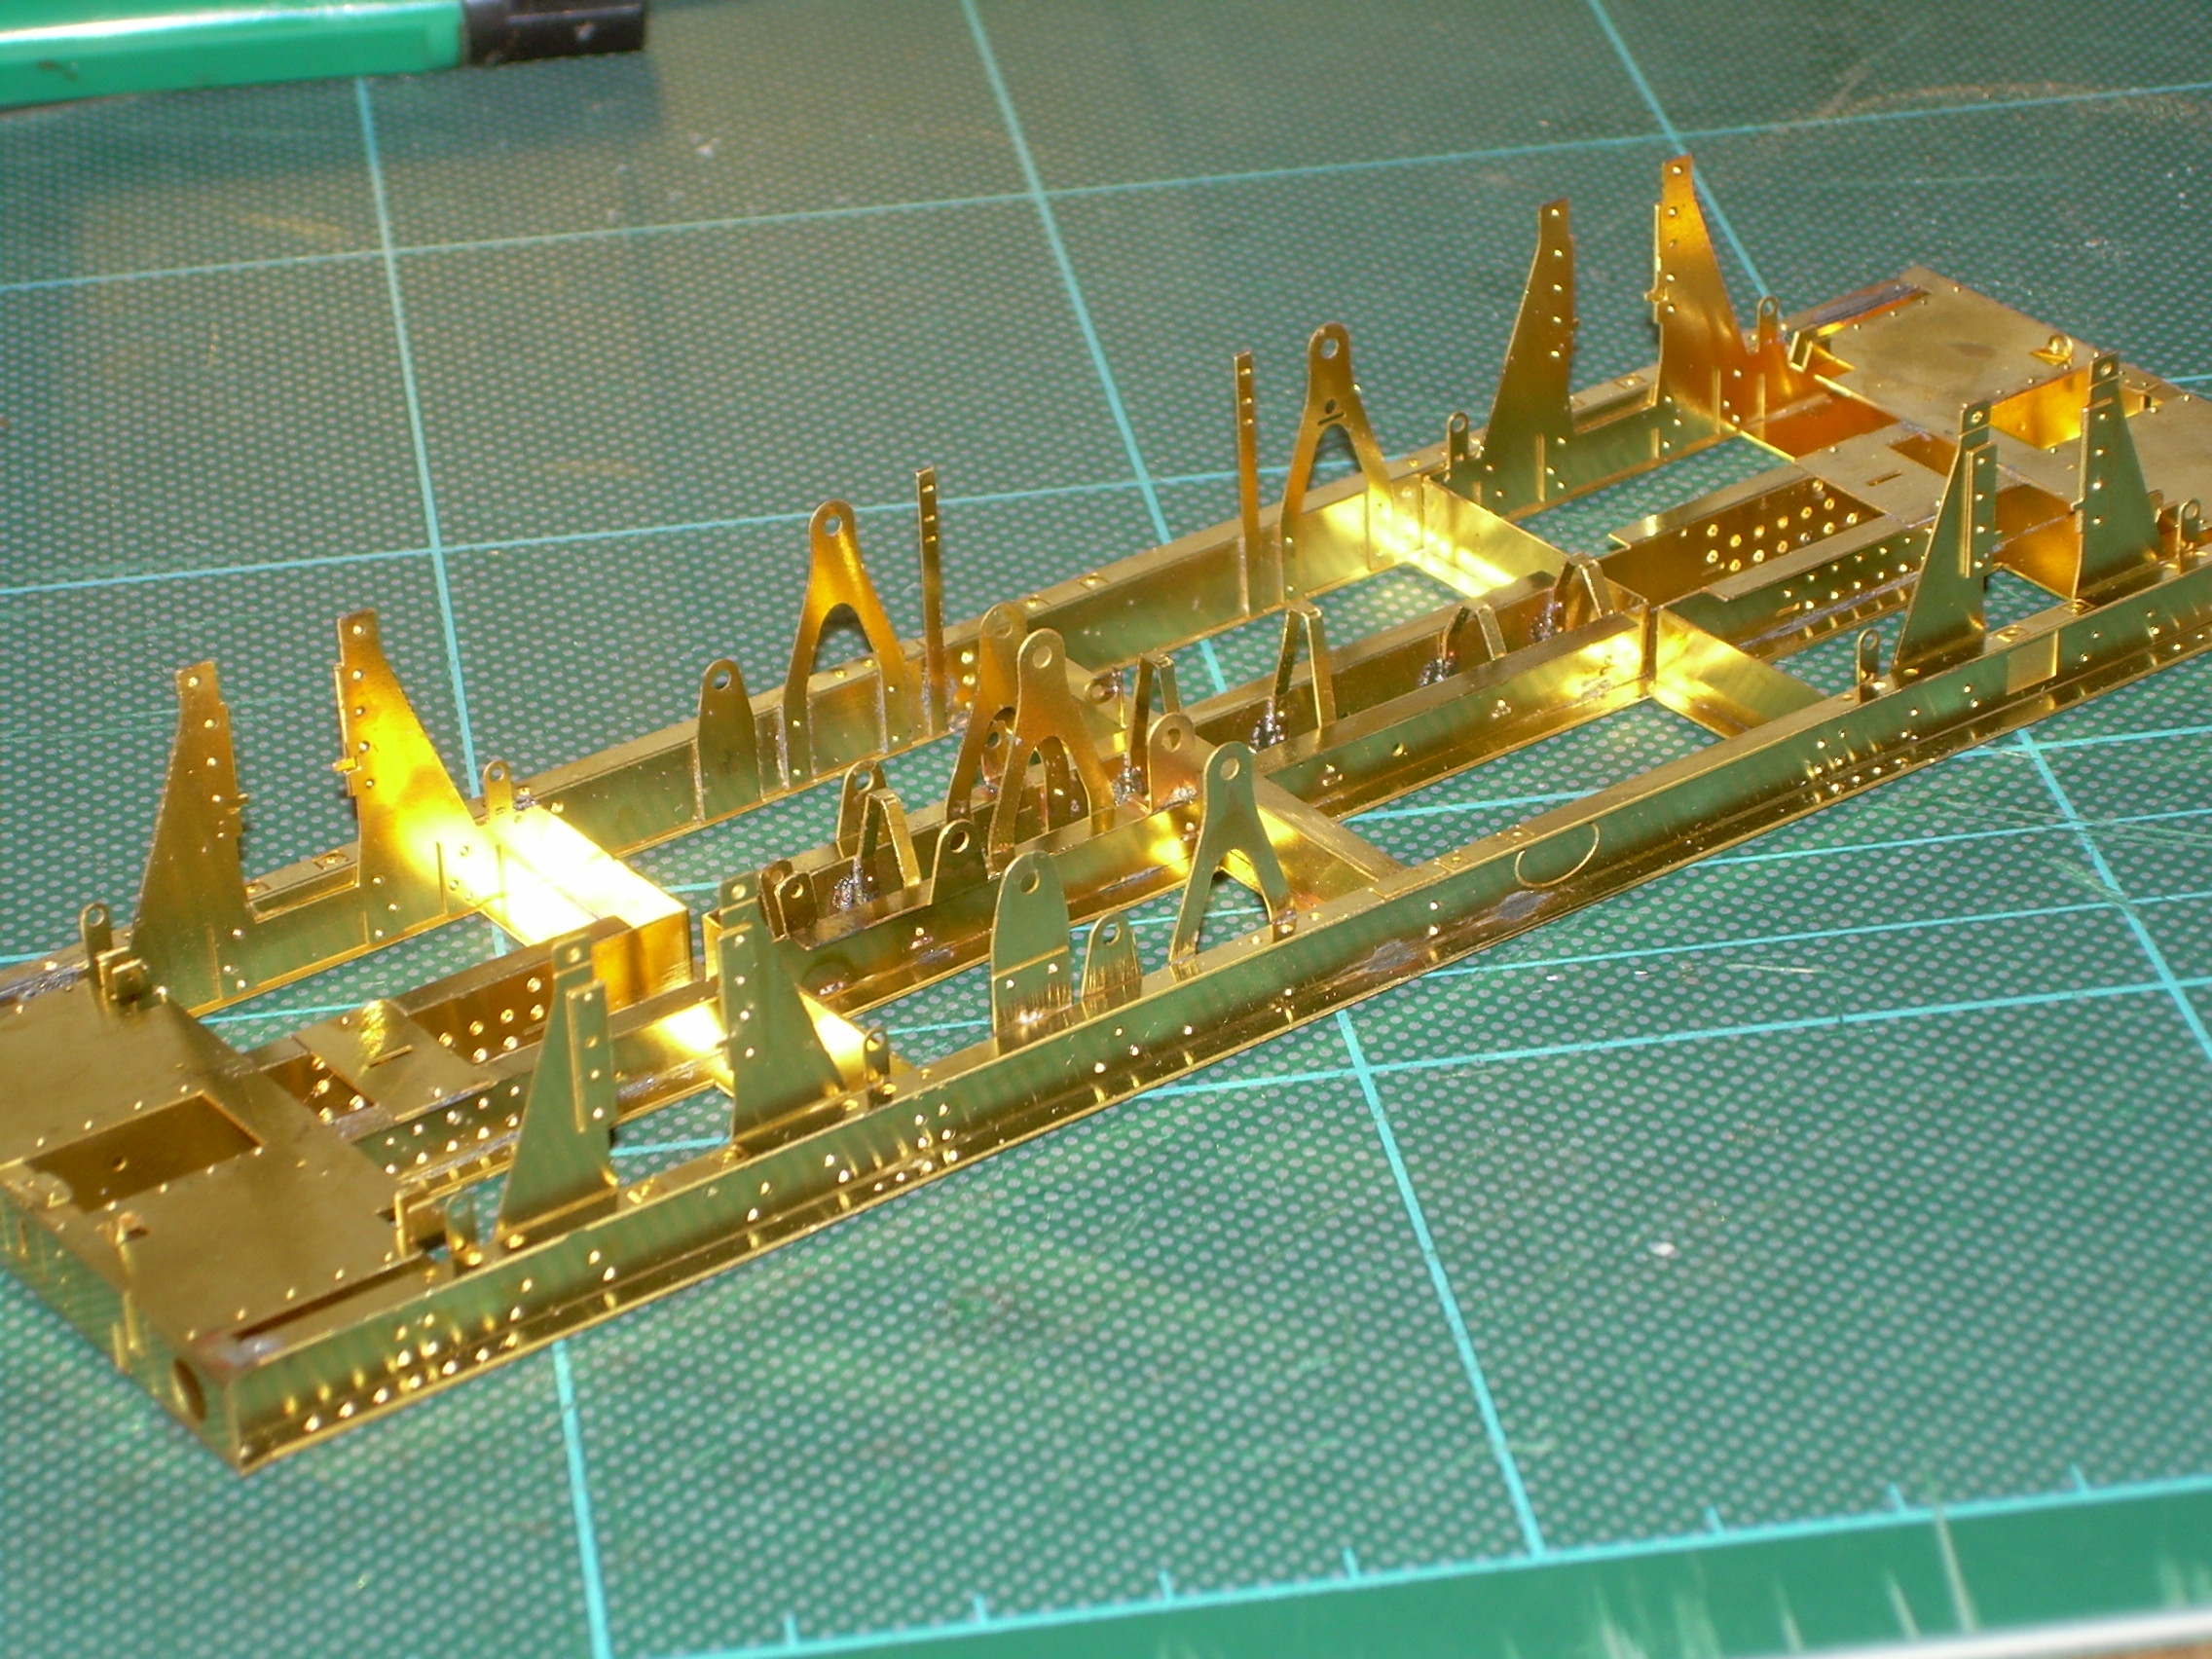
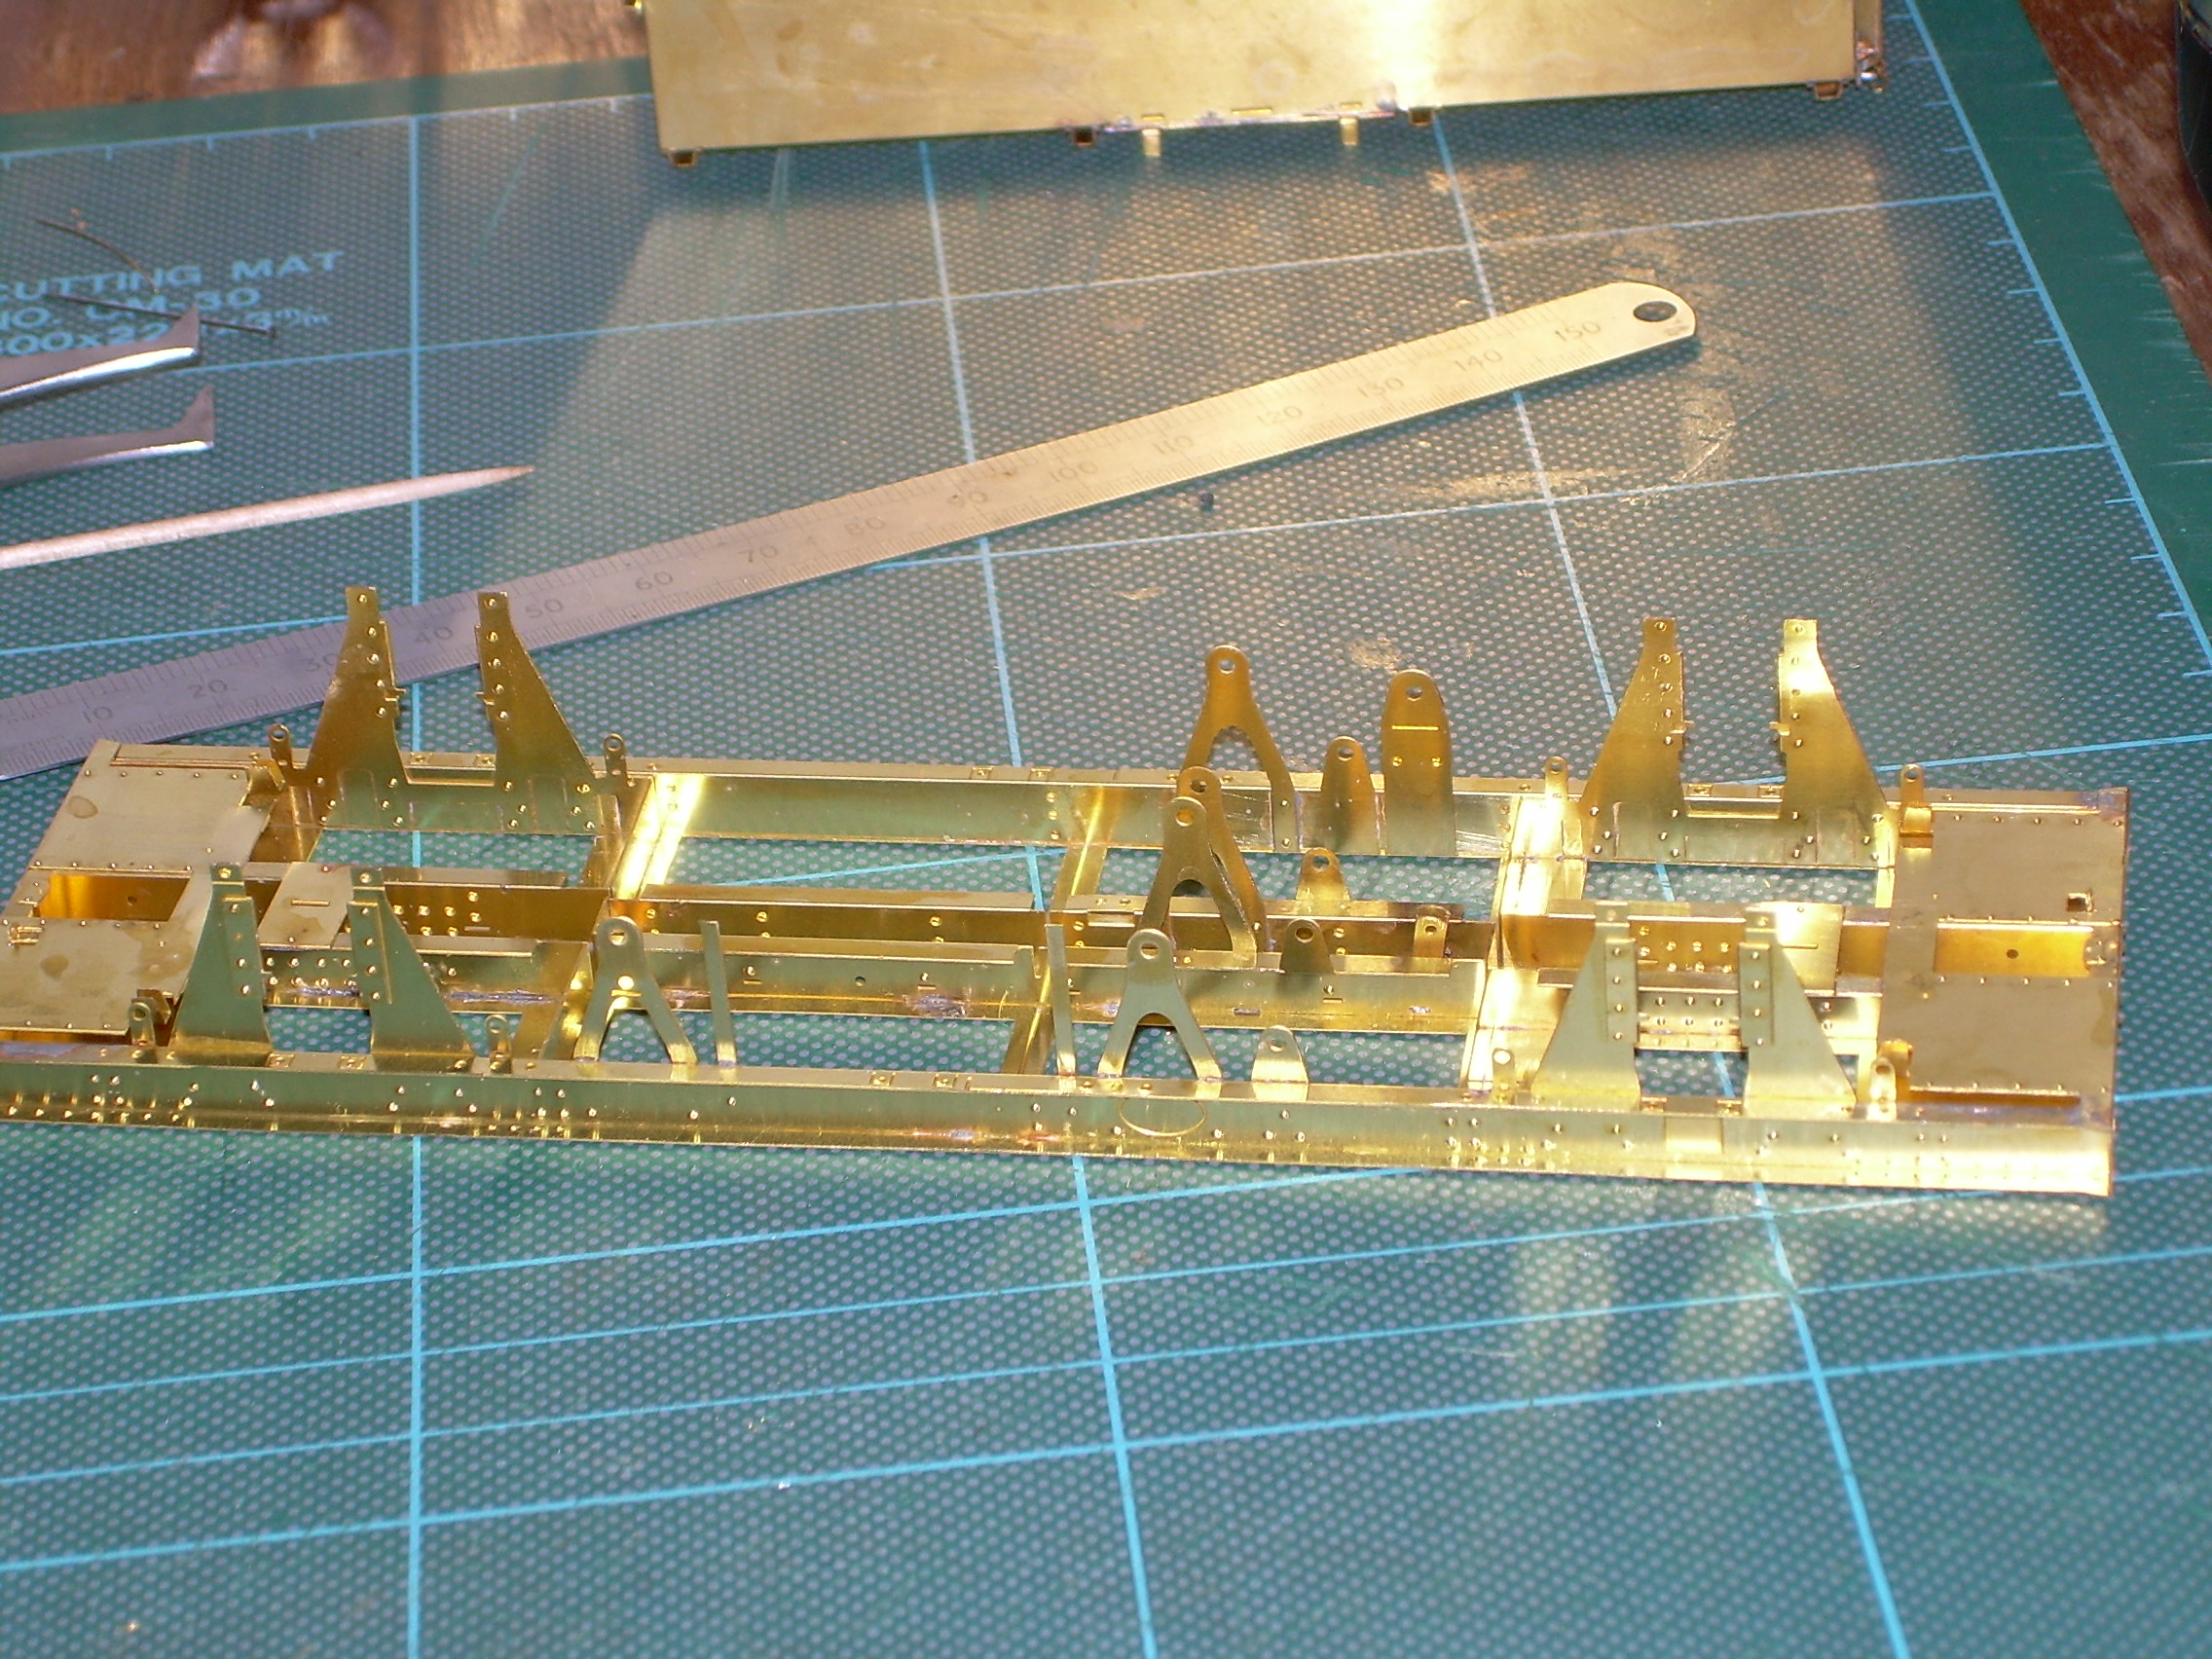
These have now been soldered together with the centre solebars and another few bits.
More detail added
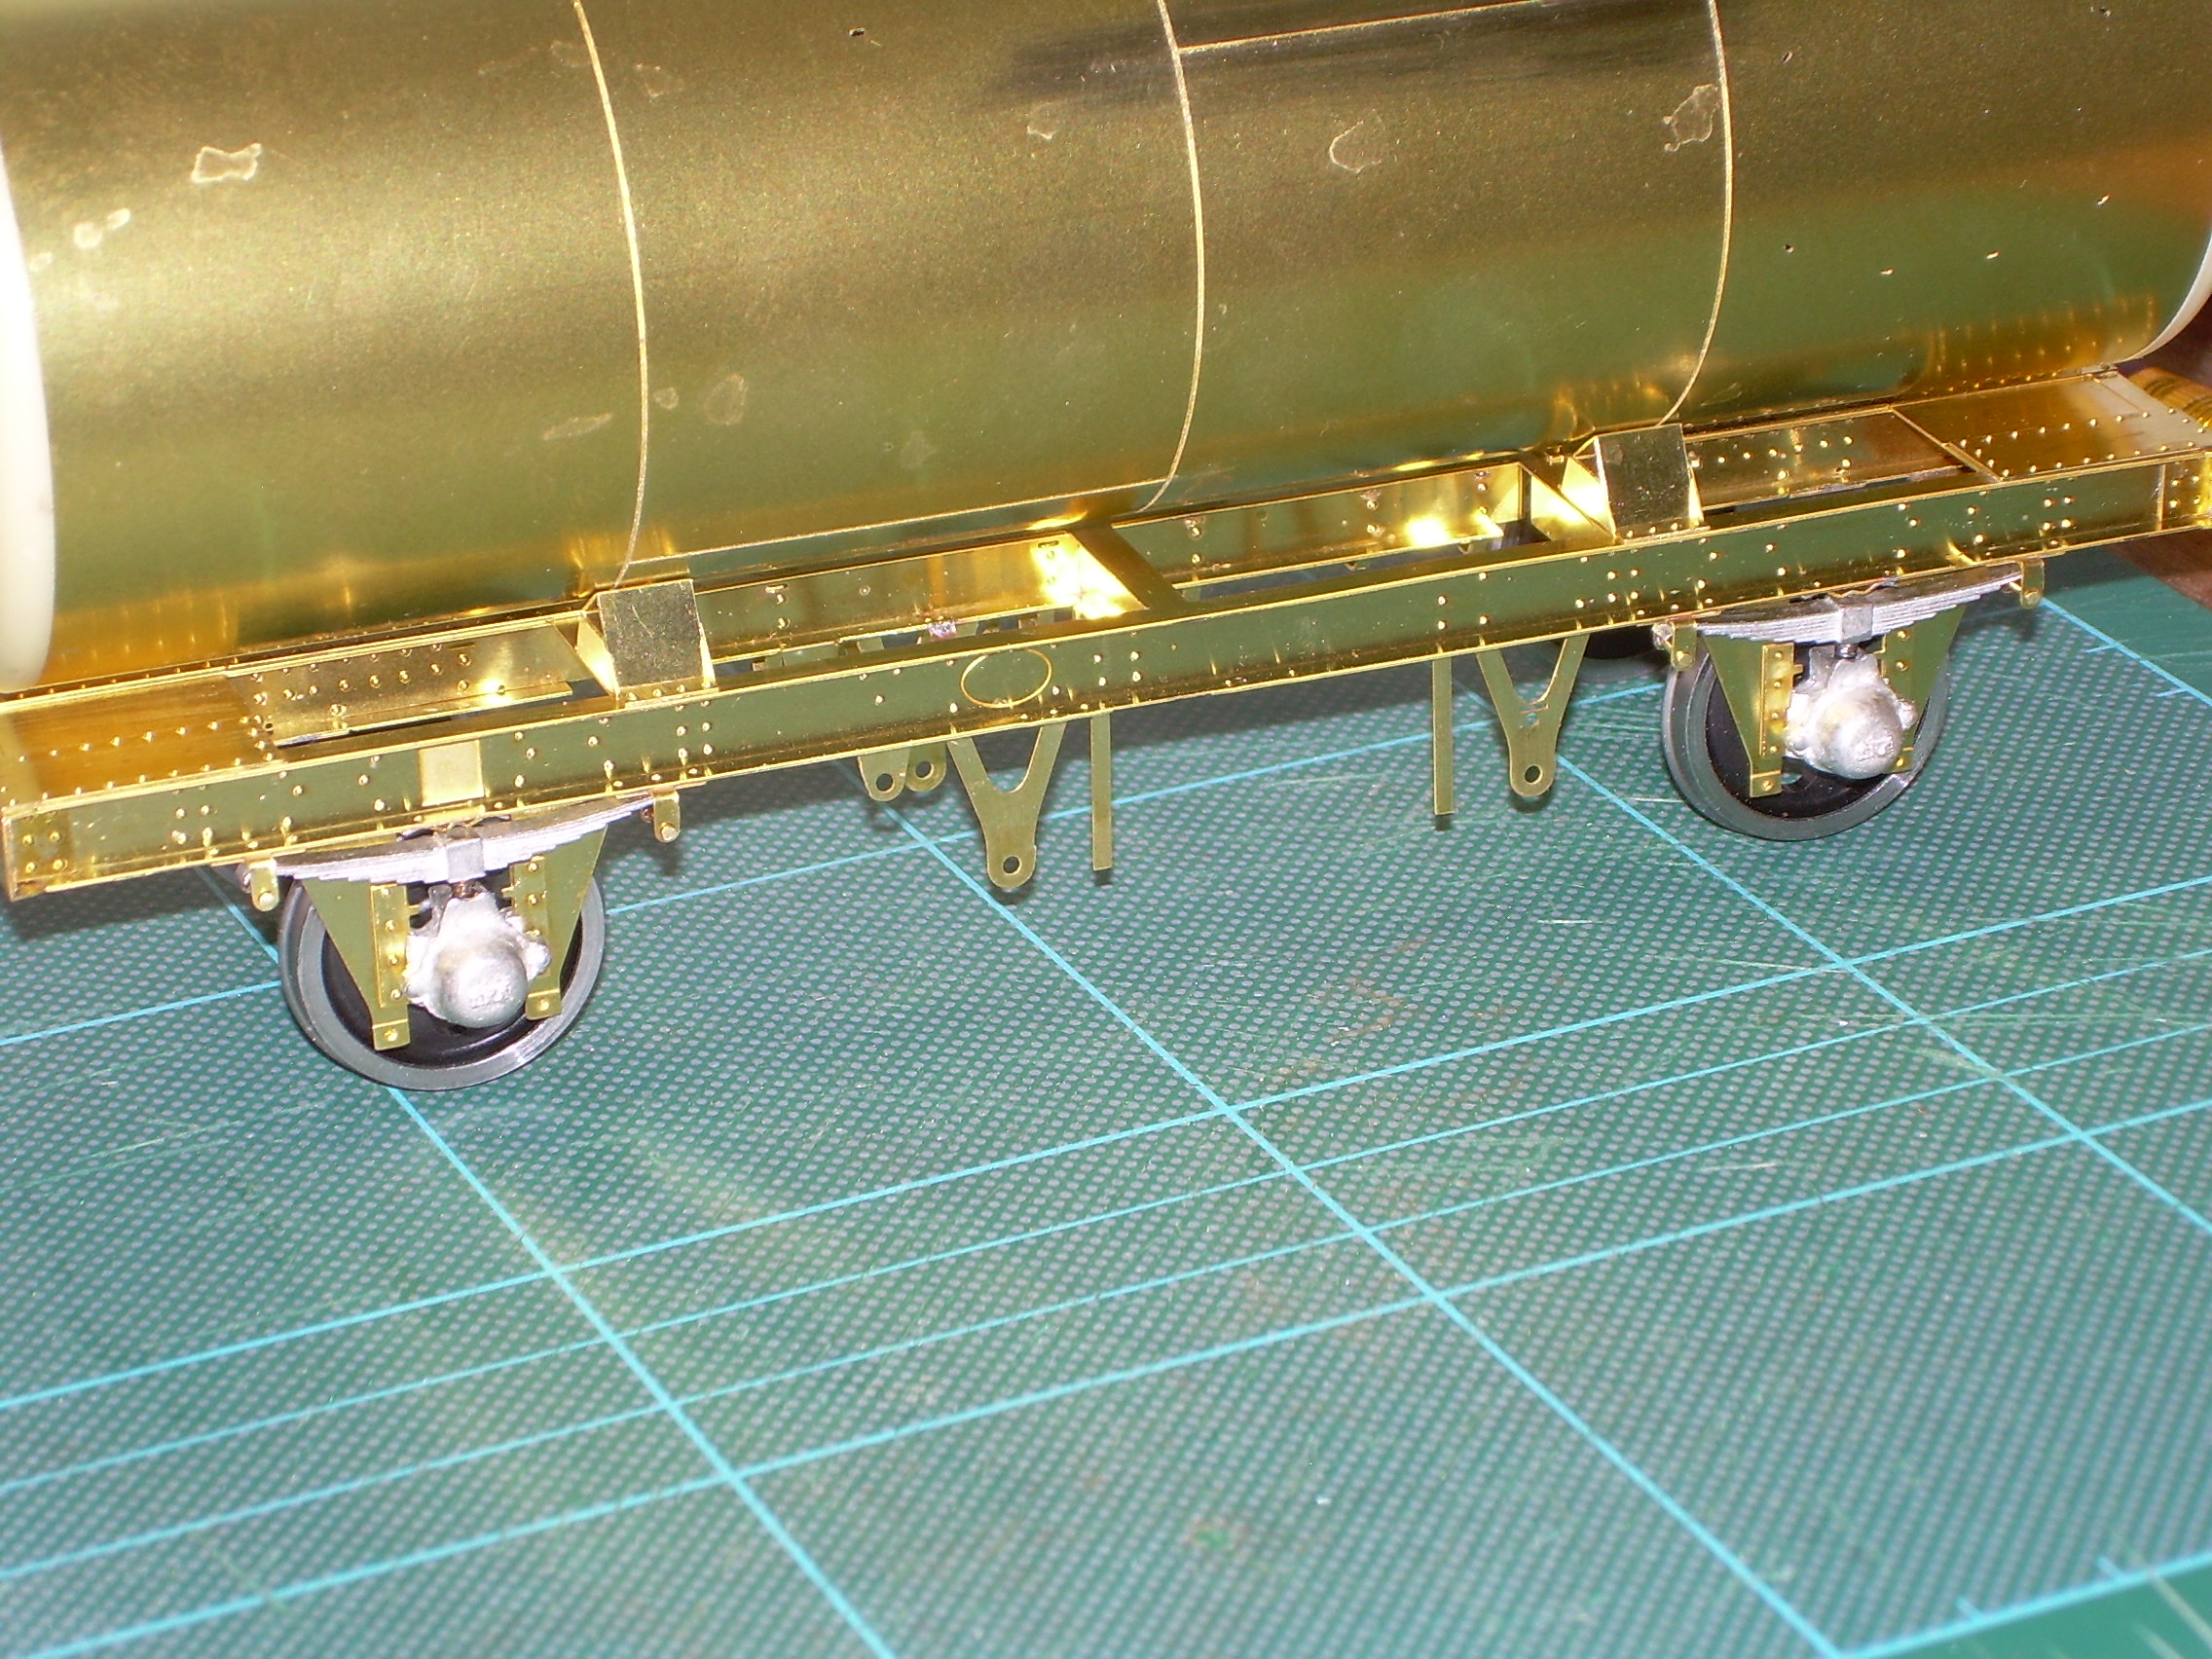
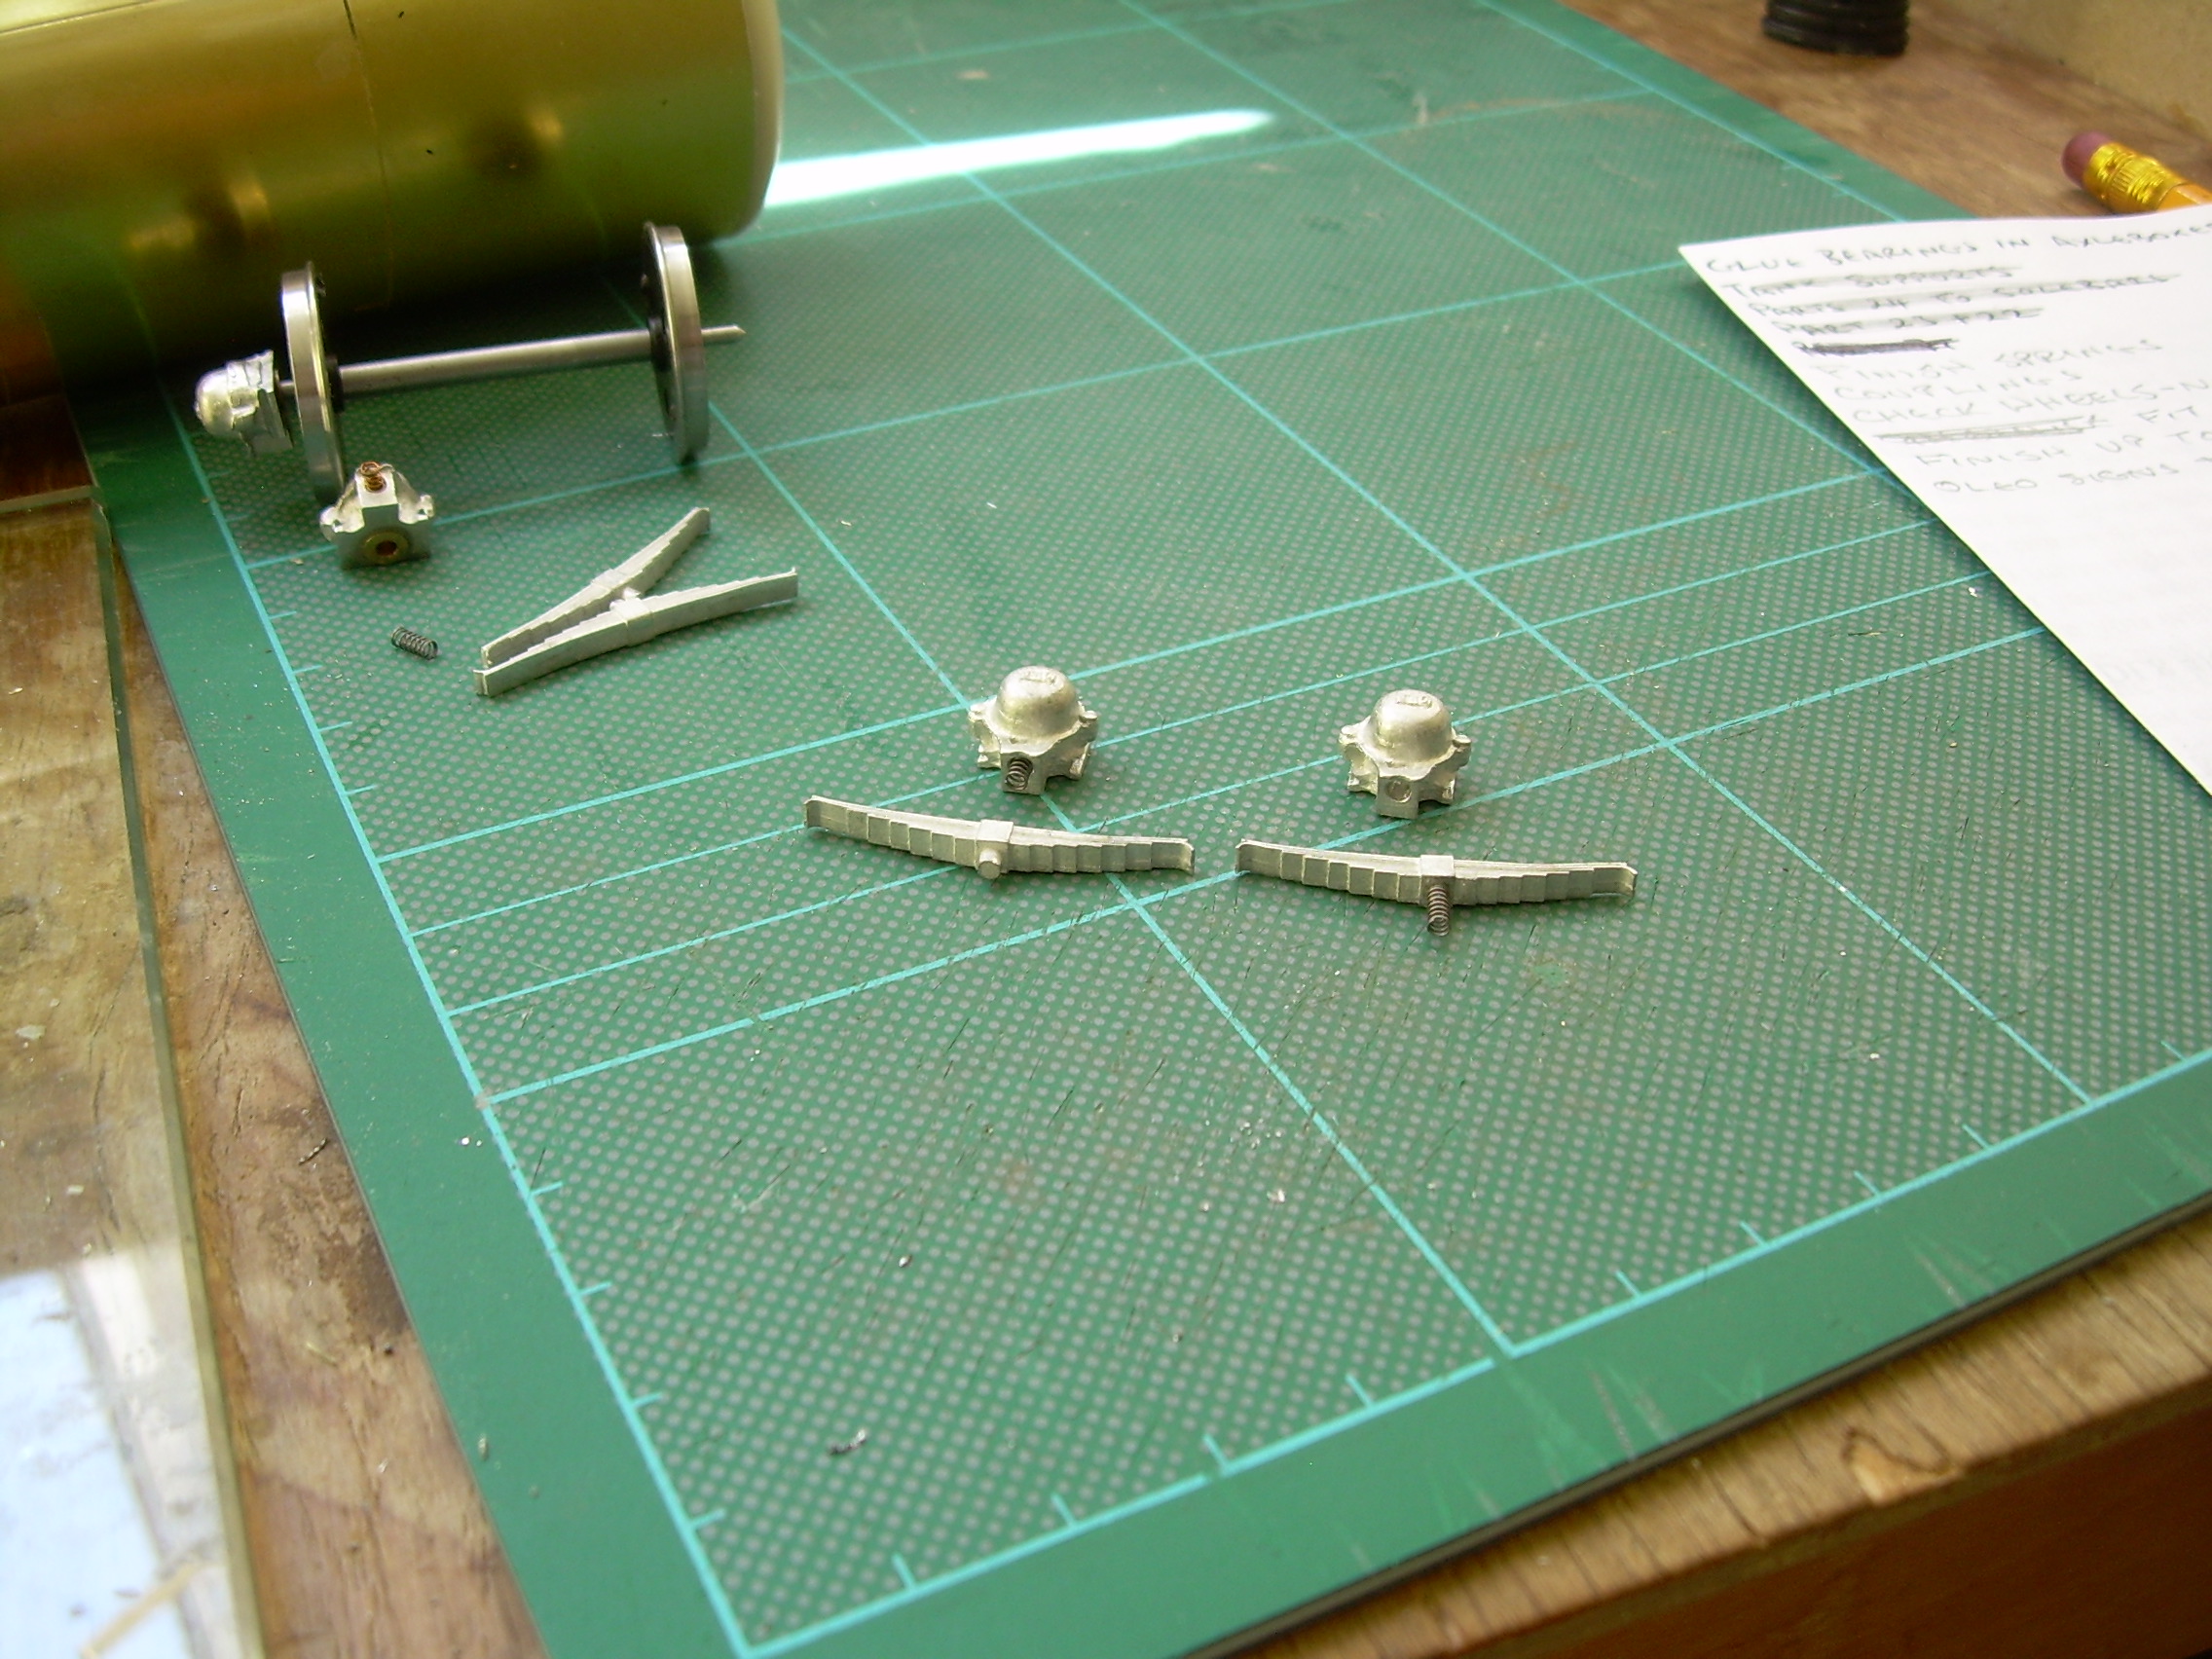
On this kit the leaf springs are castings rather than built up but still with separate axleboxes. The instructions point out that it is possible to spring the wheels and suggest a method using phosphor bronze strip. However the axlebox castings are quite substantial, it looks like the prototype had roller bearings, and there was room to drill out the small locating holes at the top to take some small coil springs. I then filed down the lugs at the bottom of the spring casting to fit inside the coil springs. Hopefully the photo makes this clear.
Here they are temporarily fitted. The idea is that when the wagon is weighted the coil springs will compress down on to the axleboxes but the wheels free drop slightly if the track requires it.
There is tons of room to add weight in the tank before the resin ends are finally fitted. Or to be really authentic maybe I could fit the ends and then just fill it up with some diesel out of the can in the garage!
Ken - I did a couple of these a while back, they are great kits - and your soldering is neater than mine, are you using a resistance set up?
Yes I am. I've had it for around 20 years now. I am using it exclusively as my other irons are in storage during a protracted house move. It's not always ideal but as needs must.
Not sure if it helps at all, but the Building 0 Gauge Online (for info, this site was not available 9Aug2021 - Ed.) site has pix of these exact kits for both the 'A' tank and the 'B' tank in the gallery section.
P.S. - lovely looking build, BTW - and having been building that Slater's PALVAN of mine I'm starting to recognise what's going on under there.
Thanks. I spent quite a long time looking at that site, it is a great help alongside the drawings. In this case though it suggests cutting off some small tabs on each end of the main underframe fret, I can't work out why as they locate and support the outer brake hangers.
Working on the brake gear now and will post more photos in due course.
I have a Slater's box van to do and trying to source etched brake gear for it. I was about to order some Ambis etches, they seem to do everything except the brake shoe hangers. Any ideas or are you building the kit as is?
I'm building a Slater's PALVAN, this is a plastic kit with everything except the solebars, vac cyl and brake hangers/brake shoes as an etched kit. So the brake hanging gear, brake actuating gear and brake levers are on the brass etch, and 'yes', other than adding Slater’s etched sprung suspension I'm building it as it came in the box - I ordered it with S7 wheels.
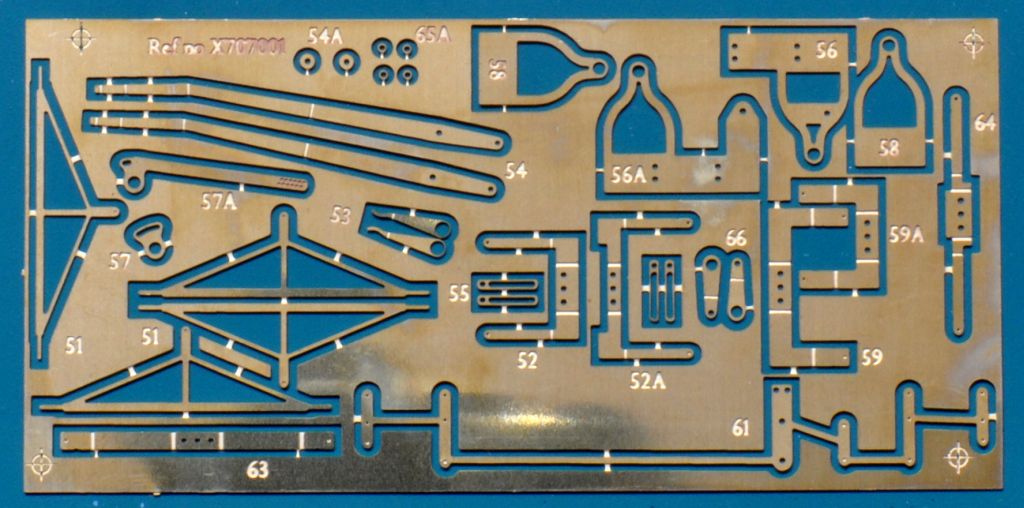
I just managed to grab this pik of the etch that they supply - given the stuff you have under the tank wagon, you should be able to recognise some of this stuff.
Enjoy!
I think you might find that our upcoming underframe detailing set for the Slater’s BR 10' WB fitted stuff will be useful. Both 4 & 8 Shoe versions will be done. DJP/MMP
I think that comment regarding cutting off the small tabs may be a minor error. I'm building 32 of these little babies and I can see no reason or note in DJP's instructions to do this. If you look on all the photos up to 36 they are not there and then on 37 they are back. I could be wrong and stand corrected if I am... (Ducking back into my hiding hole, tin helmet on).
As I recall - it is some time back now and my nurse tells me my memory is not what it was these days - Simon V built this from a prototype etch. So the comments would not apply to your own or to Ken's kit/s. DJP
It's too long back now I'm sure your memory is just as good as it always was though don't listen to the nurse - I ignore comments like that from mine. My etches look the same as the one on here though so fingers crossed I said the right thing. I hope you are keeping well.
I think that comment regarding cutting off the small tabs may be a minor error.
Hello Mark, I've looked at Simon Varnam's photos again and you are right, so I'm glad I didn't remove them.
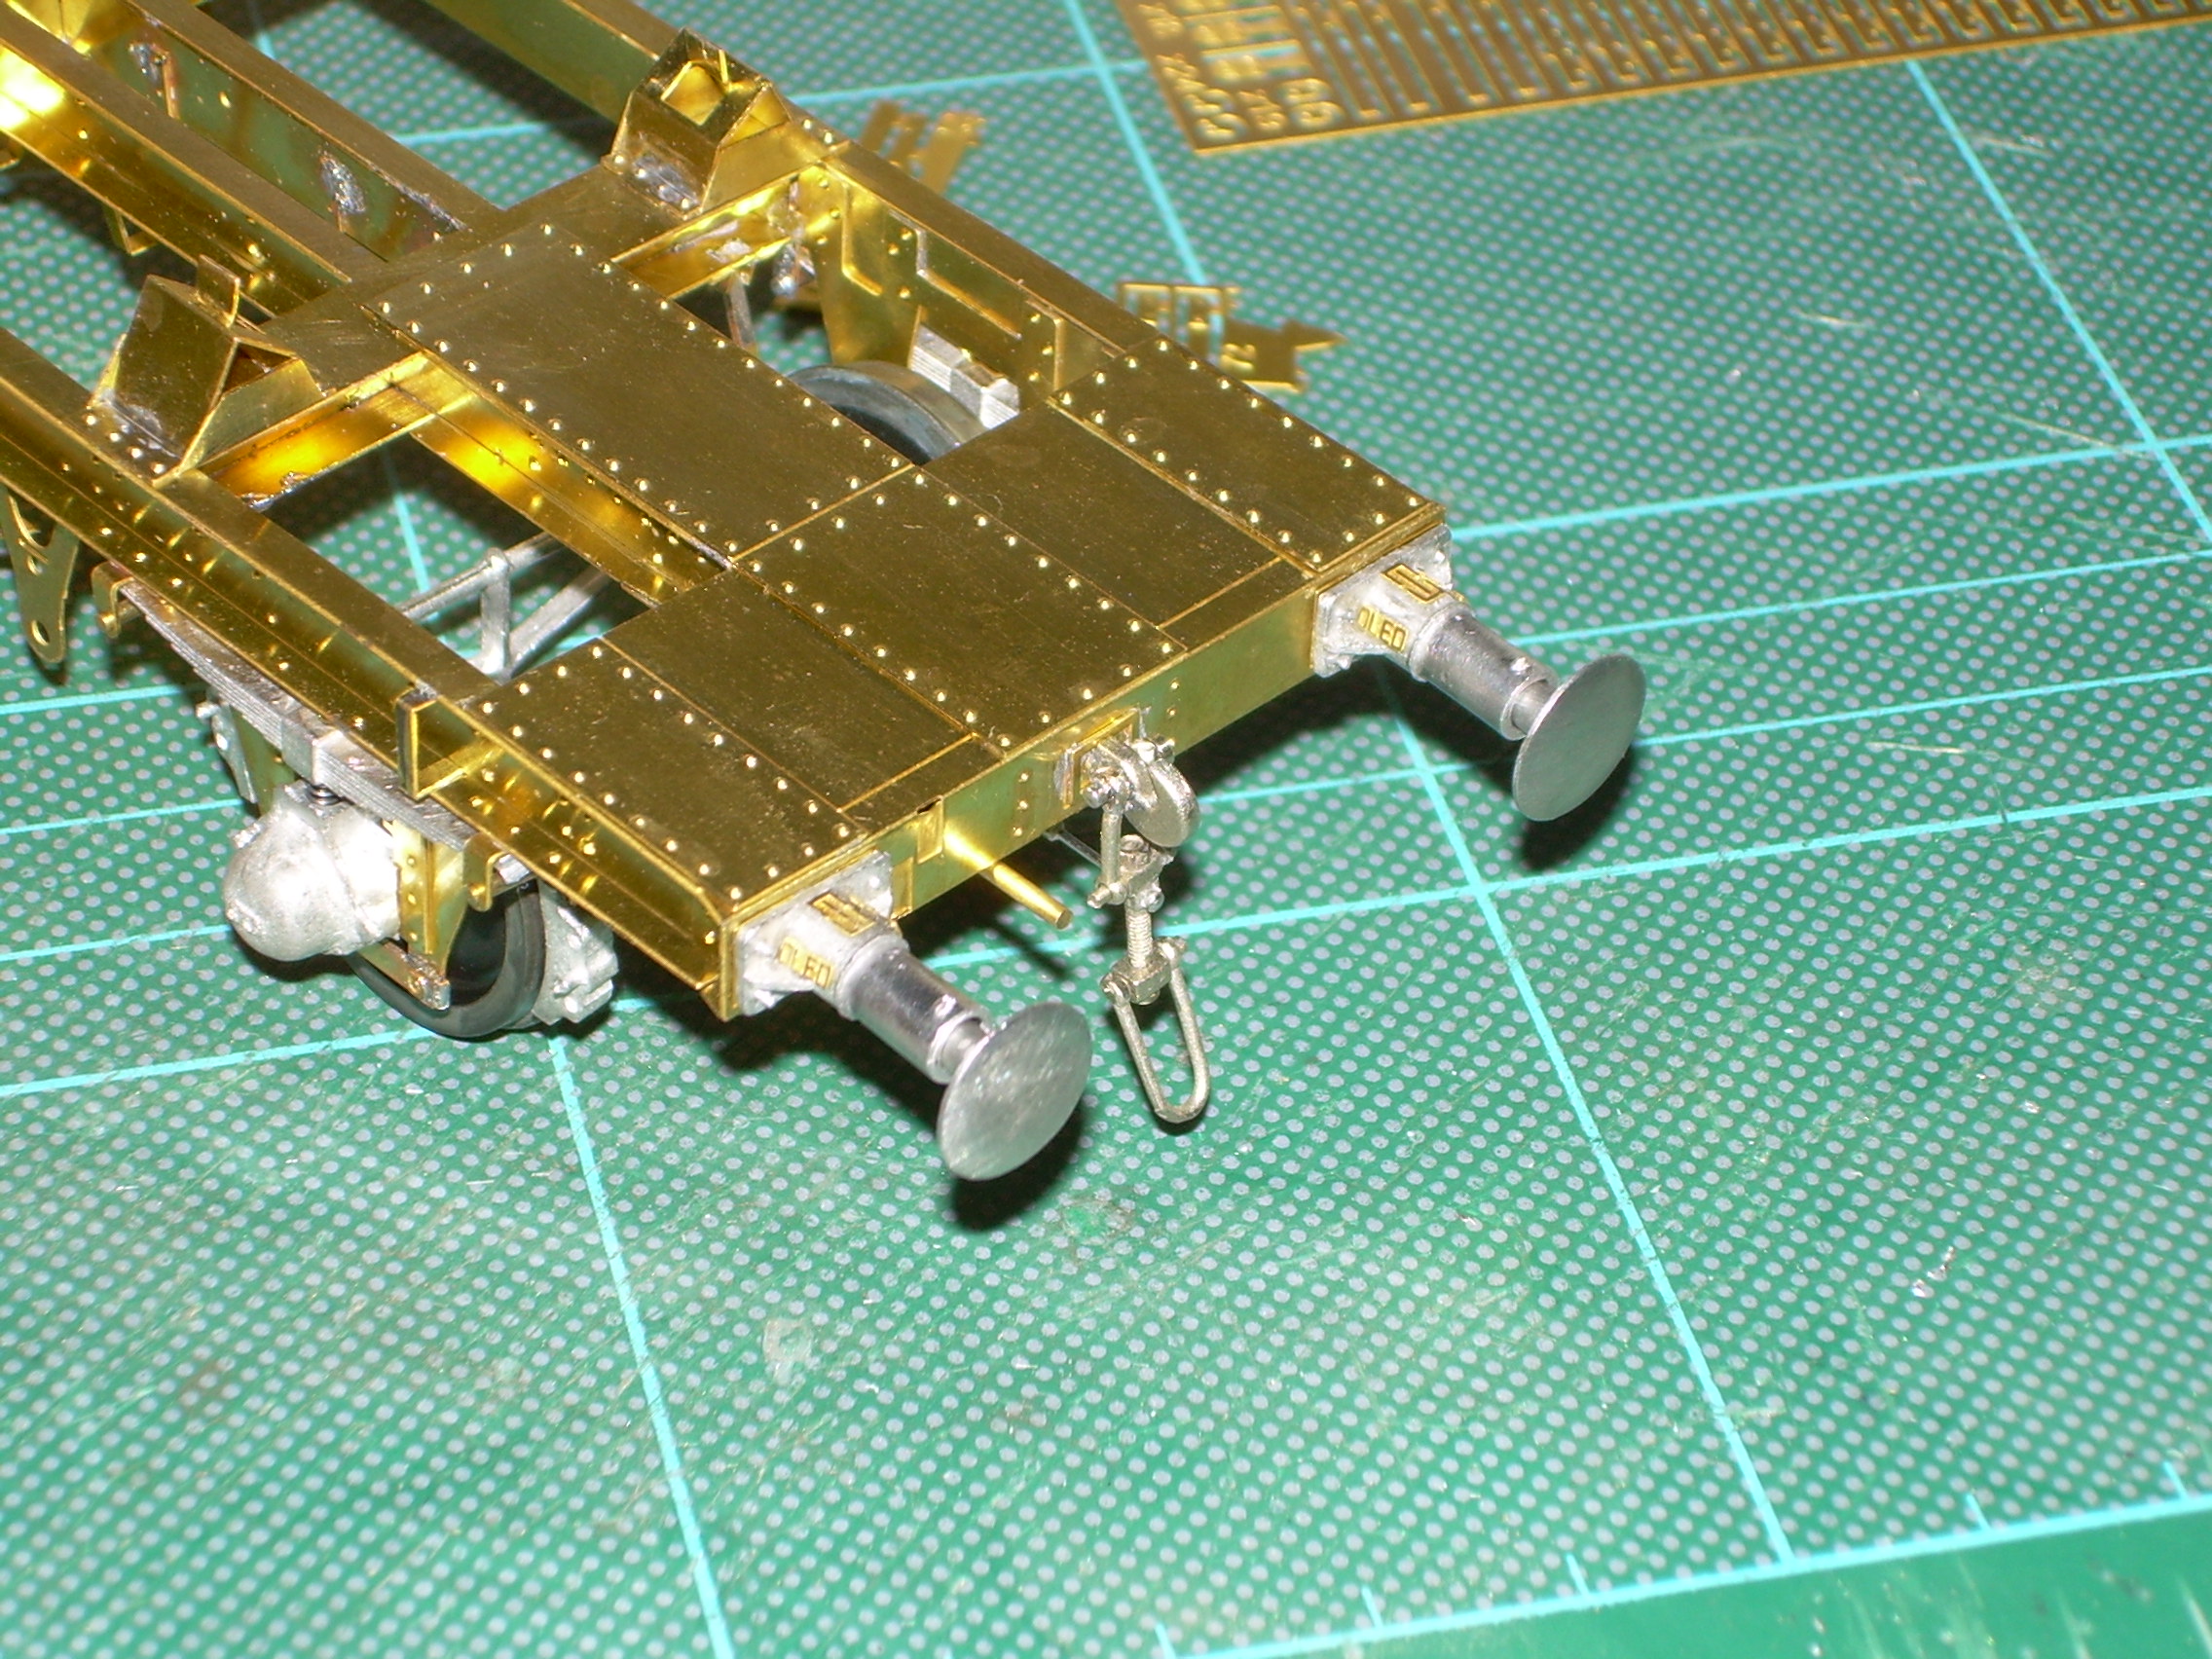
Todays efforts include fitting the buffers with the lovely OLEO etchings, and sprung as per Simon Varnam's website.
Screw couplings added, I know they are not the correct ones (unless somebody tells me otherwise) but all I had to hand and will change them later.
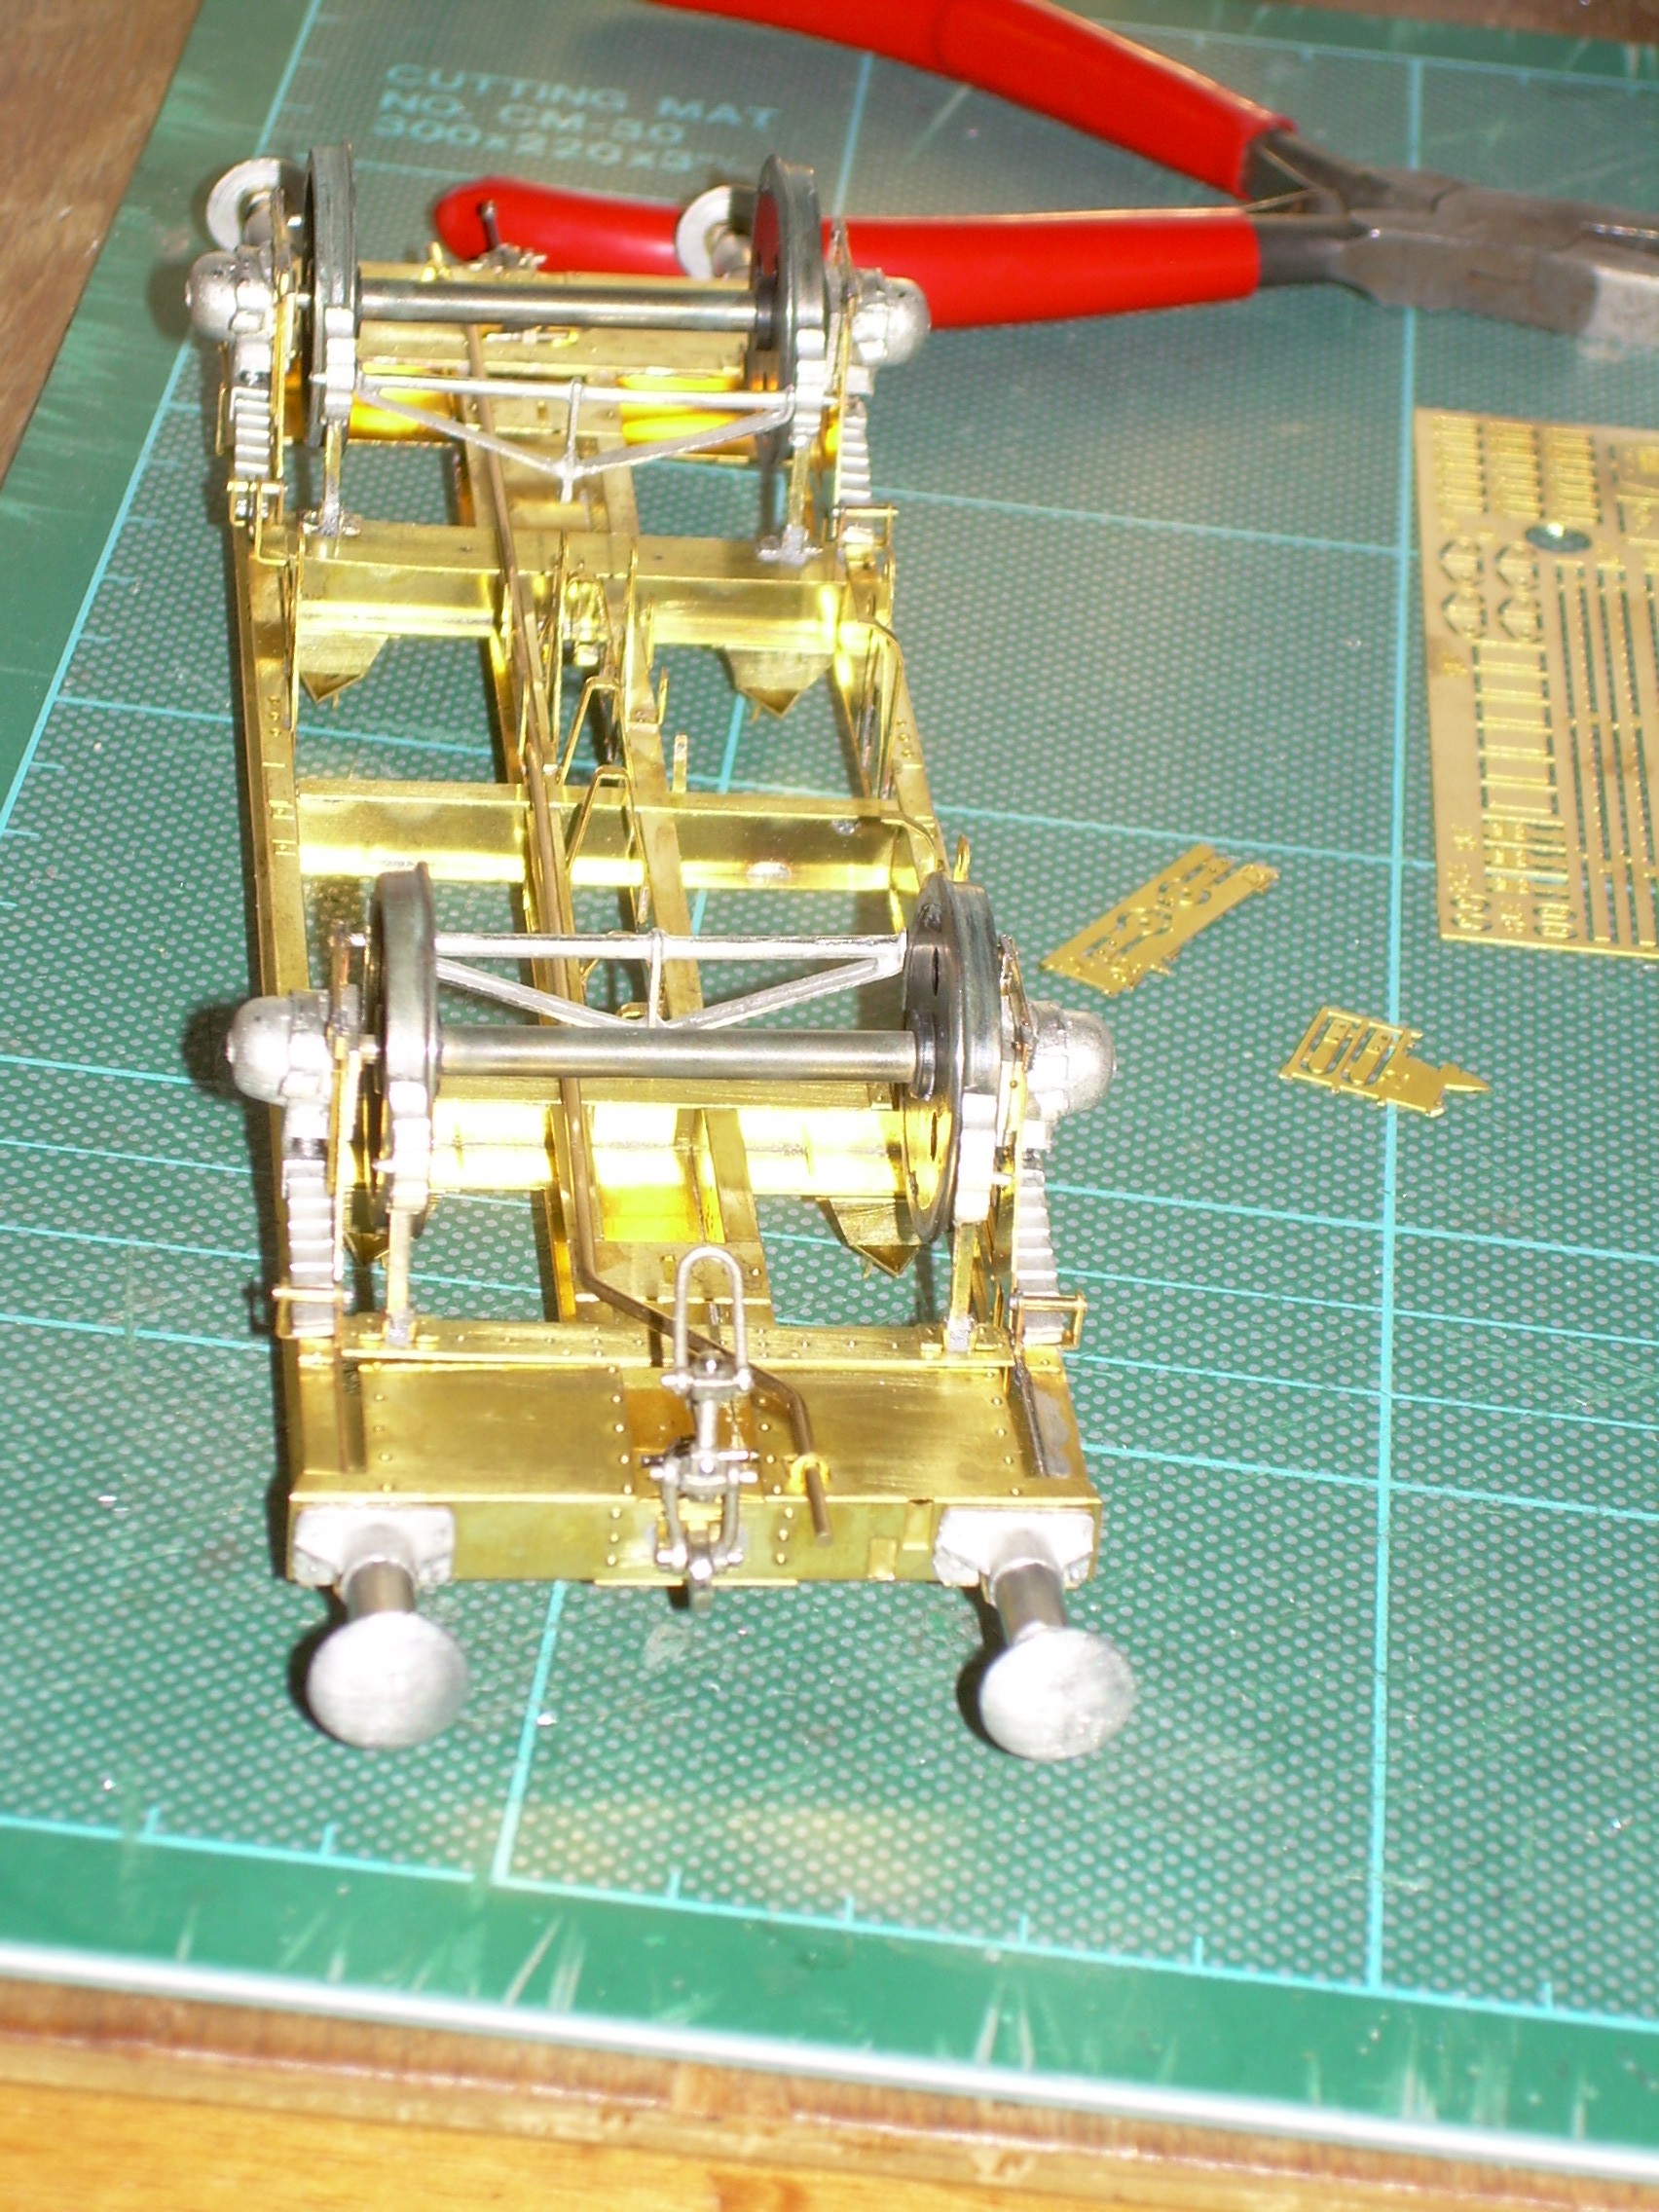
The vacuum pipe is temporarily in place but needs to be tweaked slightly to lay flat.
The wheels have been blackened (although in the photo it doesn't look like it) but not very happy with the results. Perhaps someone can help. As they were already in place I used a cotton bud to clean them with Meths, then another cotton bud to soak them with Birchwood Casey gun blue and finally buffed with brass wheel in the Dremel.
But the gun blue didn't stick to all of the metal evenly and in areas not at all. Re-applied the gun blue and buffing but after the subsequent soldering session and cleaning in warm, soapy water the treated surface has taken on a rough, slightly green surface.
I bought some re-profiled wheels from Christopher Makepeace some years ago and they were beautifully blackened. Maybe I need to blacken them in a bath rather than cotton buds. Any help much appreciated.
I'm guessing "less is more" with the Birchwood Casey is the answer.
As previously discussed, it wants to be applied sparingly and left on for the short time suggested in the instructions before being rinsed off.
Nice looking wagon, at first sight I thought this thread was going to be about Teutonic military hardware!
For what it's worth, here's my method:
Nice, looks like a good recipe - where can I get a jar that is big enough for a 84cm piece of rail? Guess that I need to find some plastic pipe and make a simple container.
For what it's worth, my technique is as follows:
No matter what method you adopt, I think the principle to aim for is get the item as CLEAN & grease-free as possible, before you apply the Blackening Agent - just as you would do if soldering it!
I think that's the key. I can certainly tell things need better cleaning if the chemical doesn't "take" to the surface.
Thank you everyone. I will use the methods suggested in future and certainly before any construction.
It all seems pretty obvious really to anyone with half a brain - oh, maybe that's my problem.
Maybe I'm missing something here, but why not just mask treads, coat in etch primer then paint black, it's all I do and it has never let me down.
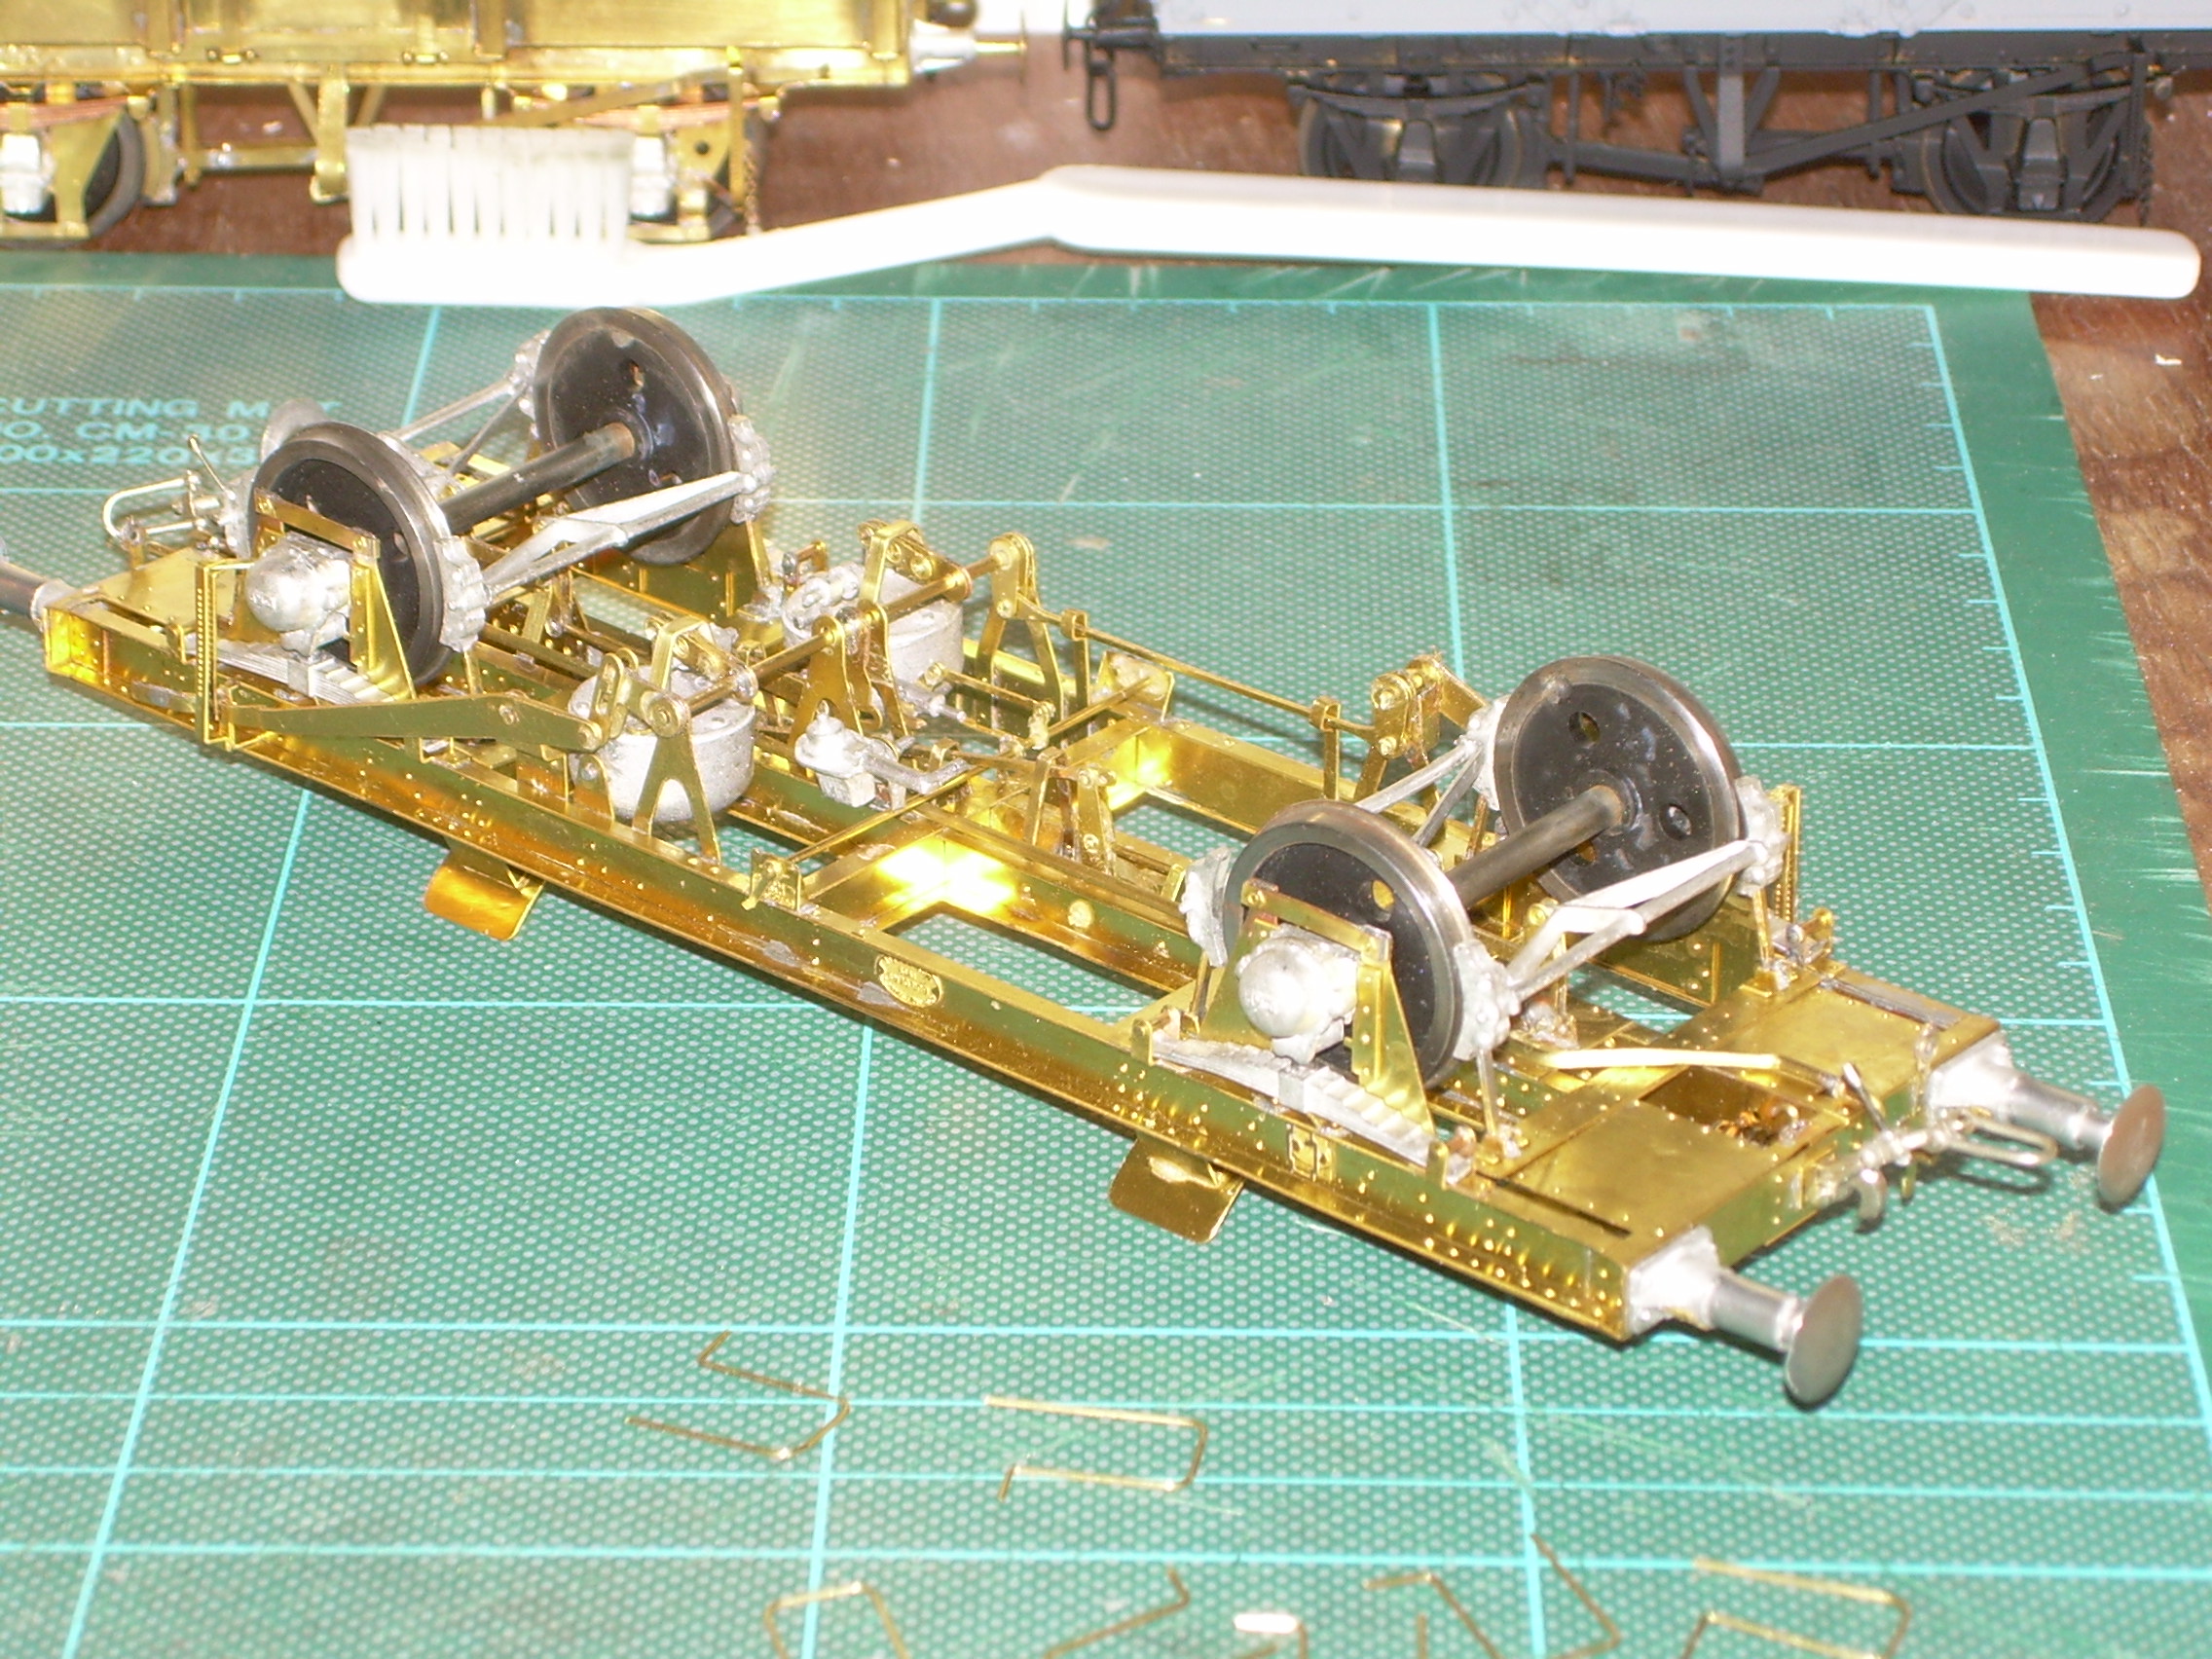
Been a while due house purchase and wife going on holiday with friends AND the camera. These photos were shot this evening without the benefit of daylight from the rear so Simon Varnam's are a better bet at this stage (although his lack the used toothbrush).
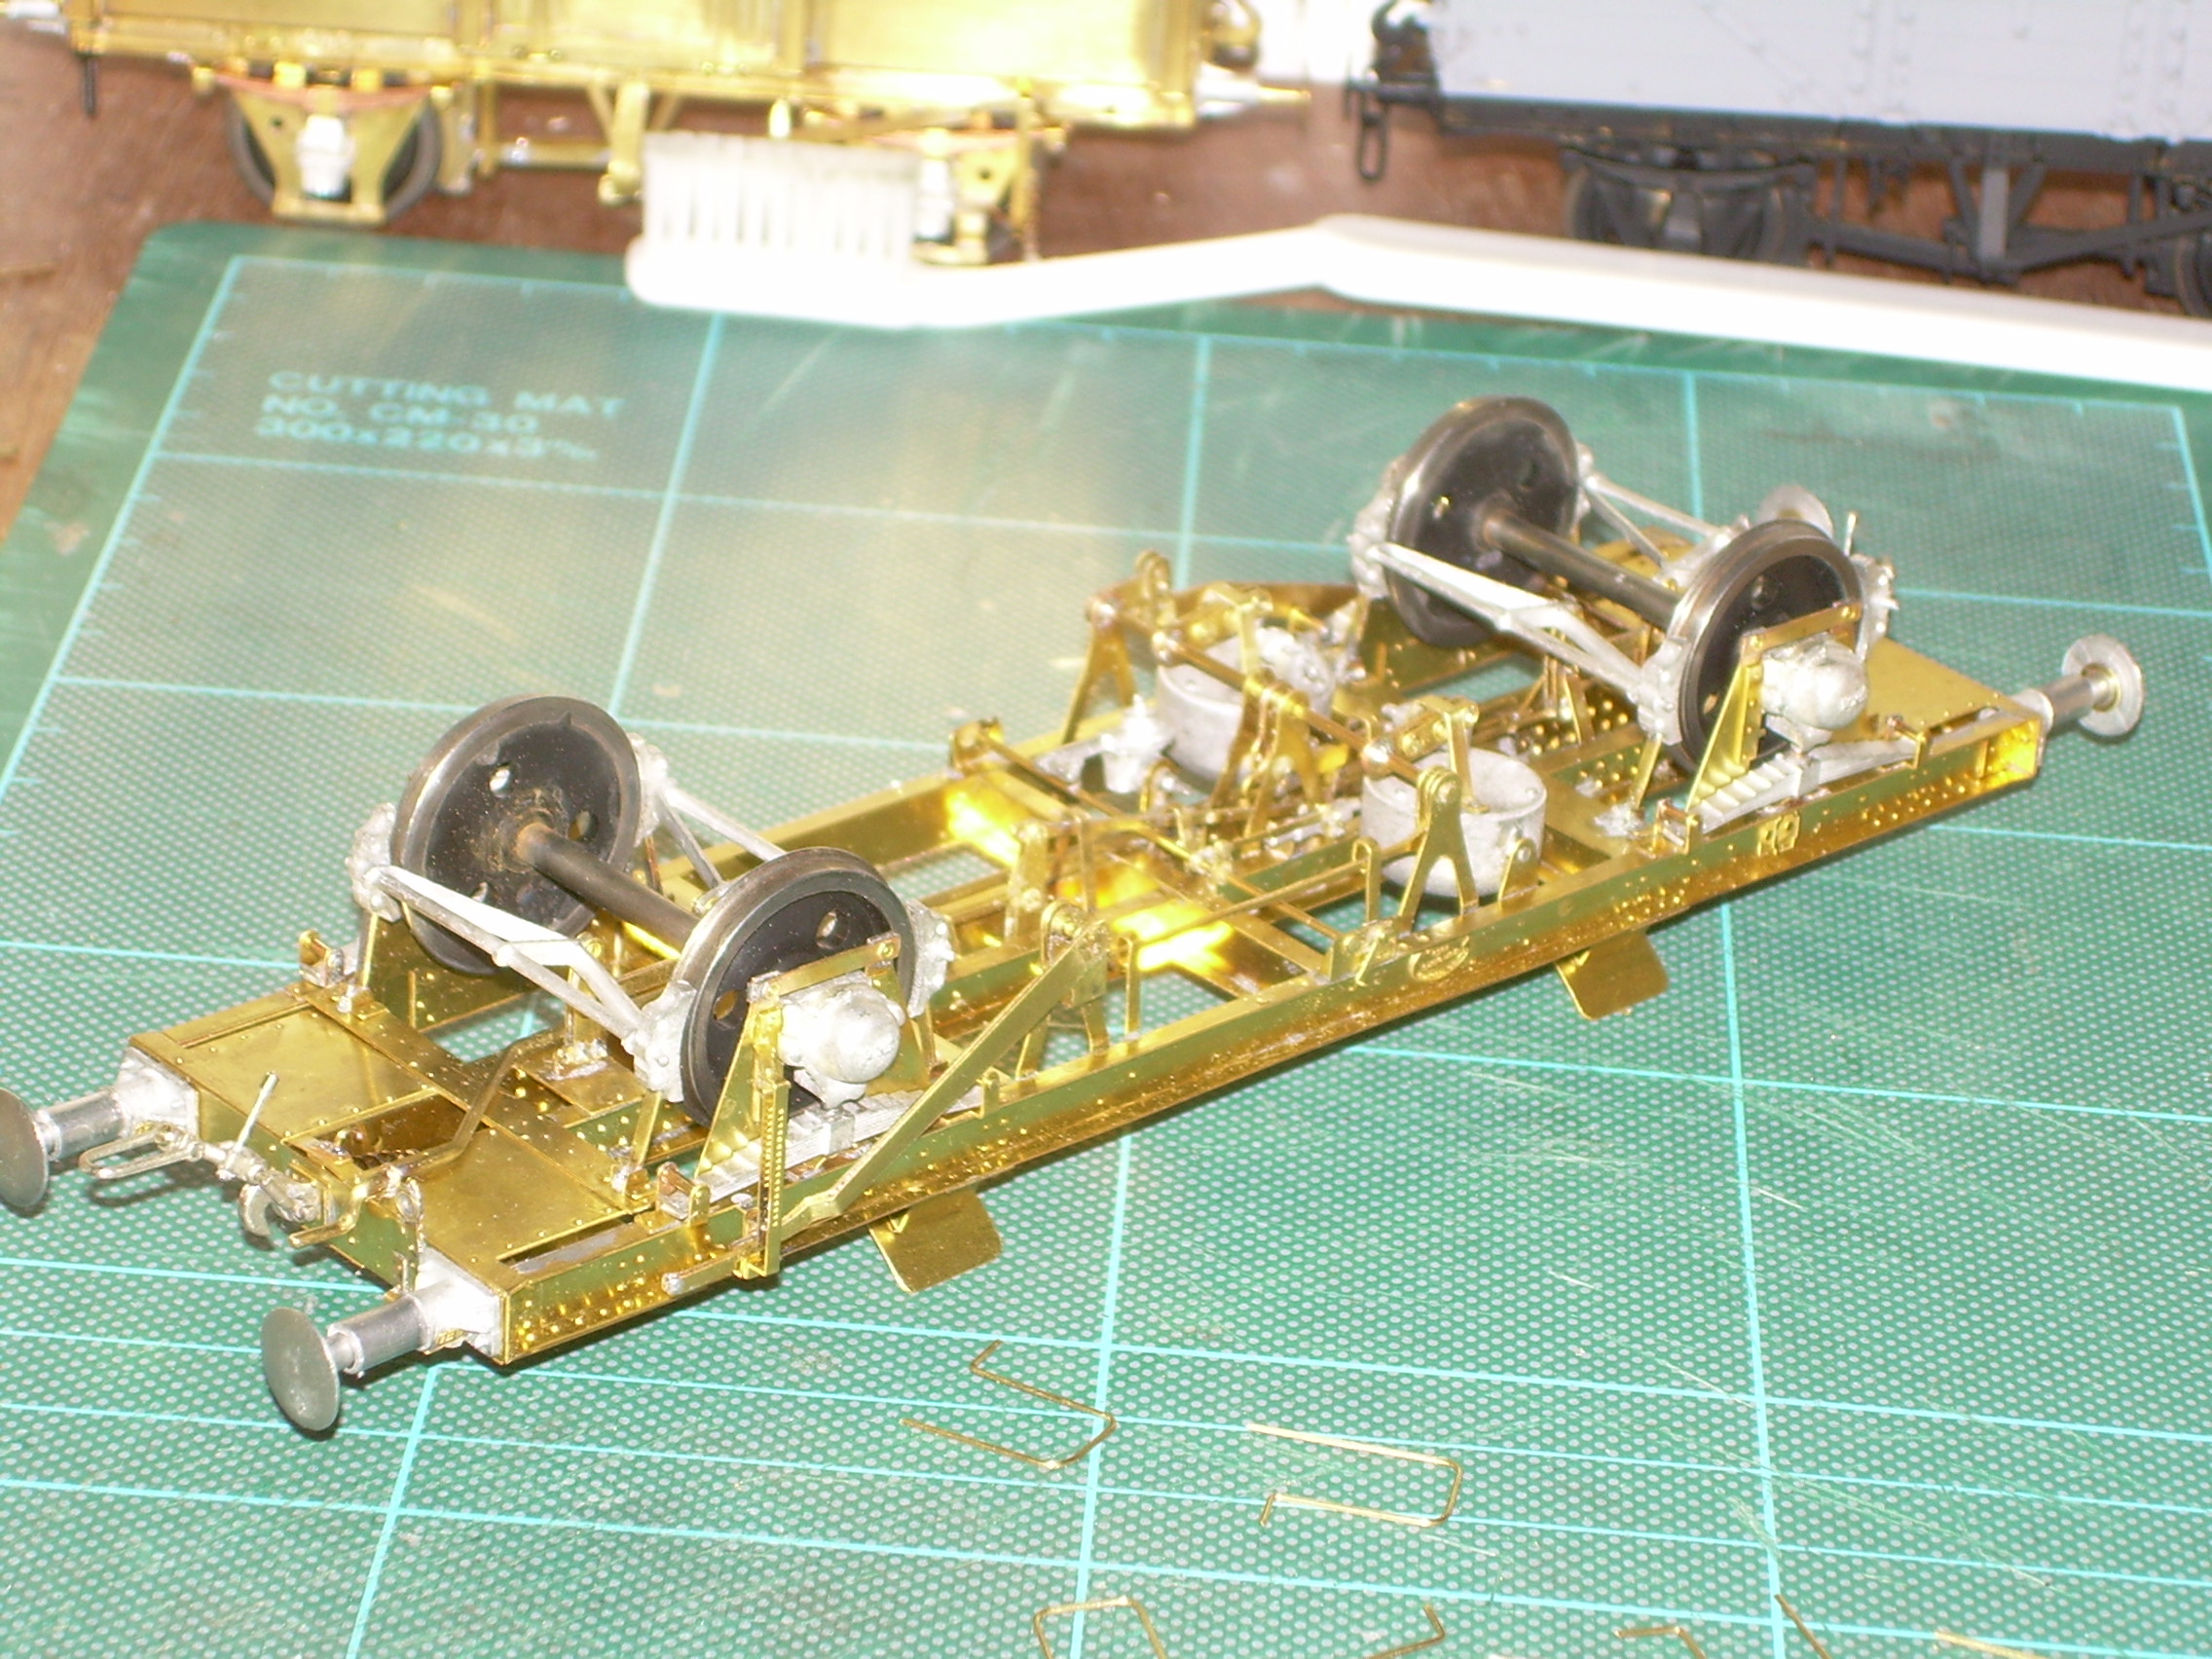
All of the brake gear has been fitted apart from the safety loops under the axles (ran out of wire after making 7 of the 8, more from Eileen's Emporium arriving tomorrow) and the 5 rubber vacuum hoses which will be fitted after painting.
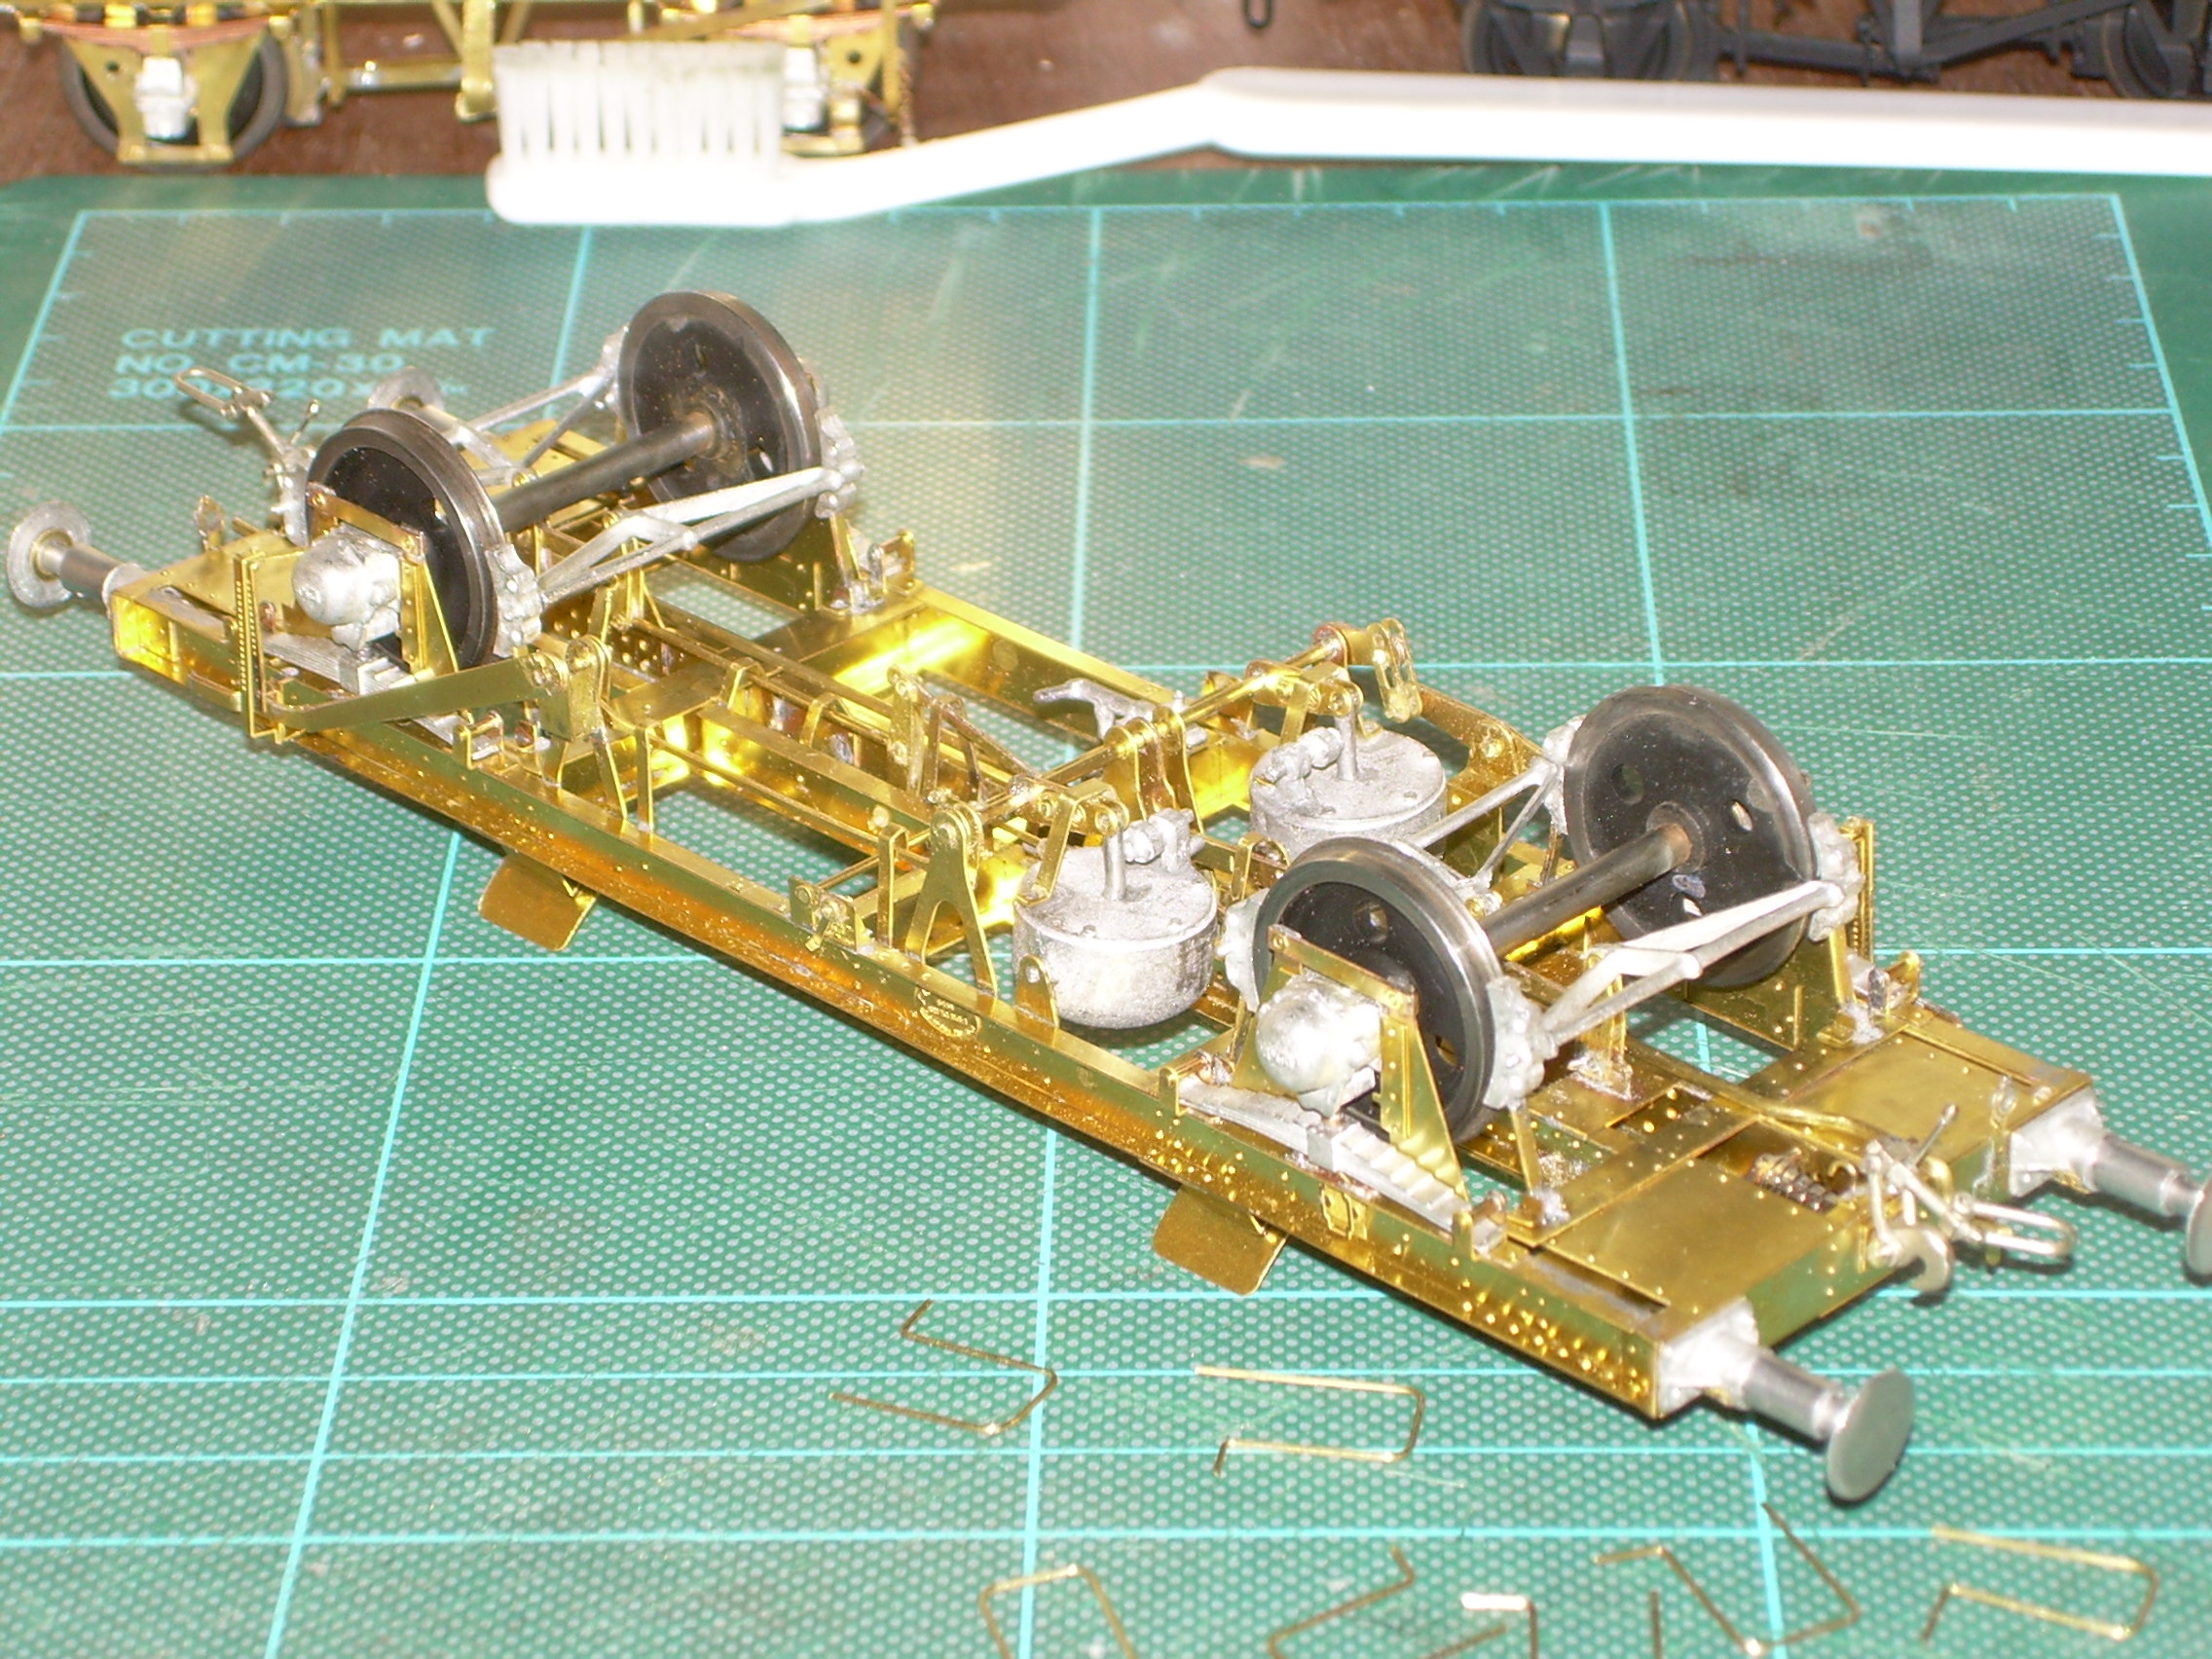
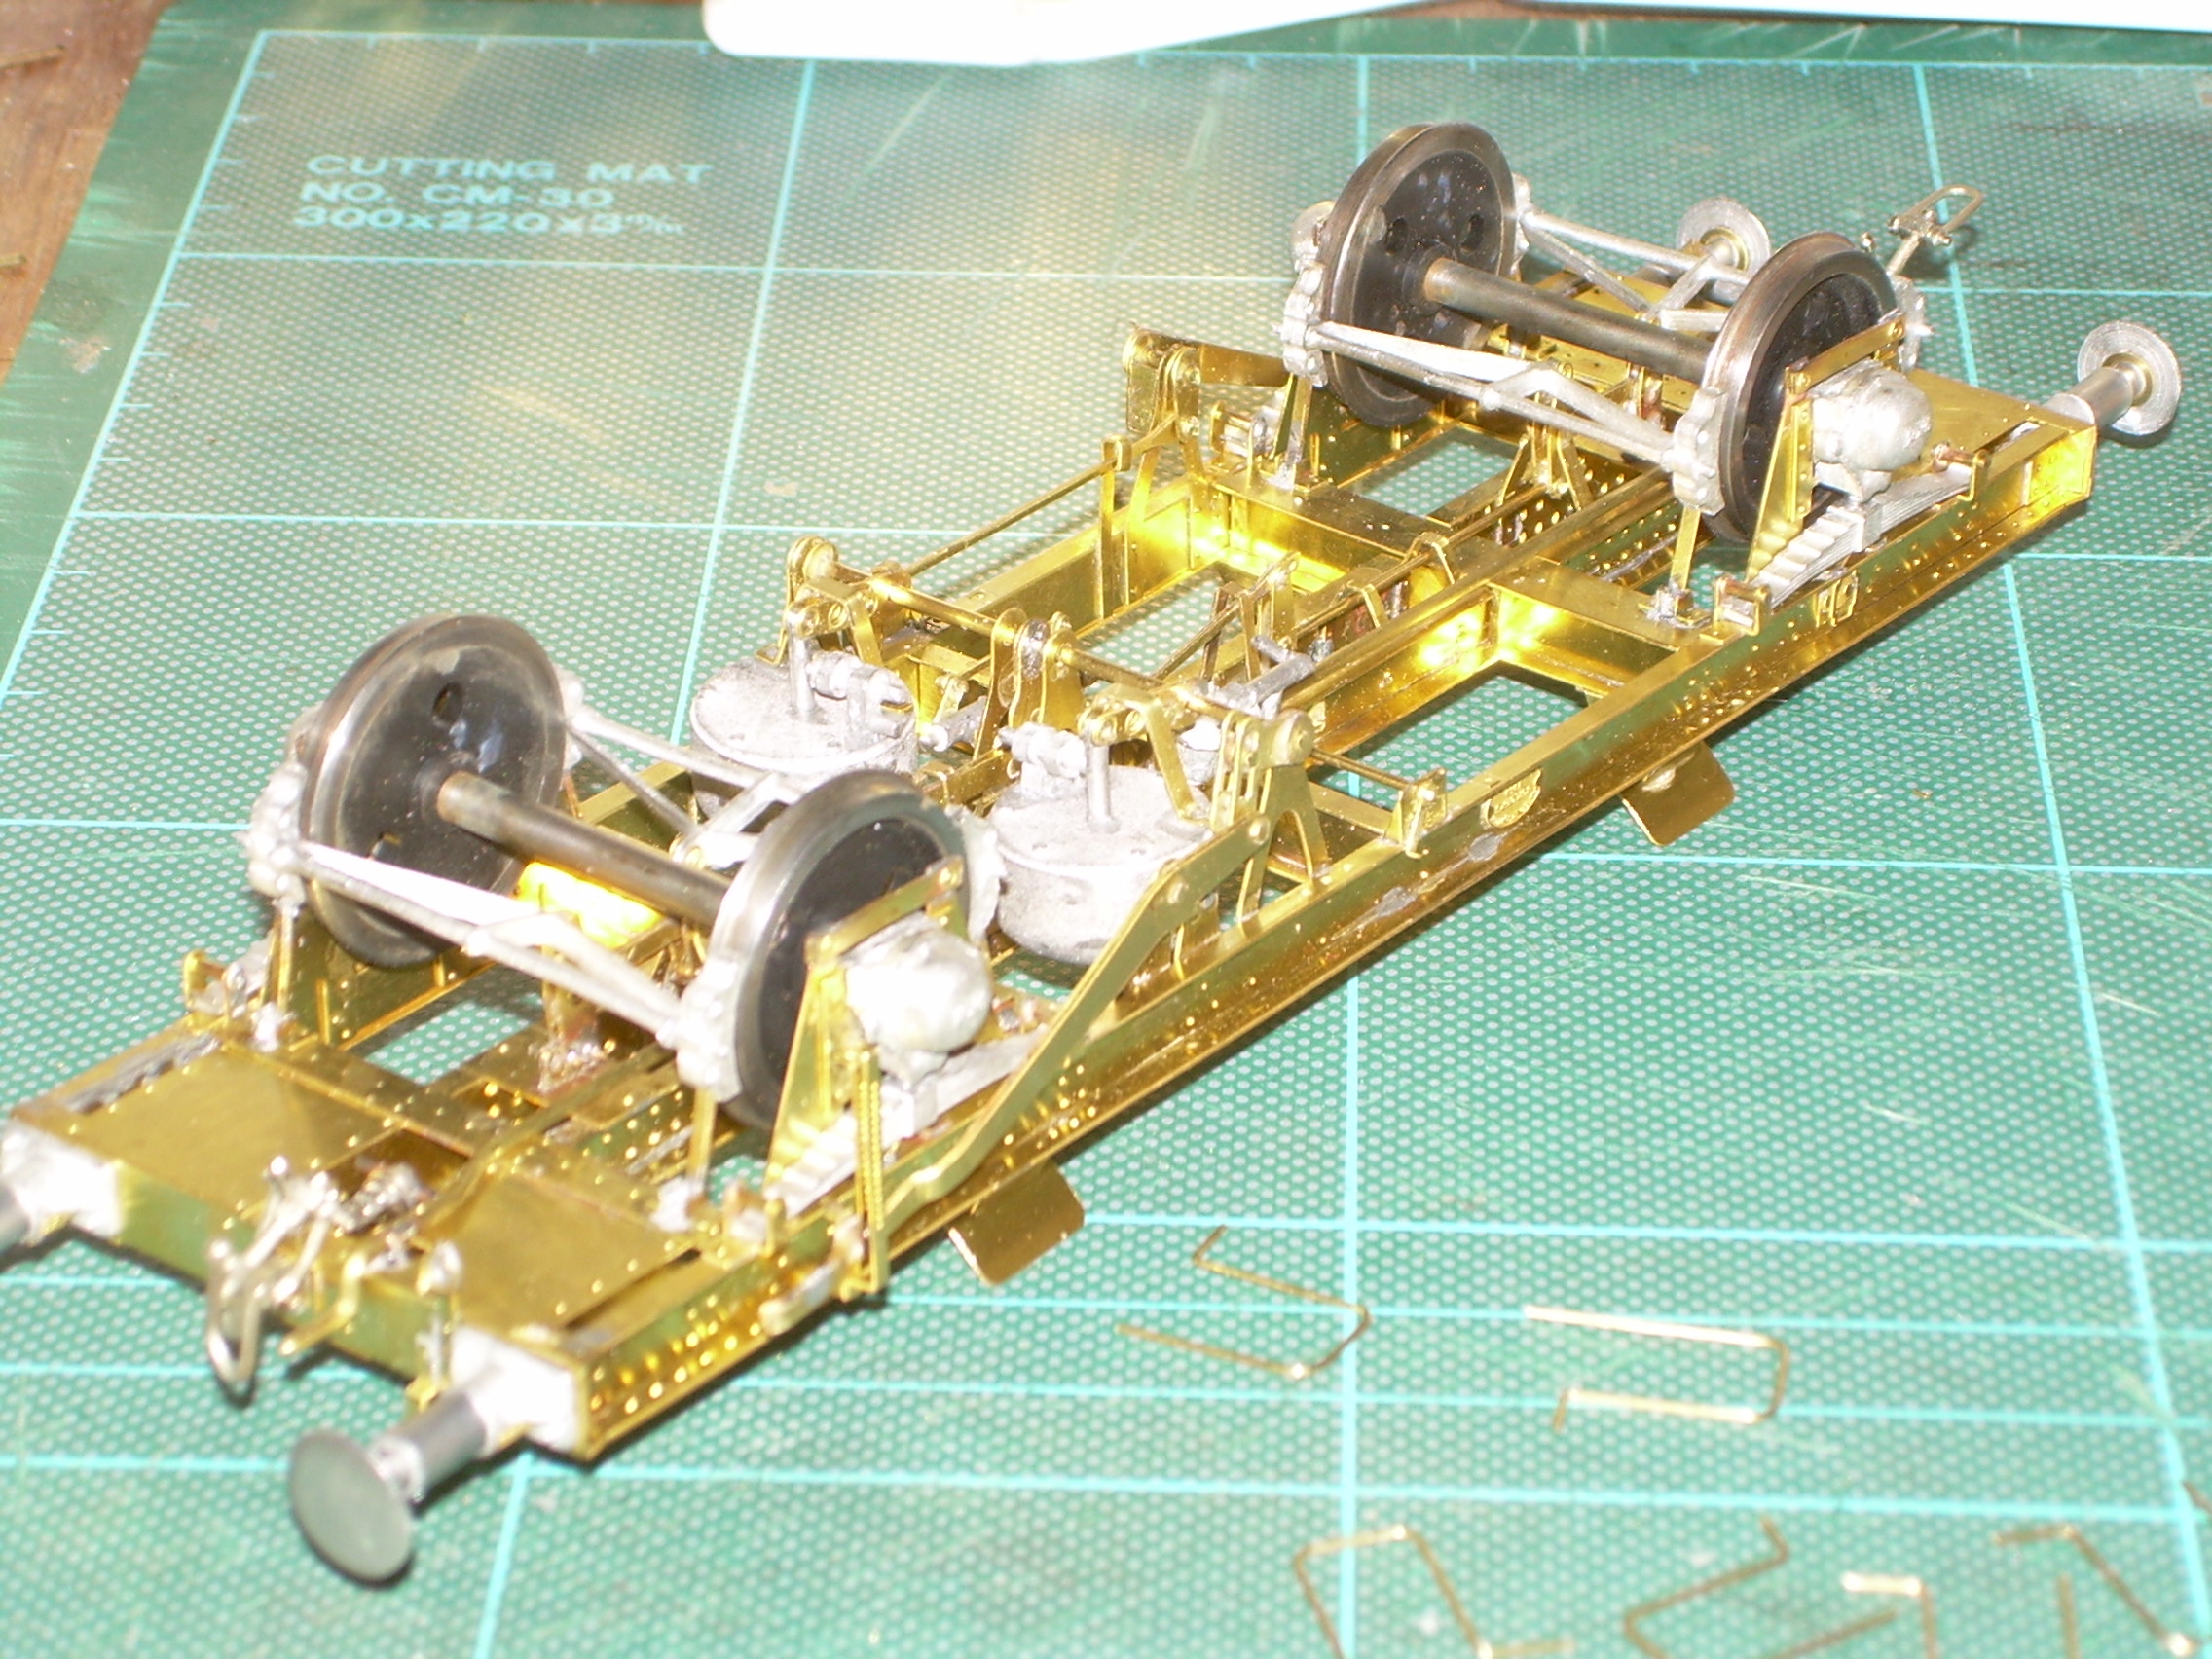
The next part of construction is fitting the tank to the body and the discharge pipe. The instructions suggest for extra details a chain can be added between the caps and the chassis. I have been looking for very, very fine chain for this and perhaps the buffer things on the MK1 coaches when I came across this site Builders in Scale. They have 40 links per inch chain in brass or blackened (and some useful figures presumably 1/48). Has anyone tried them?
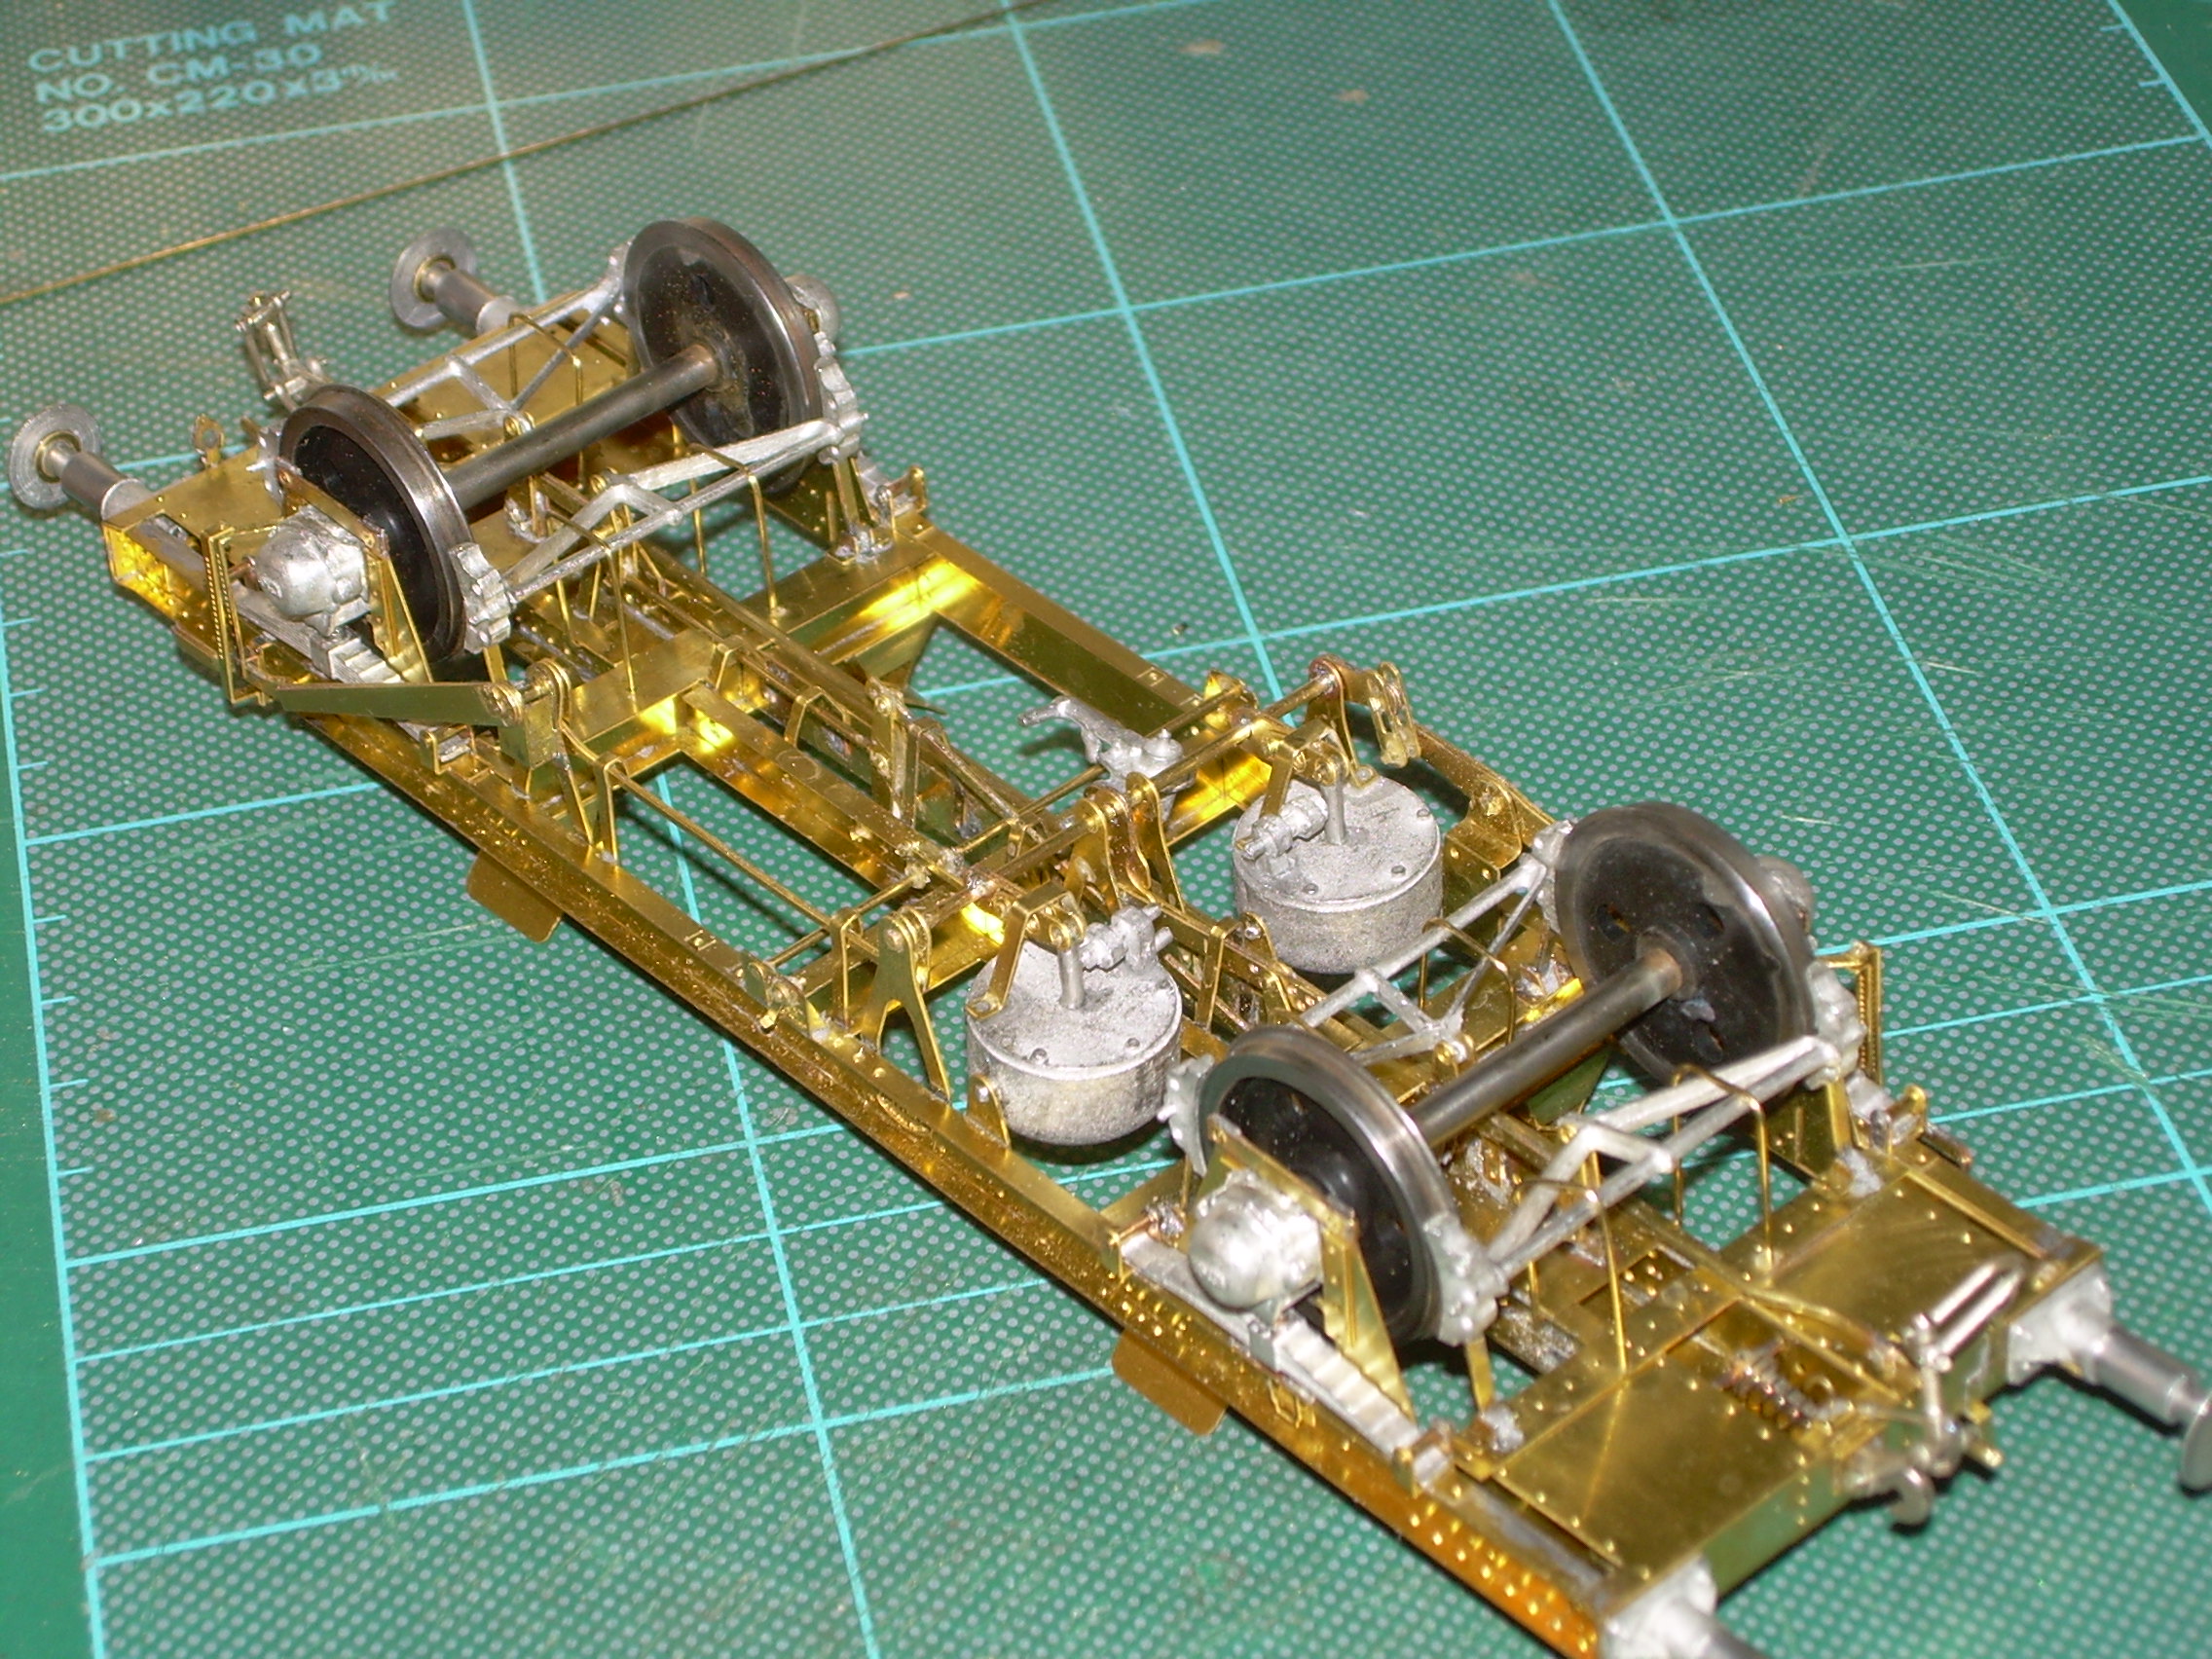
A better photograph tonight with the brake yolk safety loops on. Unfortunately the better photograph shows I must do the nearest one again!
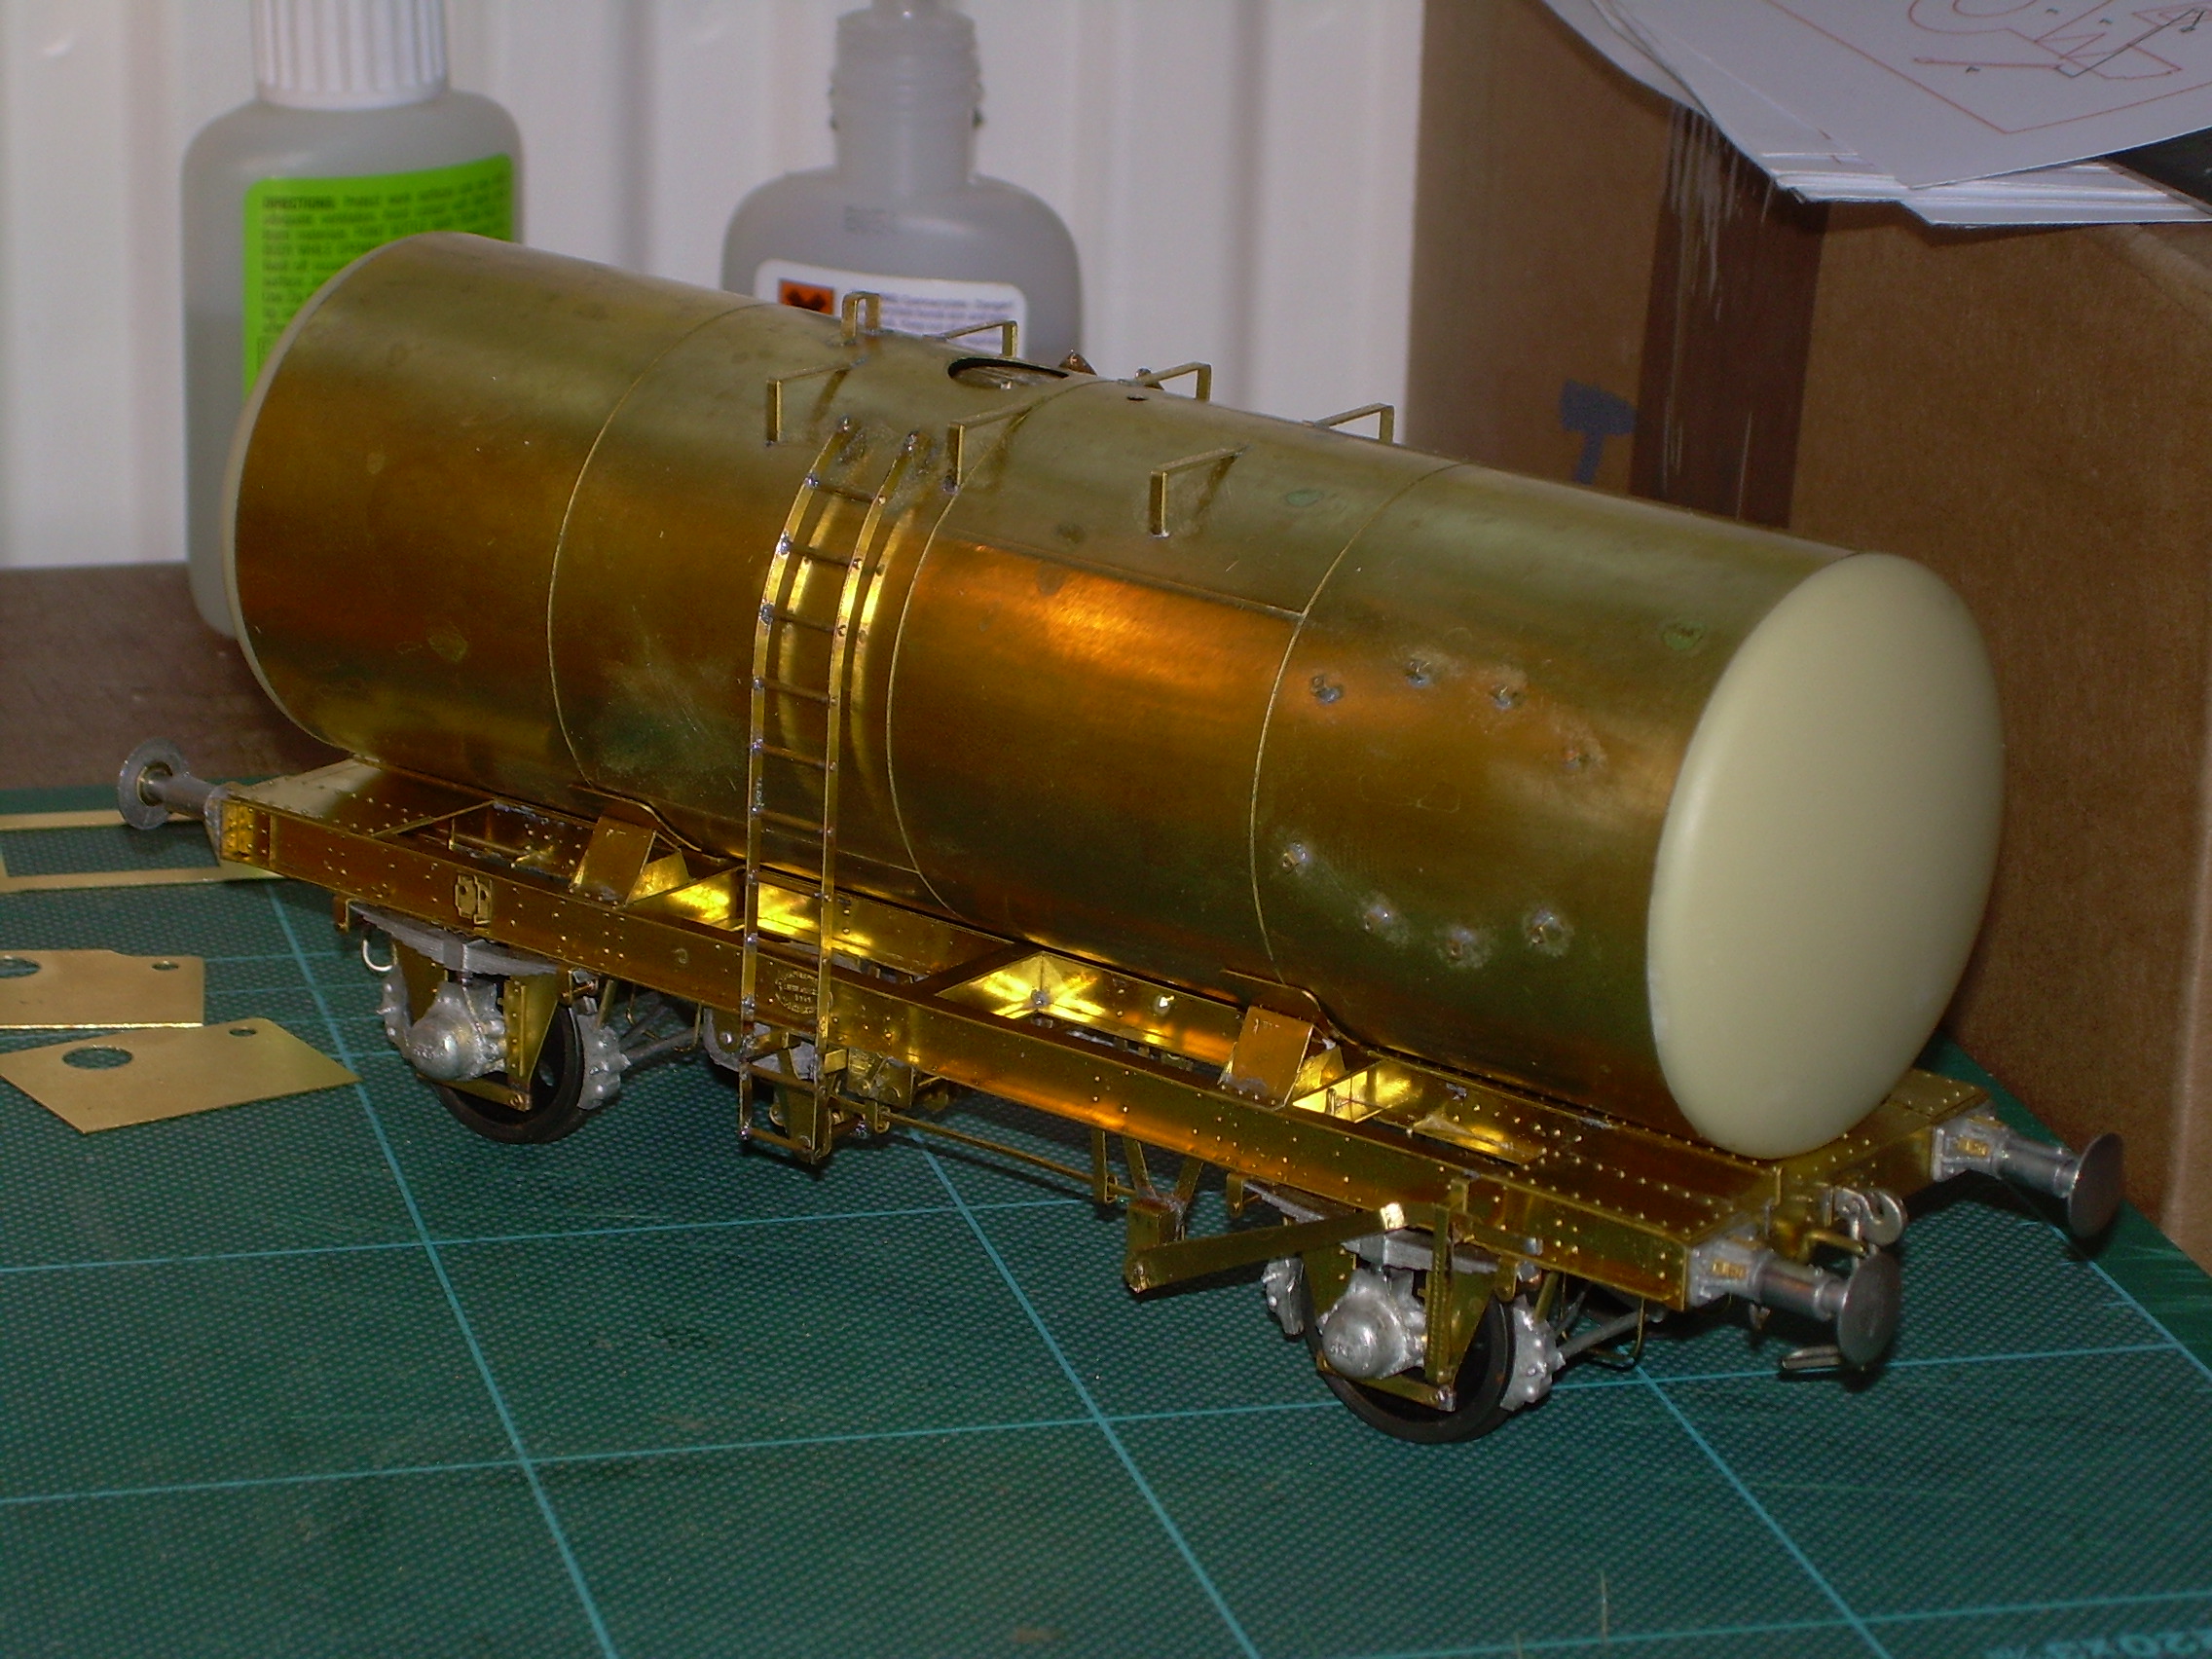
I've now got the tank fitted to the chassis and the ladders in place albeit with some delicate filing of the wire ends to finish.
I spent ages trying to get the tank to sit down properly including filing of some of the central rivet heads on the chassis. I'm still not 100% happy with it but couldn't get it to fit better, maybe something I did wrong earlier.
Now the gratings, filler and valve to fit before moving on to the next project. The resin tank ends are not fixed yet so weight can be added to compress the springs added earlier in the build.
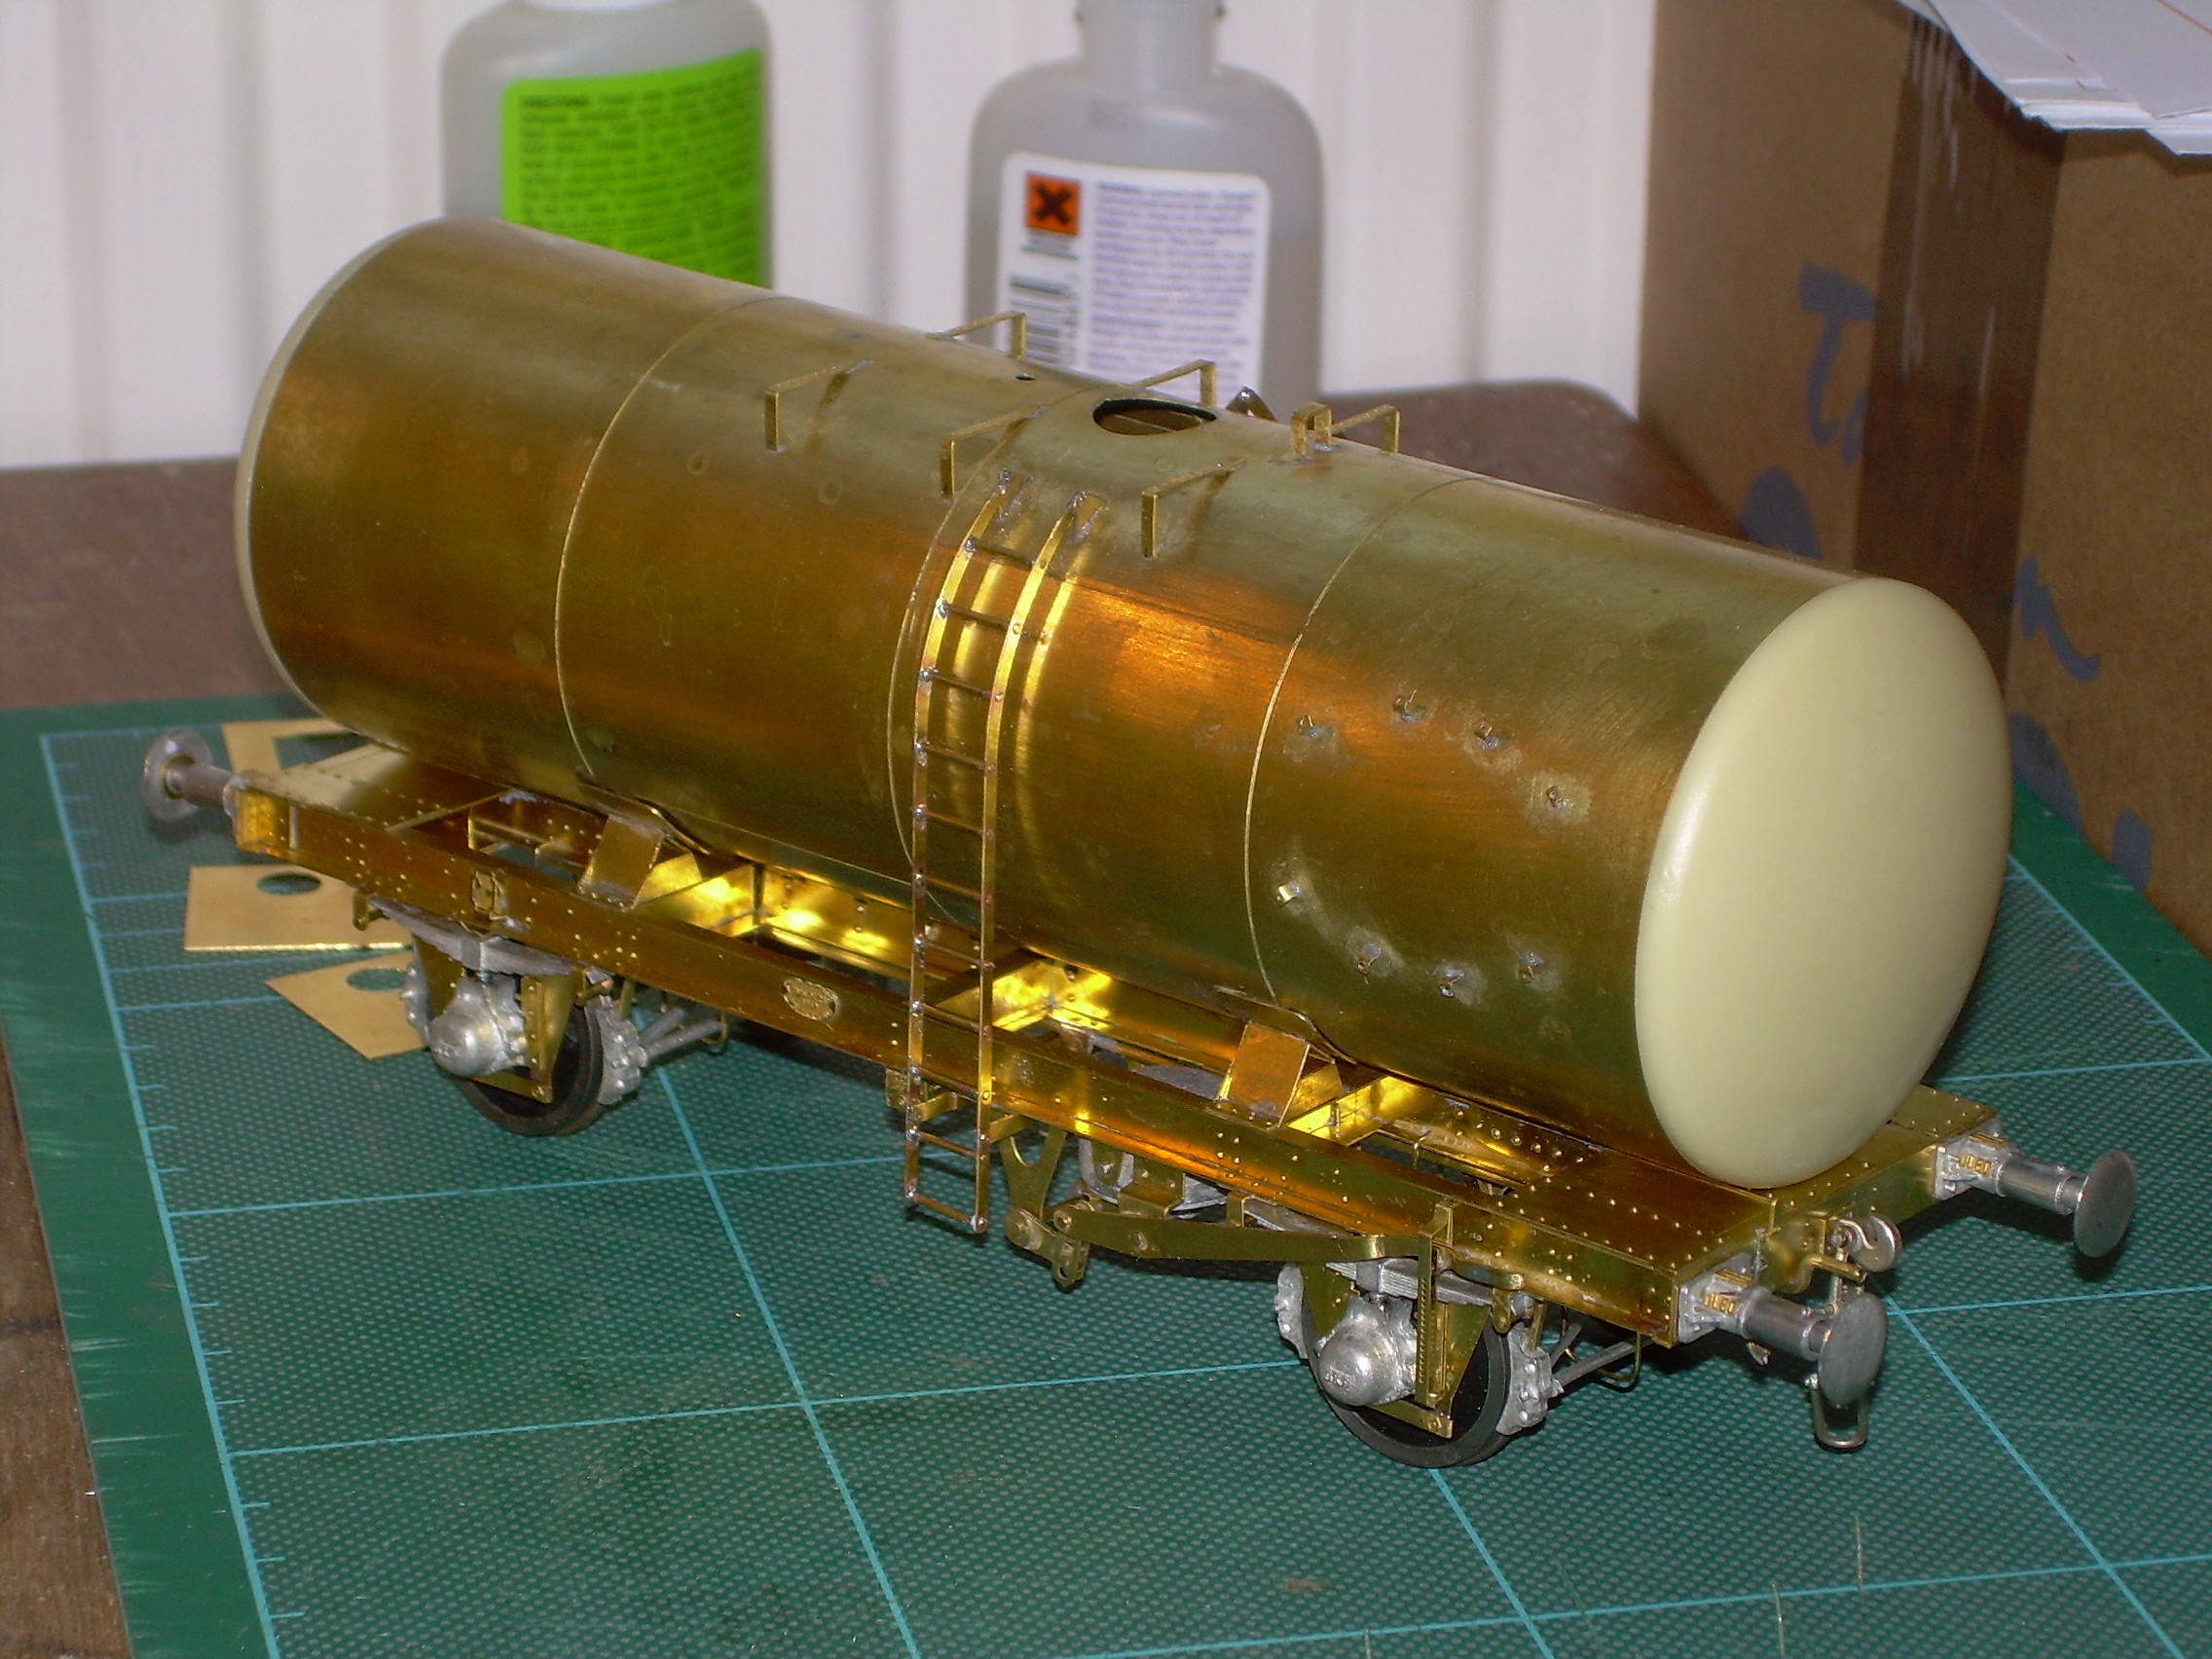
Latest bits done today, a bit fiddly but satisfying. Need to tweak one or two stretchers before applying the cross wires.
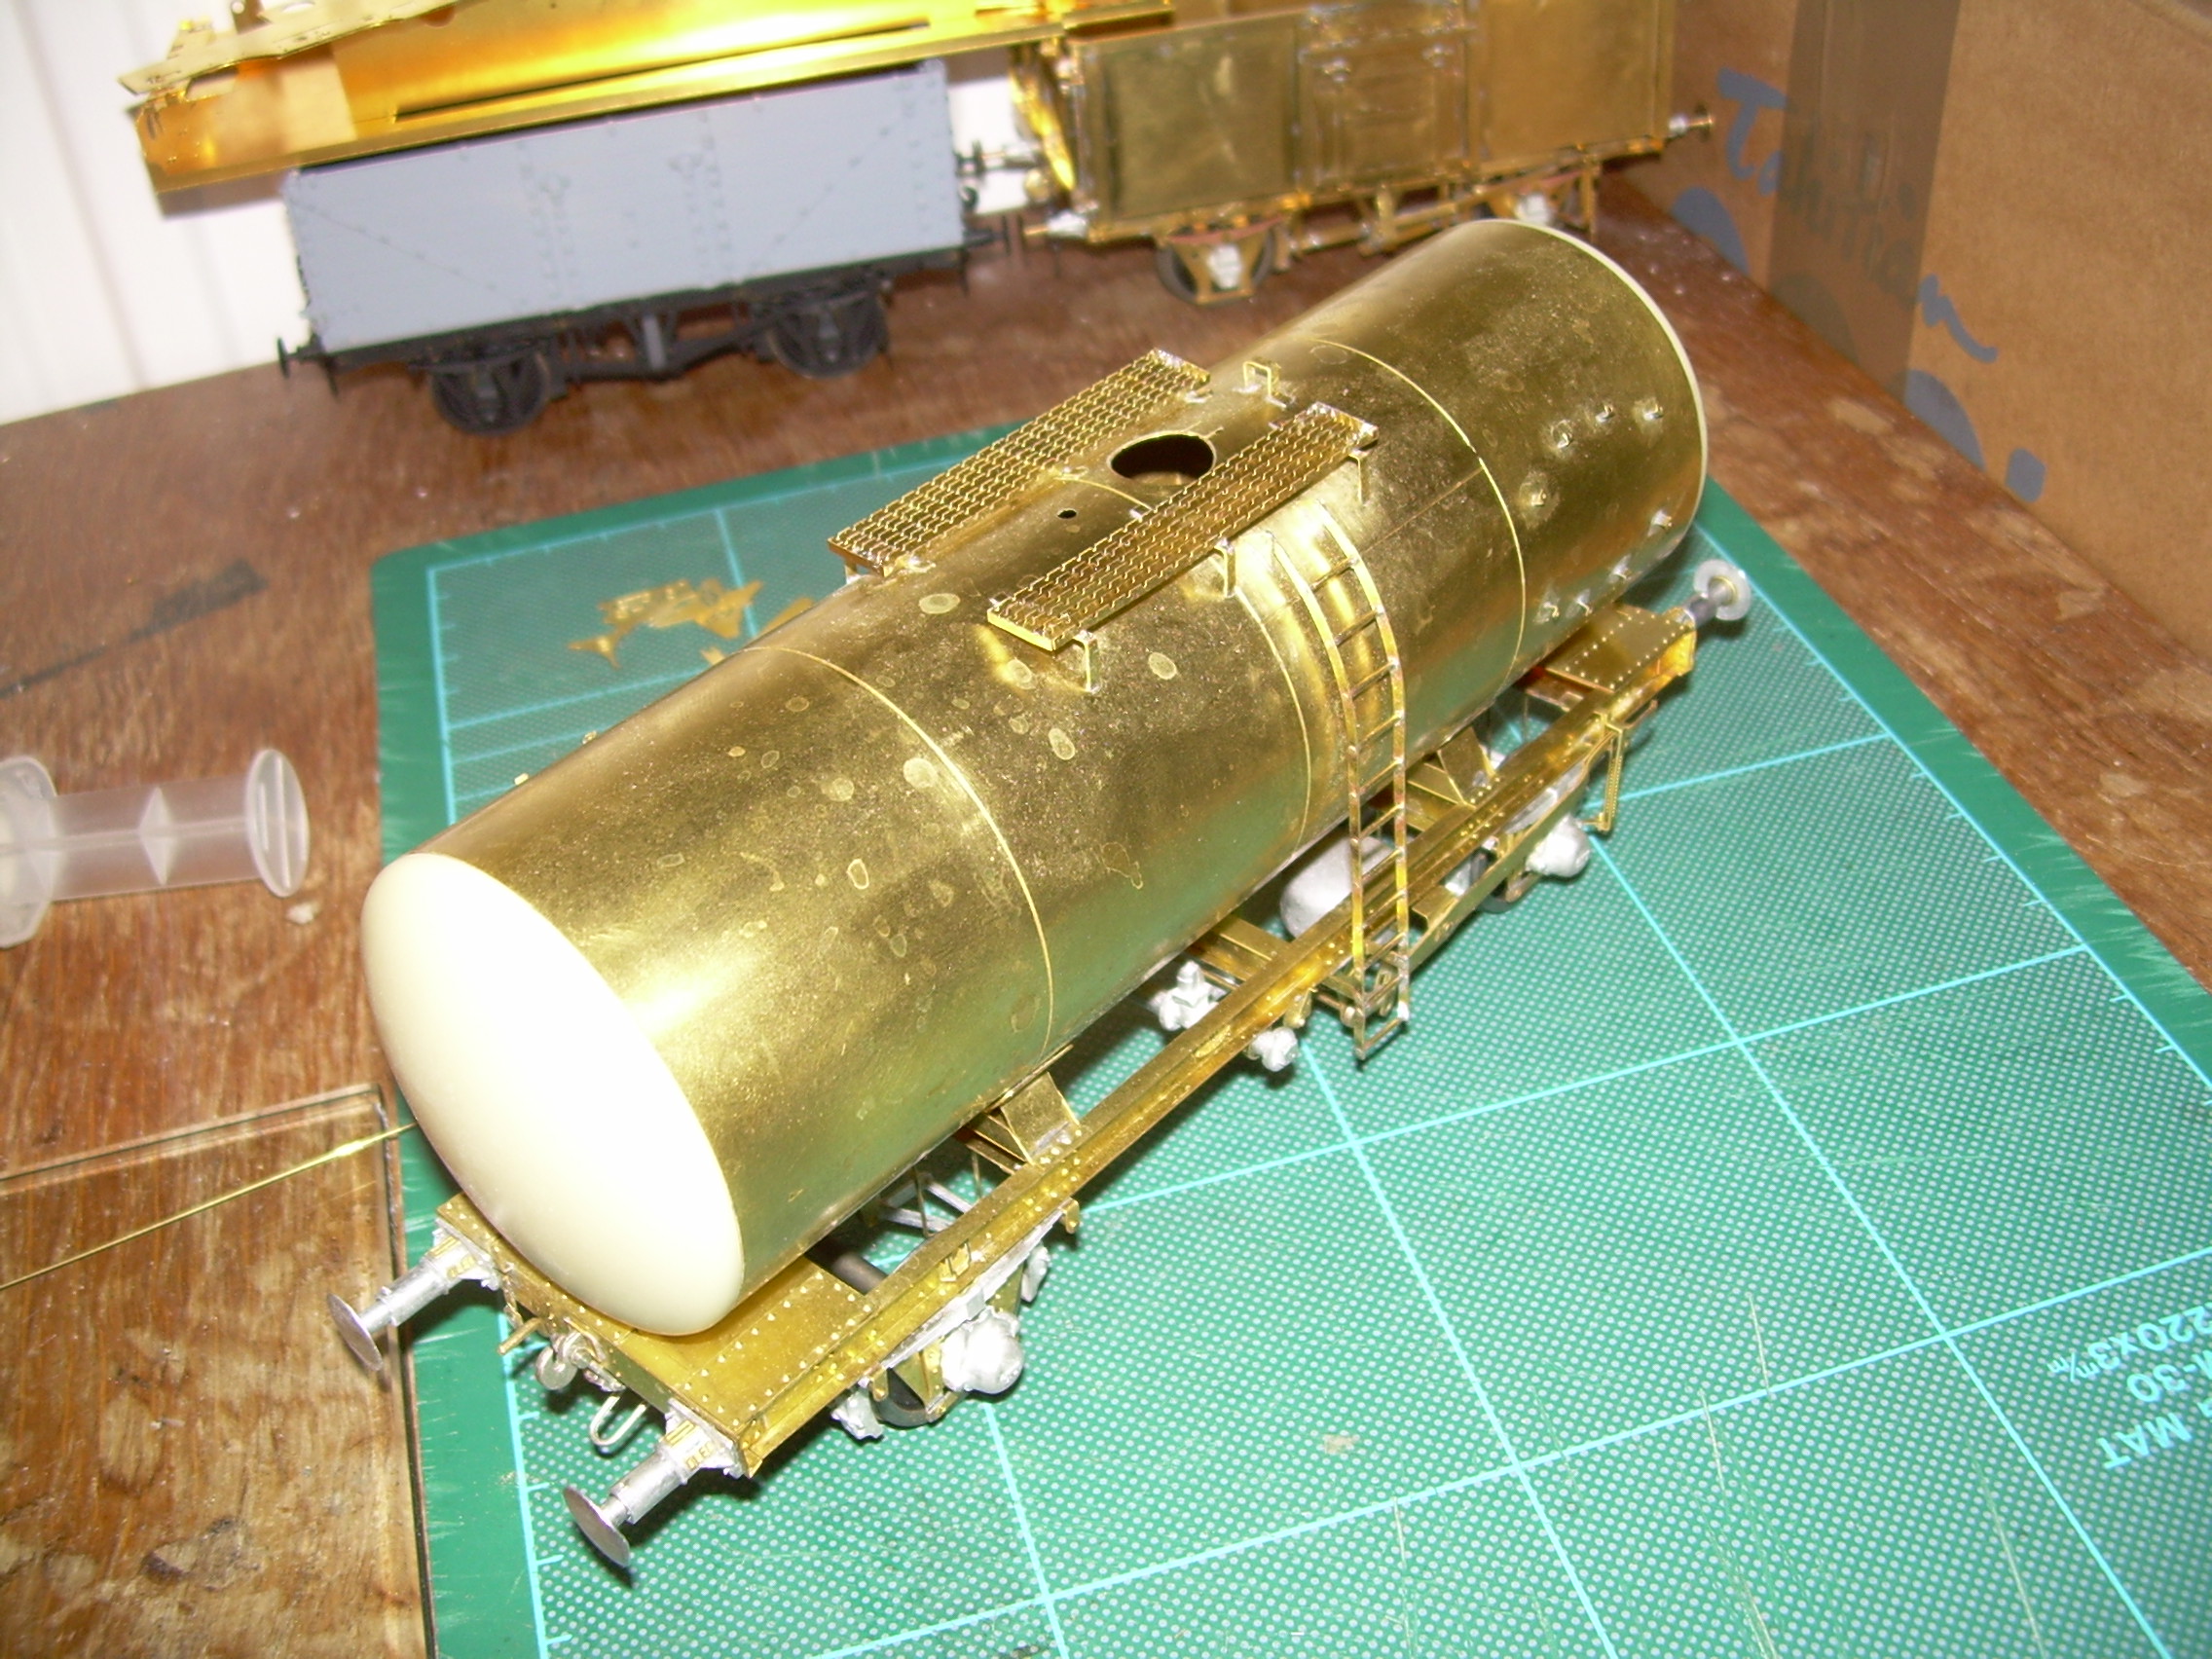
Just about finished. I have added the filler, discharge valve and grating rungs. Couplings have been changed to correct type and various vacuum hoses added underneath the chassis and to the buffer beams. Overhead electric flash warning panels added and I will fit the Esso plaques on the brackets but not until after painting.
I have found a supplier of very fine 40 links per inch chain to add to the discharge plugs (and to finish the 16 ton wagon) eyesight permitting.
In retrospect I would superglue the rungs to the gratings as the longitudinal bars warped slightly when soldering, even using low setting on the resistance iron with just a quick tap of the footswitch.
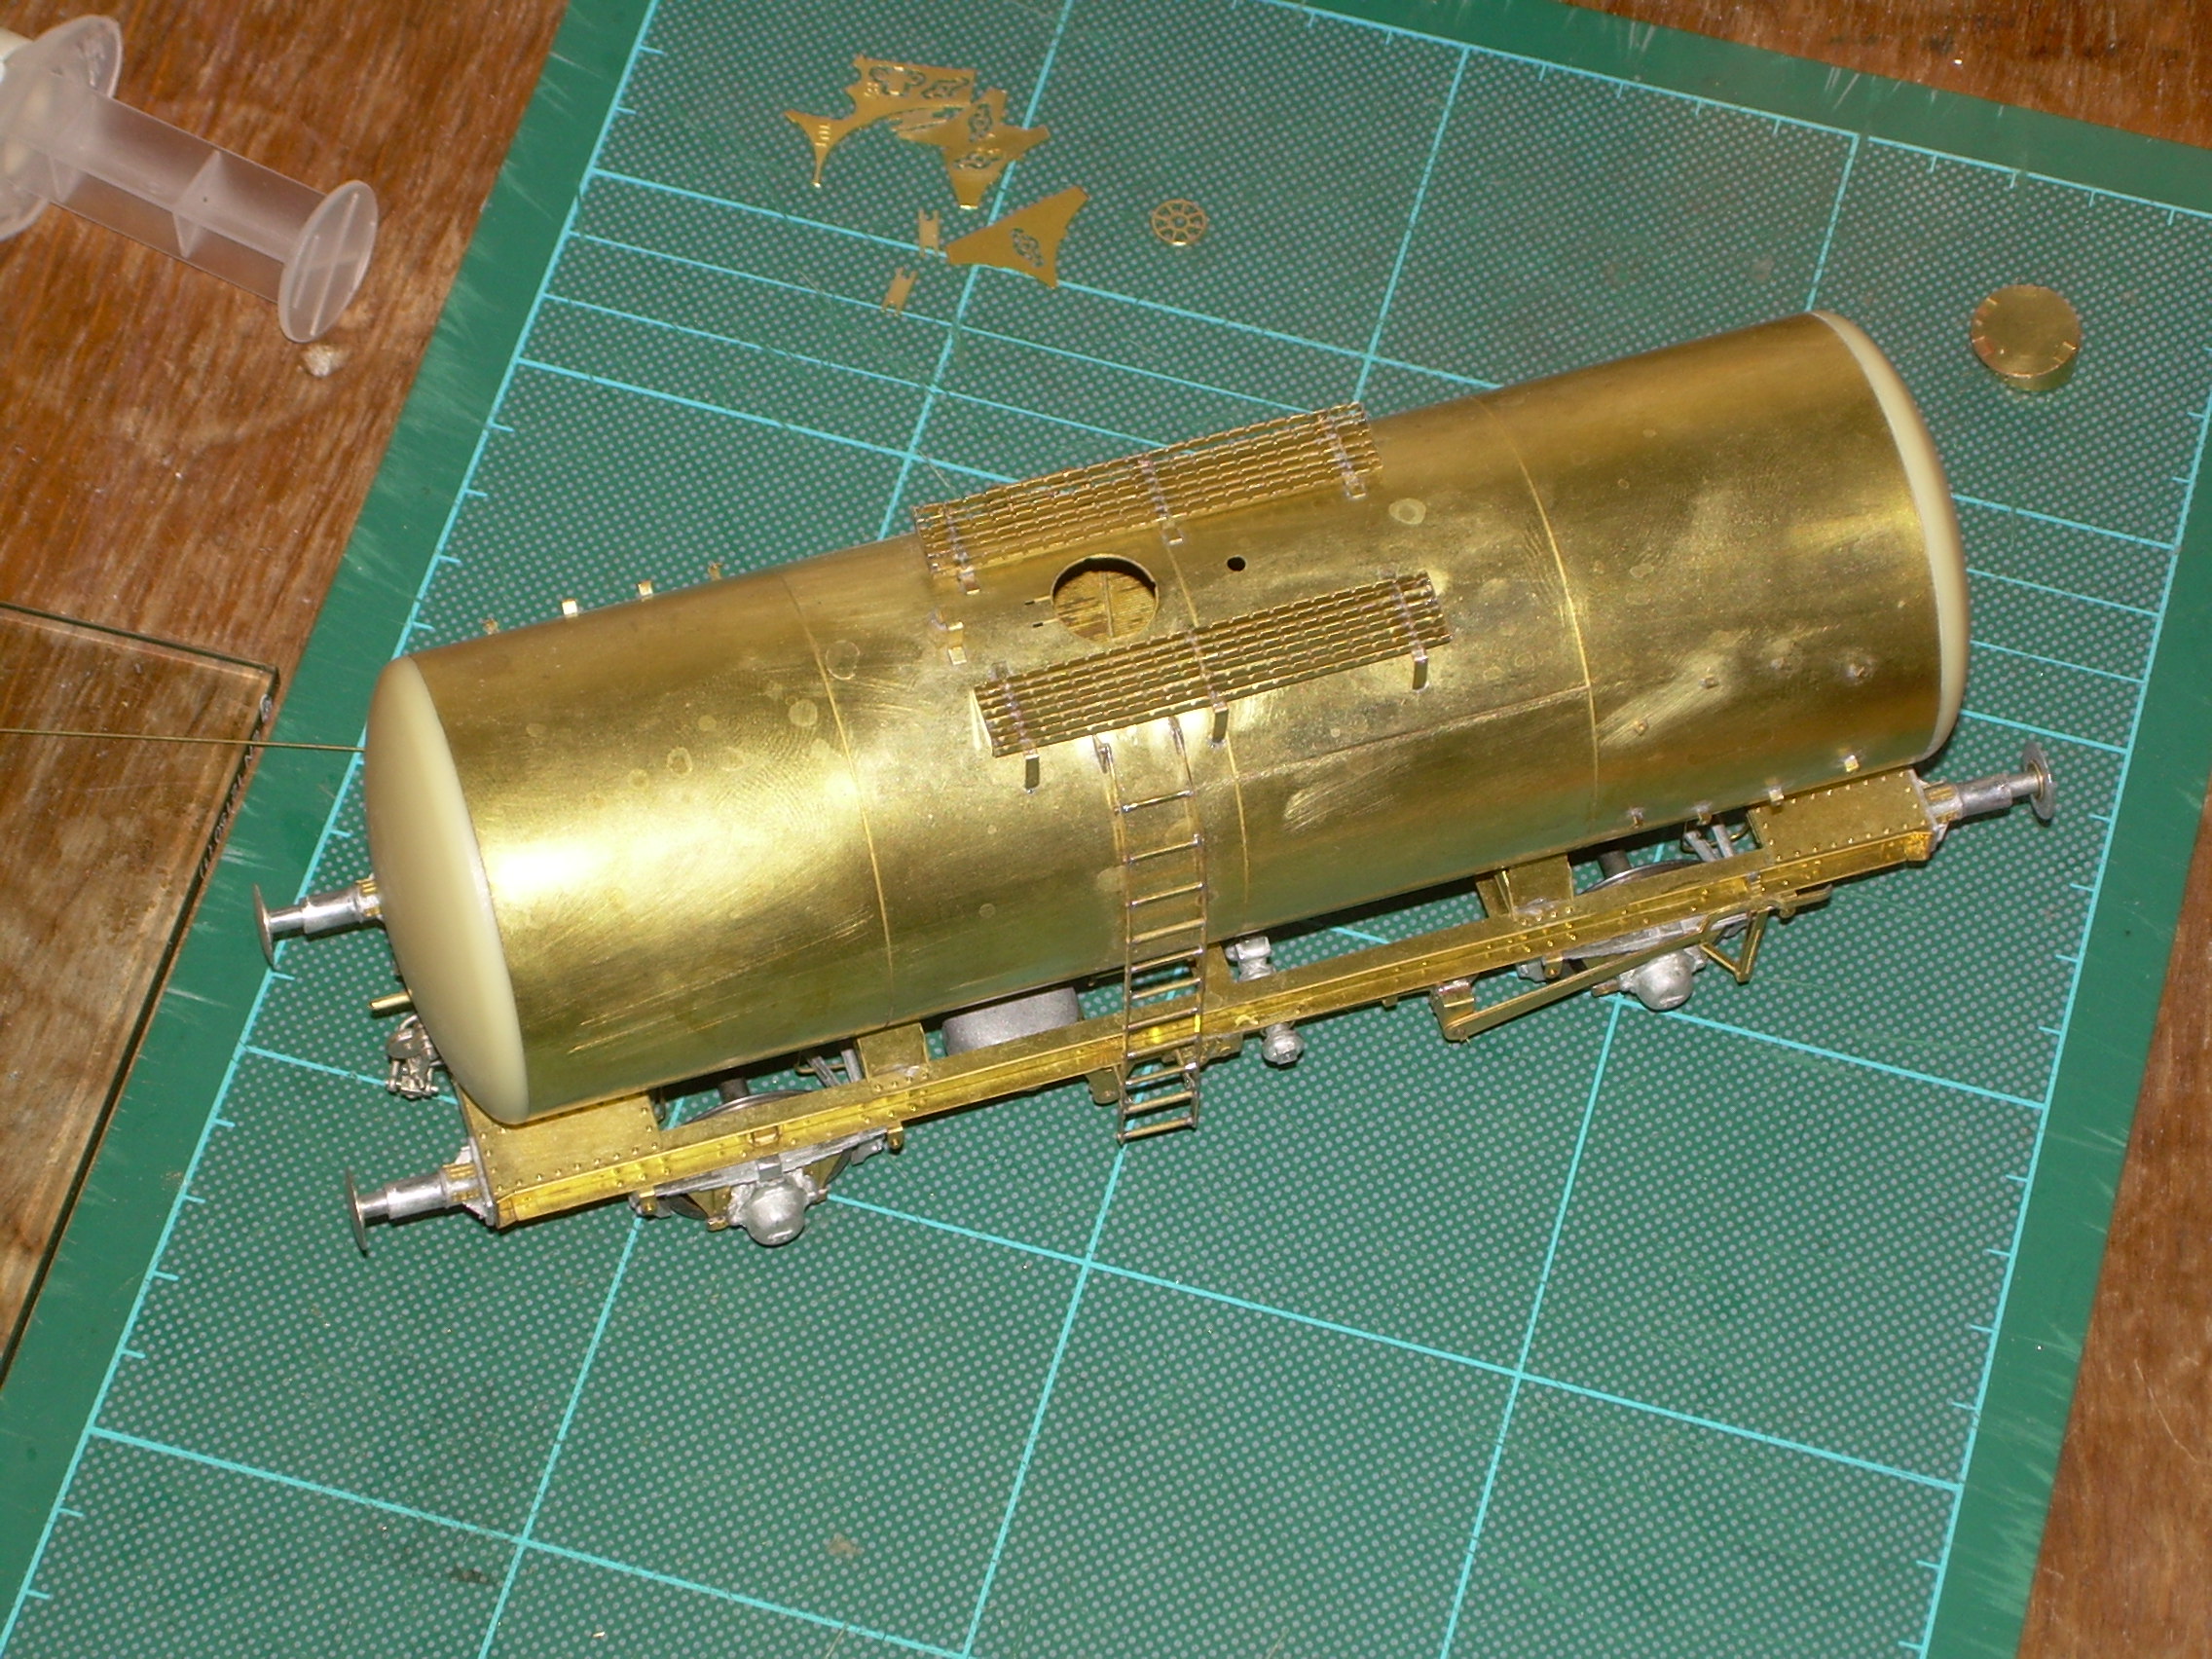
Painting won't take place for a while until I have finished my new house (my current day job) and installed workshop, probably around 9-12 months. I like the silver finish with red solebars but have yet to find a photo of one of these with bottom discharge.
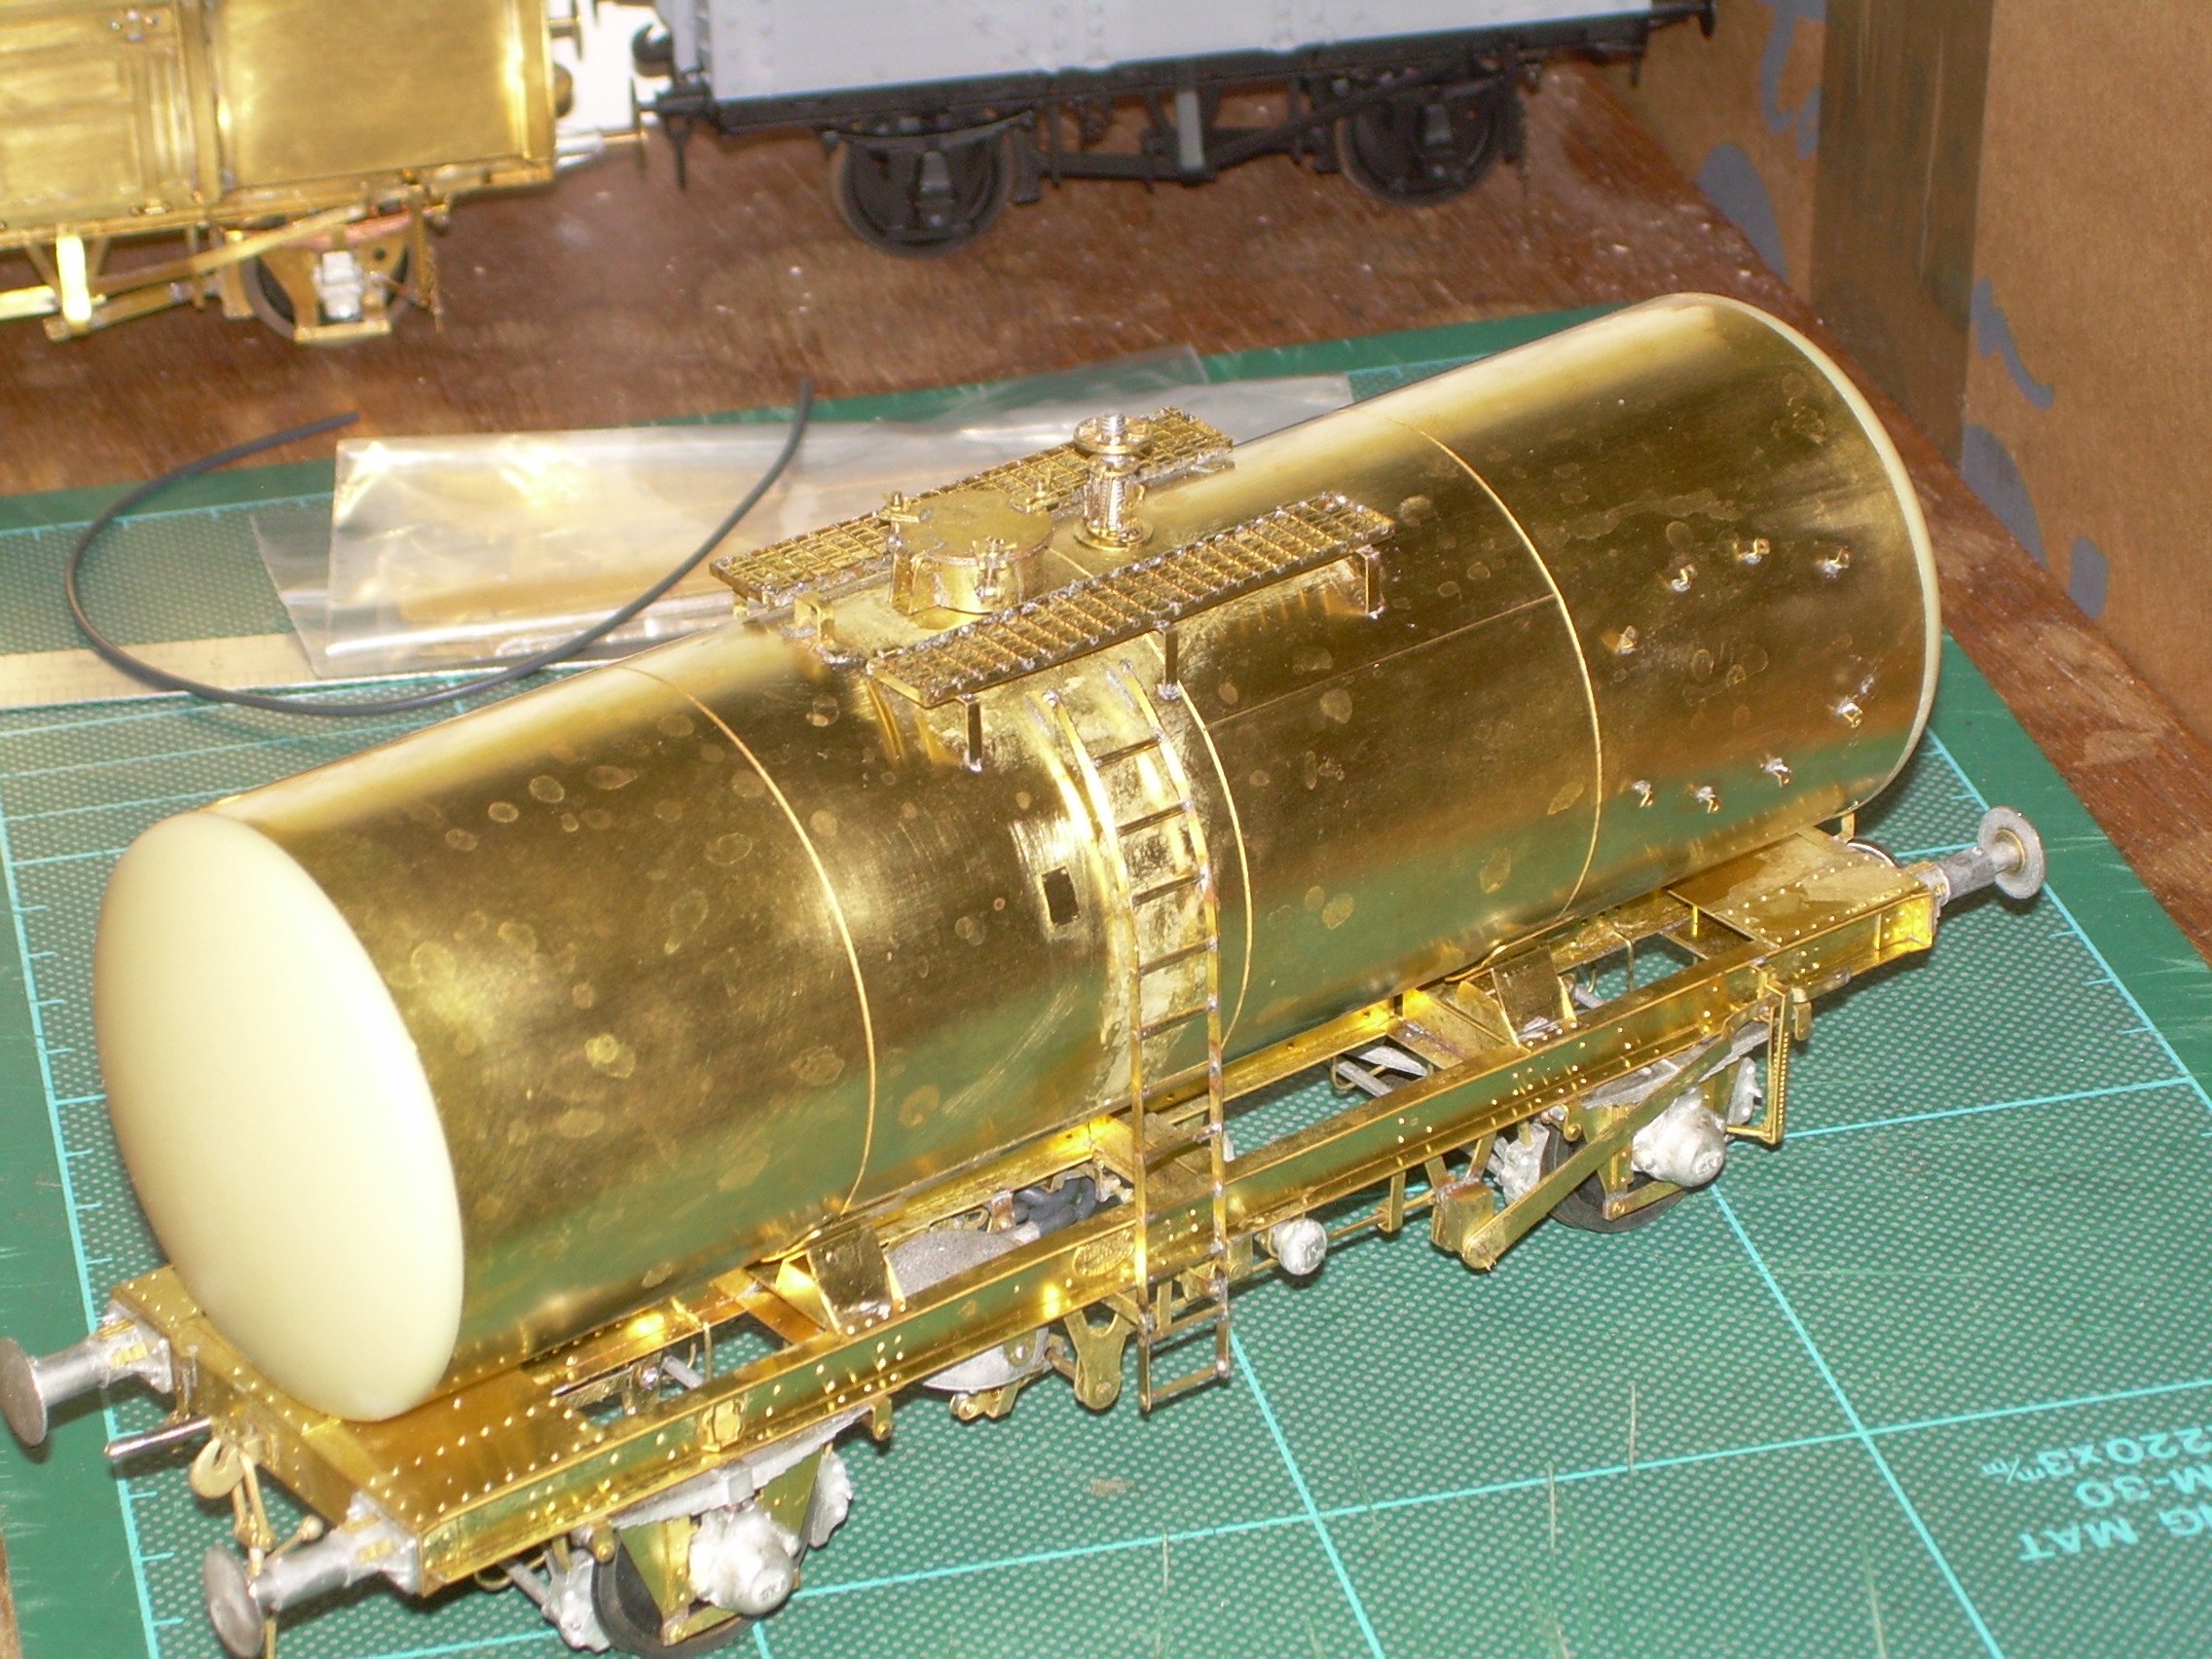
Just about finished. I have added the filler, discharge valve and grating rungs. Couplings have been changed to correct type and various vacuum hoses added underneath the chassis and to the buffer beams. Overhead electric flash warning panels added and I will fit the Esso plaques on the brackets but not until after painting.
I have found a supplier of very fine 40 links per inch chain to add to the discharge plugs (and to finish the 16 ton wagon) eyesight permitting.
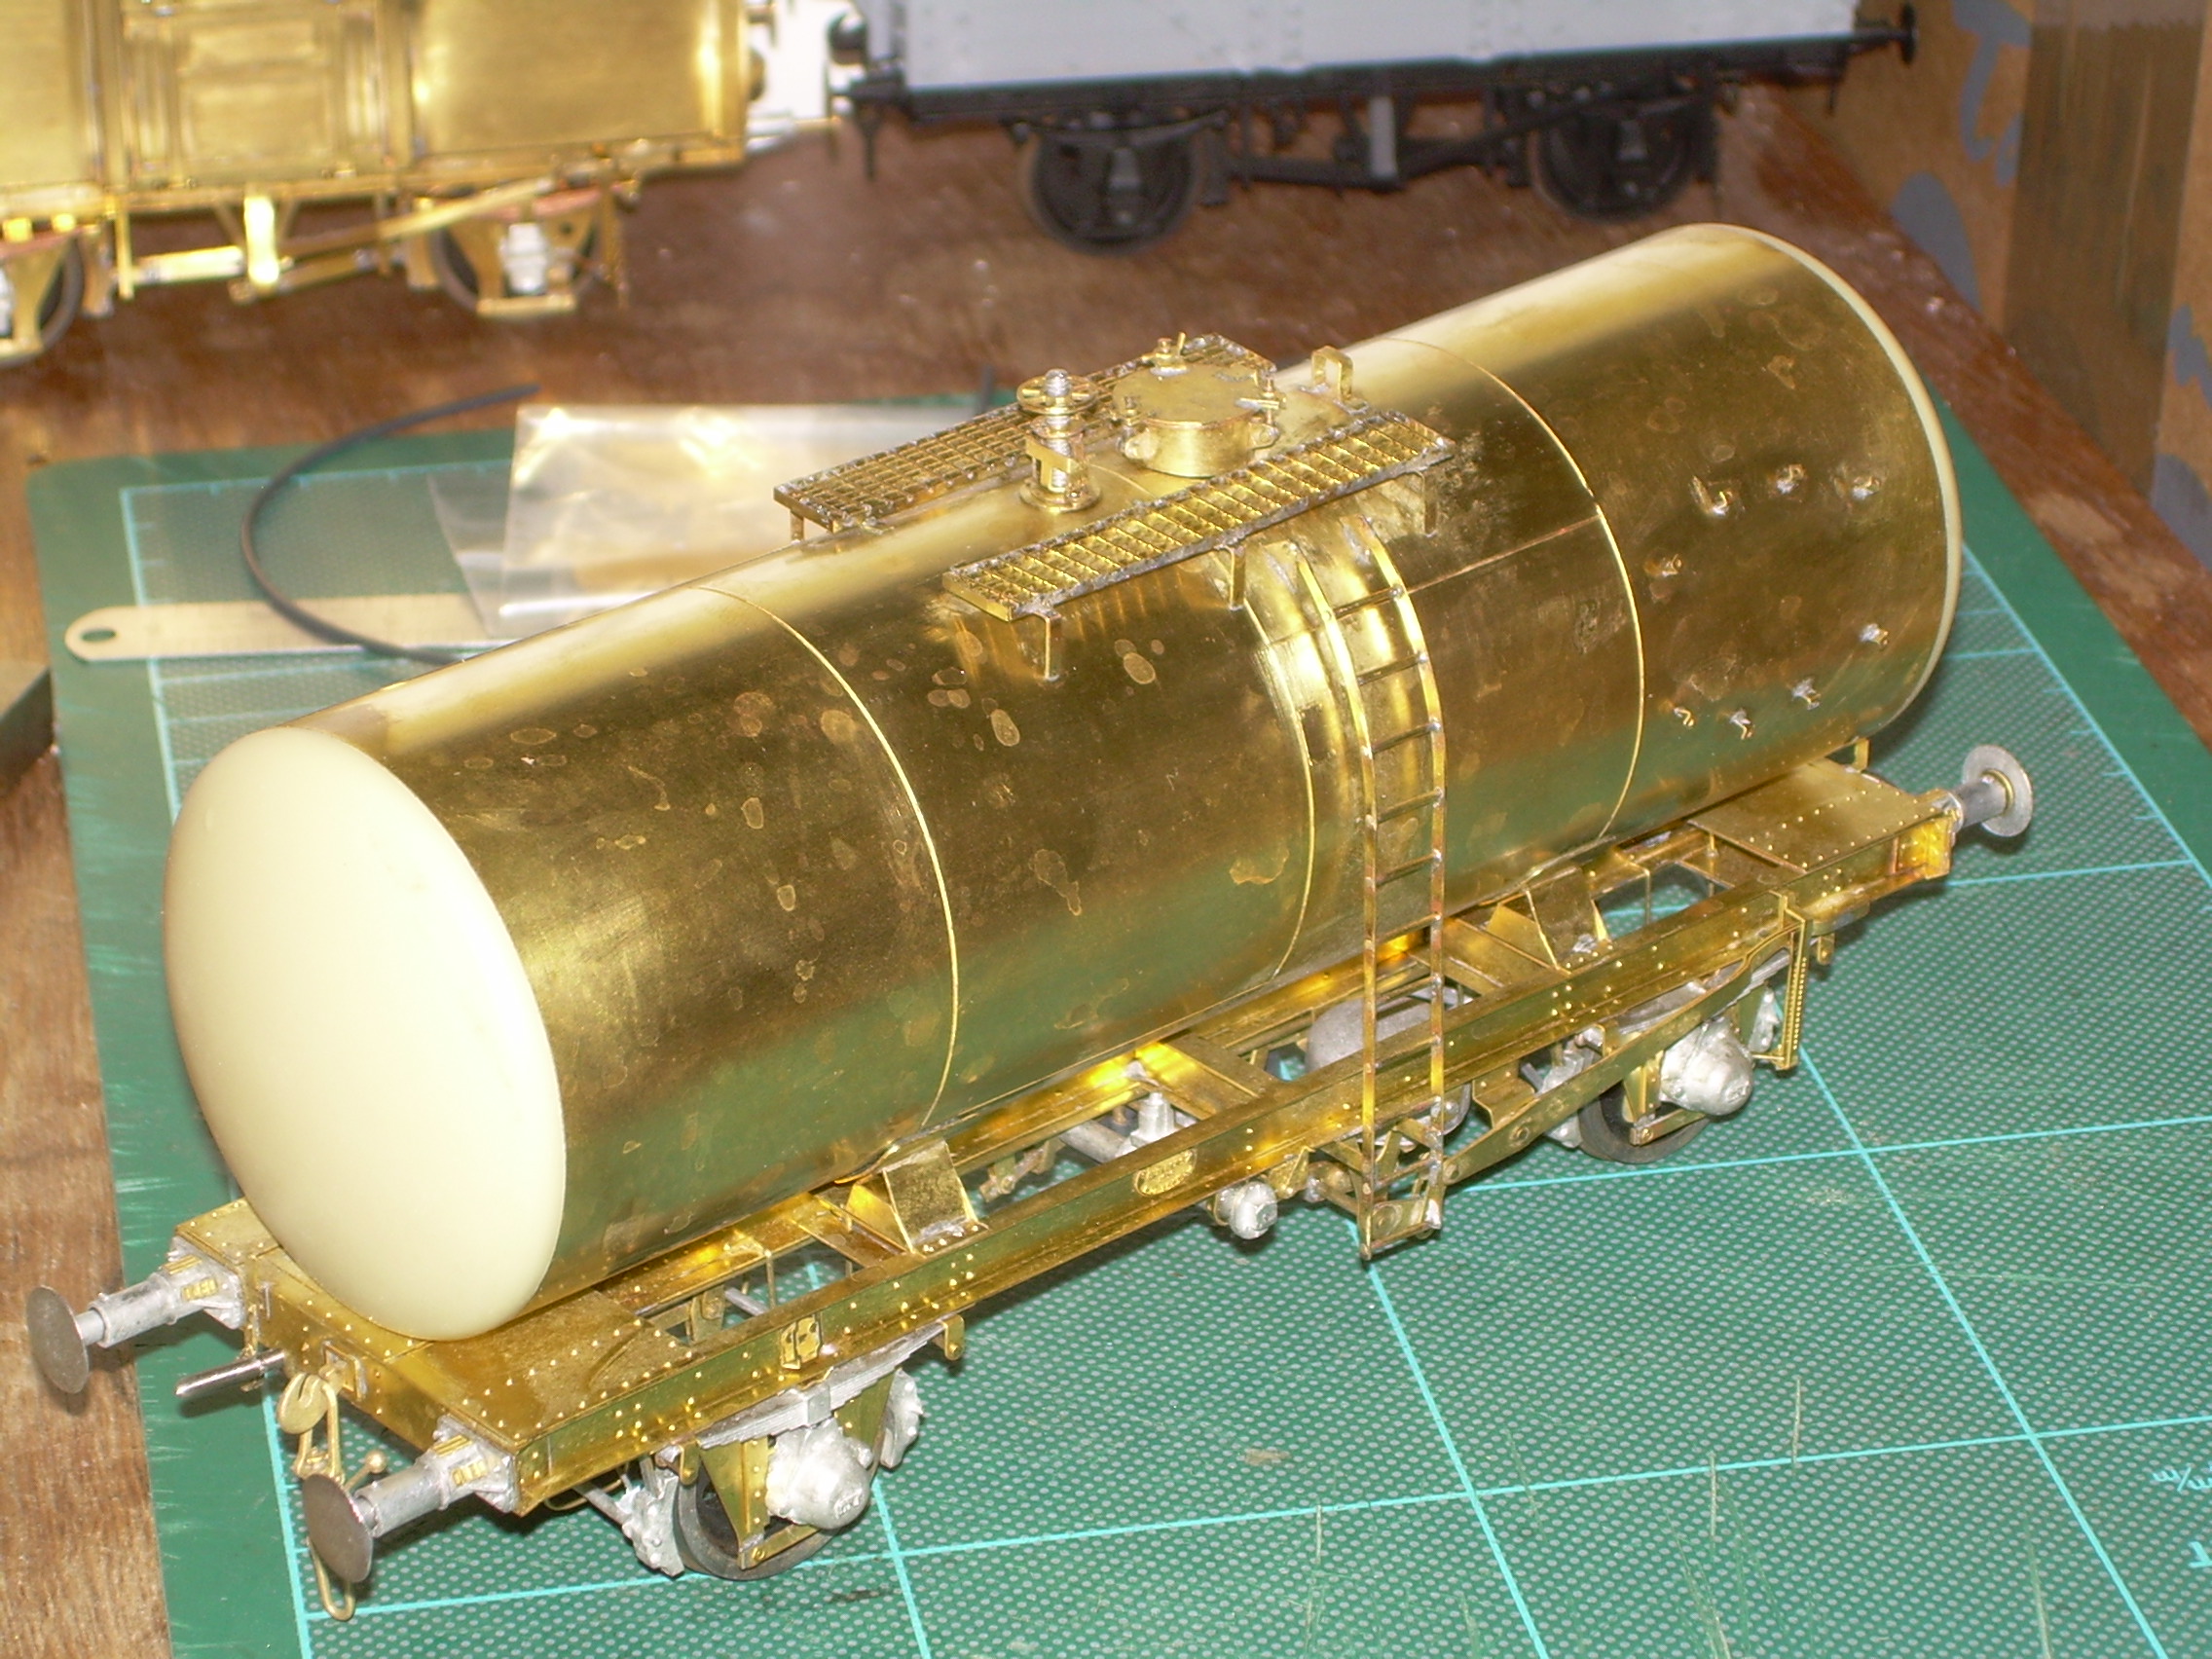
In retrospect I would superglue the rungs to the gratings as the longitudenal bars warped slightly when soldering, even using low setting on the resistance iron with just a quick tap of the footswitch.
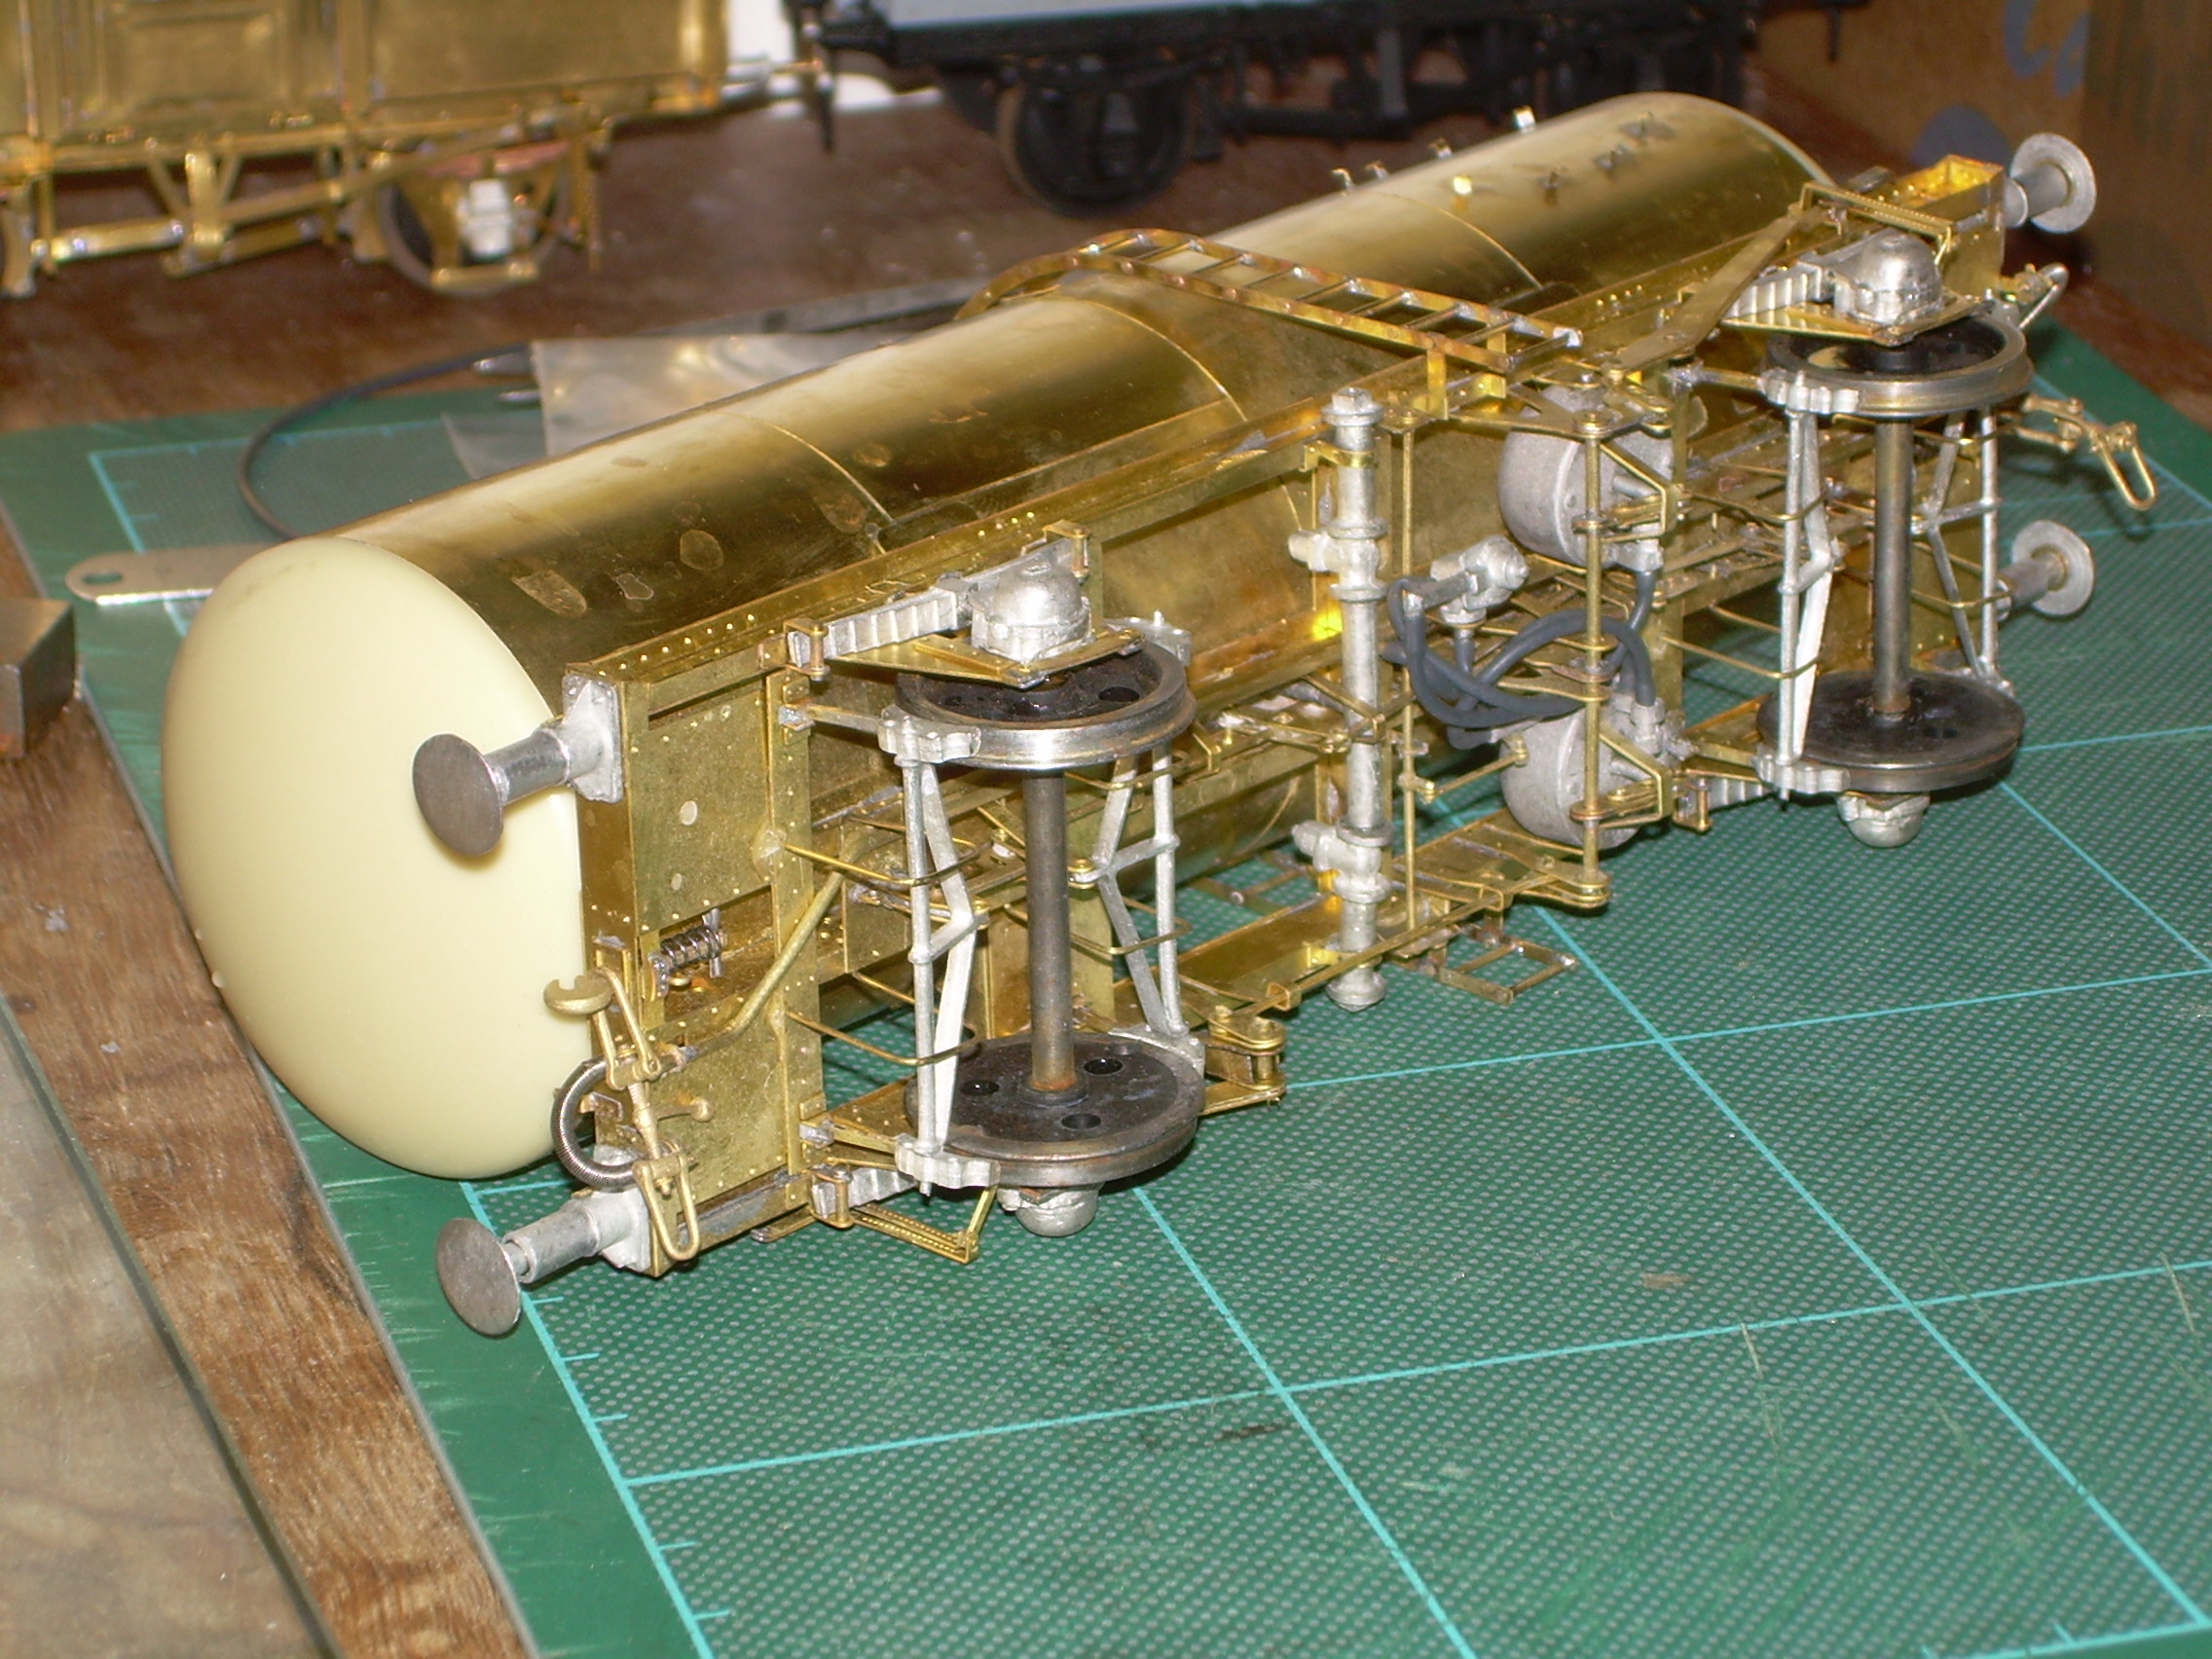
Painting won't take place for a while until I have finished my new house (my current day job) and installed workshop, probably around 9-12 months. I like the silver finish with red solebars but have yet to find a photo of one of these with bottom discharge.
Hi Ken. Lovely build there. Did the grey pipes in your last picture come with the kit or did you purchase them elsewhere?
They are indeed provided in the kit & also other MMP vacuum braked kits. They are also available in the "wagon coupling & vacuum pipe set" from MMP.
Looking at it I would have thought it was guitar string, but on closer inspection I am not sure. For your Info they are 19.85mm long & 1.65mm diameter (don't ask how many coils!, too many to count)
As said, a generous length of tube is provided. It is quite soft and, although the inner bore looks very small, slides over the pips on the castings quite easily.
I have weighted the wagon so it sits with the springs about 75% compressed.
Whoops, I was looking at the vacuum brake pipes, rather than the underfloor piping.
I have finally fitted the last two bits, the small chains that connect the discharge screw caps to the chassis. I am priming it at the moment and will post a photo when done.
Does anyone out there know whether any of these A-class wagons were painted all black around 1960-64? The silver body and black chassis with red solebars which I had originally hoped for would be very difficult to apply although, I hope, not impossible.
No, not black - probably pale grey in place of silver if that makes it any easier. Careful masking seems unavoidable. Might brush paint the underframe be easier?
If it can't be black then that is how I was thinking about tackling it. Spray the whole thing silver/grey then brush paint the chassis black and solebars red.
In connection to liveries; according to R. Tourret's book Petroleum Rail Tank Wagons of Britain class B tank cars (oil/diesel) were black and class A tank cars (petroleum/aviation fuel) were originally silver with red solebars as you have alluded to. Then they became light grey as suggested earlier. Class B tank cars remained black. Before WWII tank cars were usually in the oil company's liveries before black and silver became standard.
After a bit more online research it seem silver changed to light grey quite early on so grey it is. Also the top of the underframe was grey also, everything underneath that black apart from the red solebars,
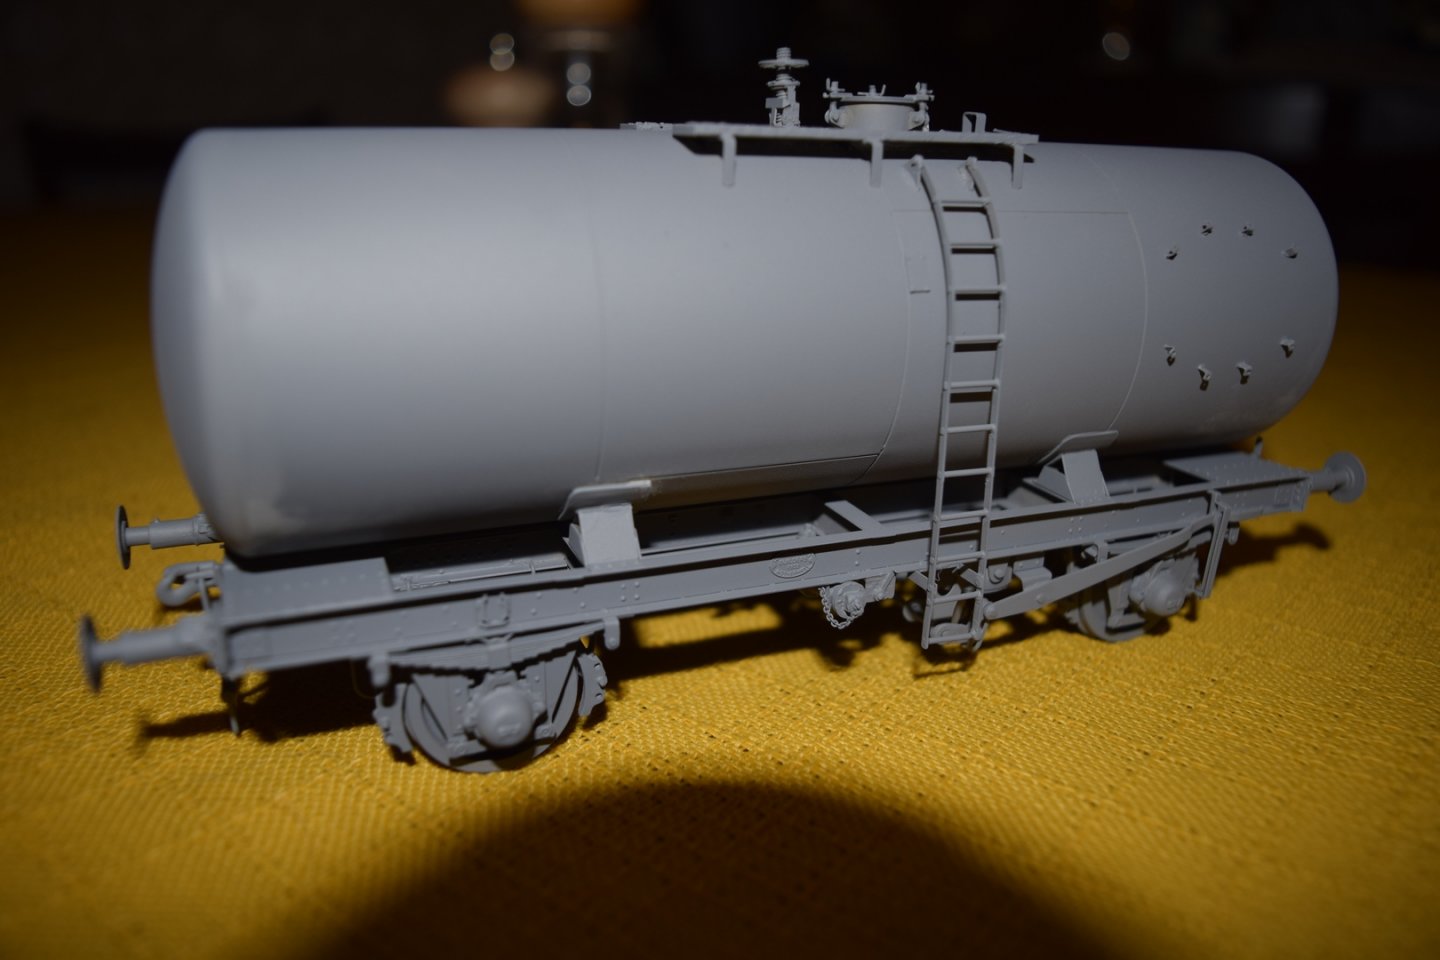
So here is the photograph I promised showing the discharge pipe cap chain. I don't know why I put off doing them for so long, they didn't take long to do.
The photo also highlights one of the problems with rolling etched metal. The horizontal etch is parallel with the rollers and so tends to bend in the etched line rather than the material next to it. I have already filed the metal adjacent to the upper lines and will have to do it here also.
If I make another I will paint it before attaching the tank to the body, make ladders in a suitable jig and attach them last.
Referring to earlier comments regarding wheel blackening I've noticed you've also painted the wheels as seen your photograph above.
As an experiment I would clean the tread and flange and blacken these leaving the face painted. Like you and everyone else I have blackened wheels with gun blue and noticed rusting. Now I clean the wheels as Heather has described to remove any grease and other foreign bodies before blackening. Once blackened I wipe them dry with a piece of kitchen towel. So far this has minimised rusting, unfortunately I can't say prevents as rust will occur given the right conditions. I also use silica gel sachets I have saved from various purchases in my stock boxes.
Incidentally the Protocraft wheels I use for my US P48 stock come ready blackened and have a wax coating which needs to be washed off before use. This I haven't done but will clean the wax from the treads. However, it has given me an idea to try and find a thin clear liquid wax to apply to wheel faces once blackened to seal them before painting and/or weathering.
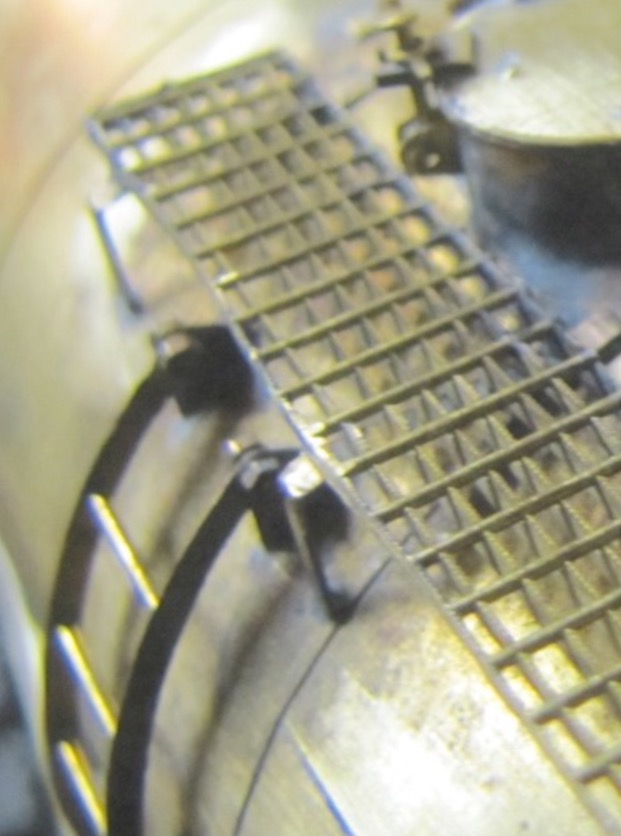
When I built mine, I secured the ladders with (if memory serves) 14ba nuts and bolts and made the ladders removable. Once painted/weathered I secured the bolts with a tiny dot of superglue.
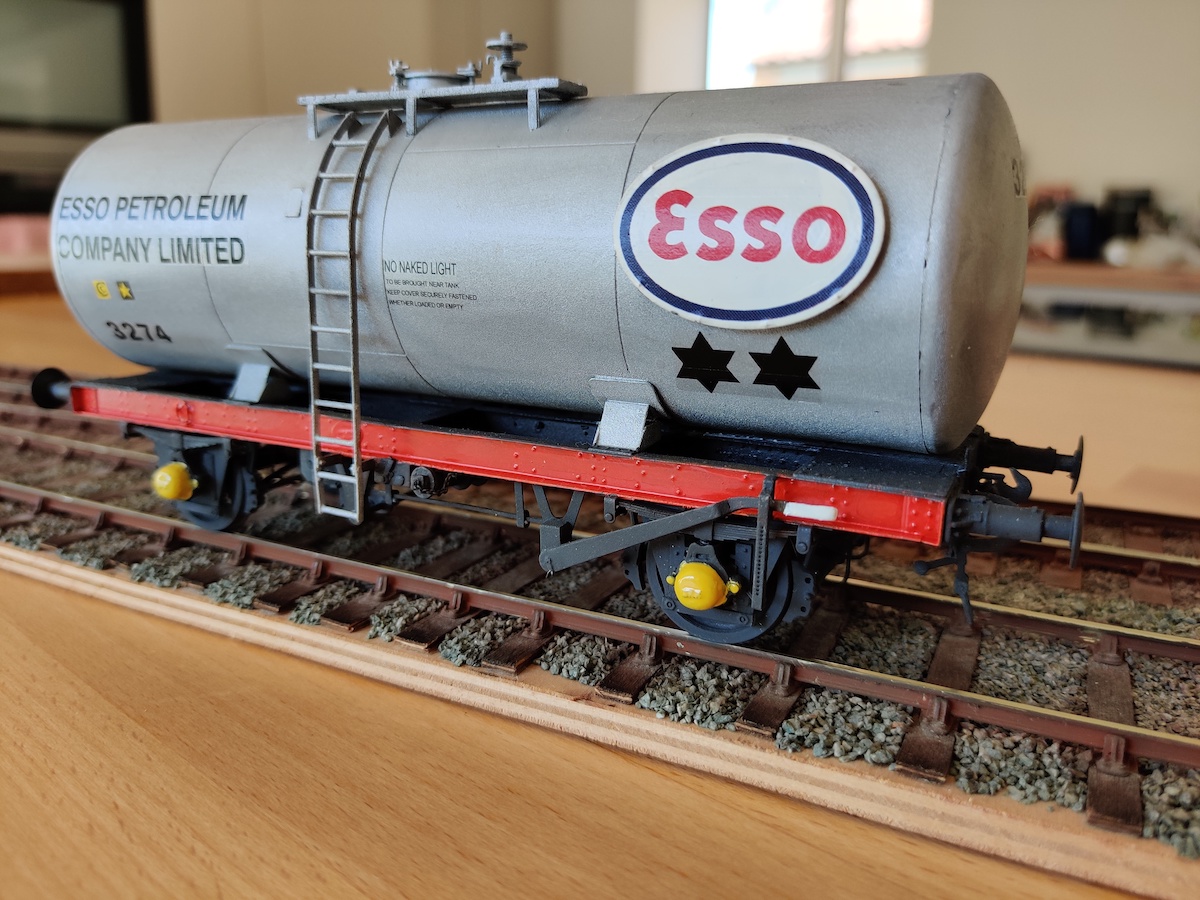
A couple of bits of paint need touching up and then it will be weathered.
Tanat Valley 3 by Peter Drost

John Borkowski converts Accurascale hopper wagons to S7

The Story of Reeth by Simon Caygill
For further information on the ScaleSeven Group, or if you have any questions: