

Tanat Valley 3 by Peter Drost
I first came across PHFmodels (or 3Dprintolutions, as they were called then) in September 2024. They were advertising some early south Wales coal wagons in 4 mm scale on eBay. Well, this would’ve been right up my street a few years ago, but I now work in 7mm so I asked if they’d be willing to produce them in the senior scale as well. They followed an exchange of photos and drawings of suitable wagons and then a number of trial prints, and cycles of improvements, both in 4mm and 7mm scale. Therefore, I feel I ought to declare an interest. Although I bought the kit with my own hard-earned; it wasn’t a freebie for review, I nevertheless have an emotional interest in the success of this venture but will make this as honest as I can.
The range of wagons that PHFmodels make mainly covers wagons built in the last three decades of the 19th century but some of them would certainly have survived until after the first world war and the steel-framed ones until well after the grouping.
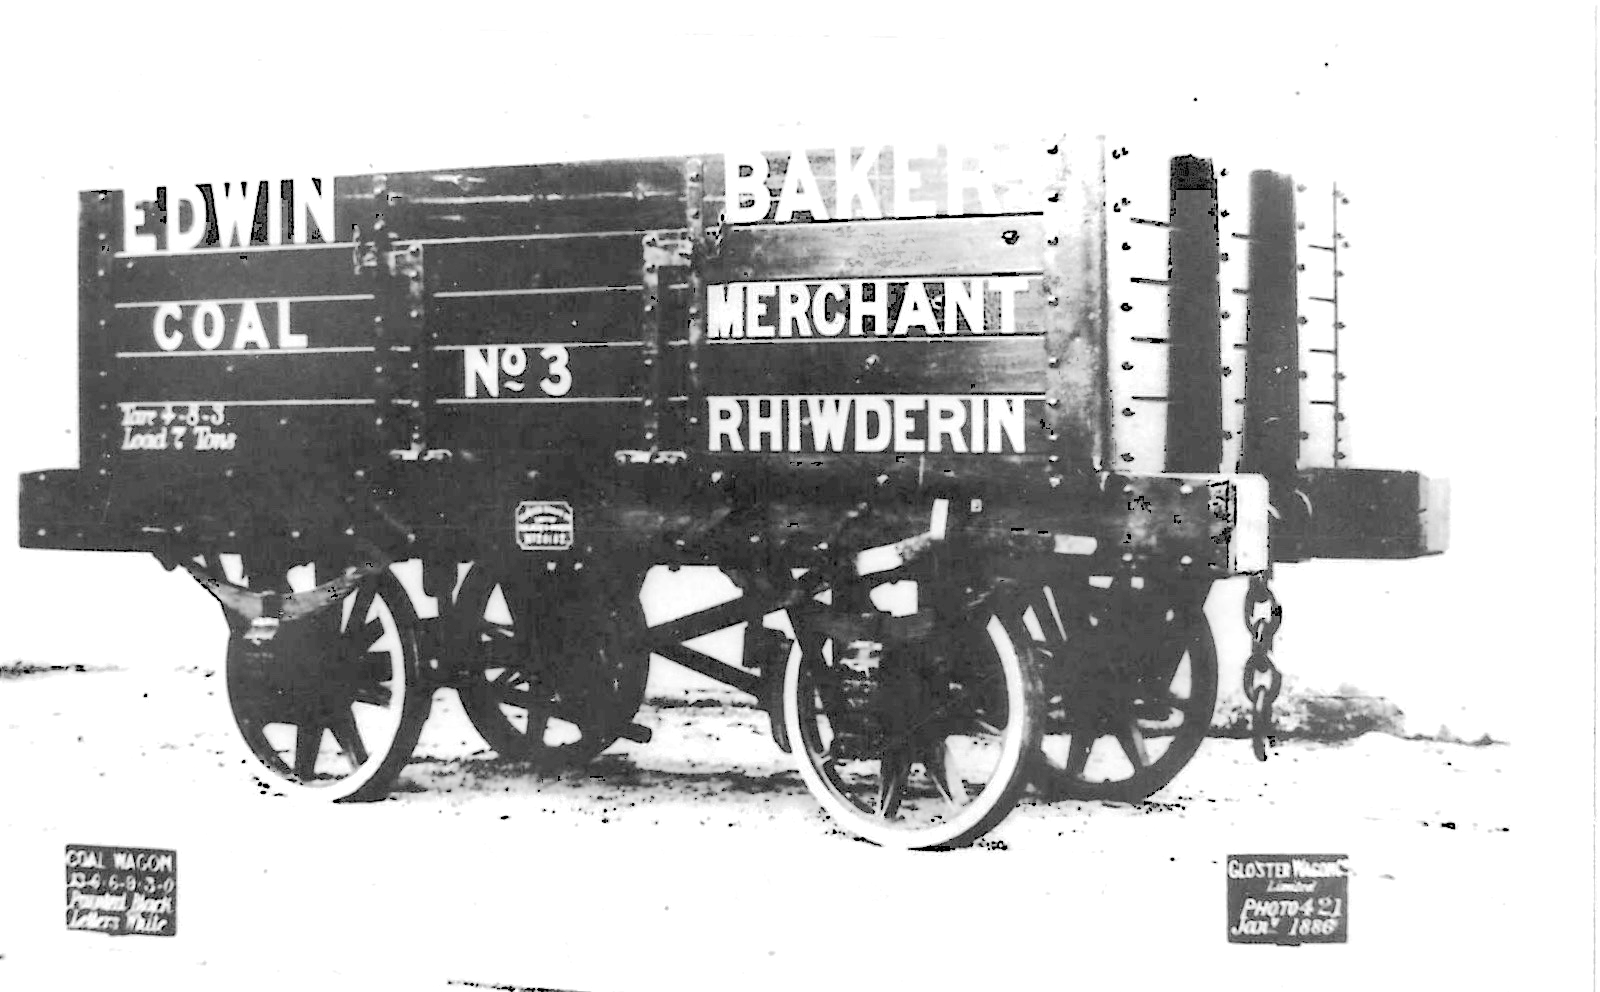
The wagon that I’m looking at now Is a Gloucester R.C.&W.Co dumb-buffered five-plank wagon of the type that was widely seen in southern England and Wales. The particular example I have chosen was an Edwin Baker wagon of Rhiwderin, which is a couple of miles from where I grew up. The village was served by the Brecon and Merthyr Railway, which is a definite double-plus-good point in my eyes.
In my discussions with Andrew Smith of PHFmodels, I explained to him that I normally either spring or compensate my wagons partly because I prefer the way sprung wagons move along the track and to give scale flanges a chance with my track building, Thus I was expecting to use products from say Slater’s, Prickly Pear or Ambis to provide the suspension.
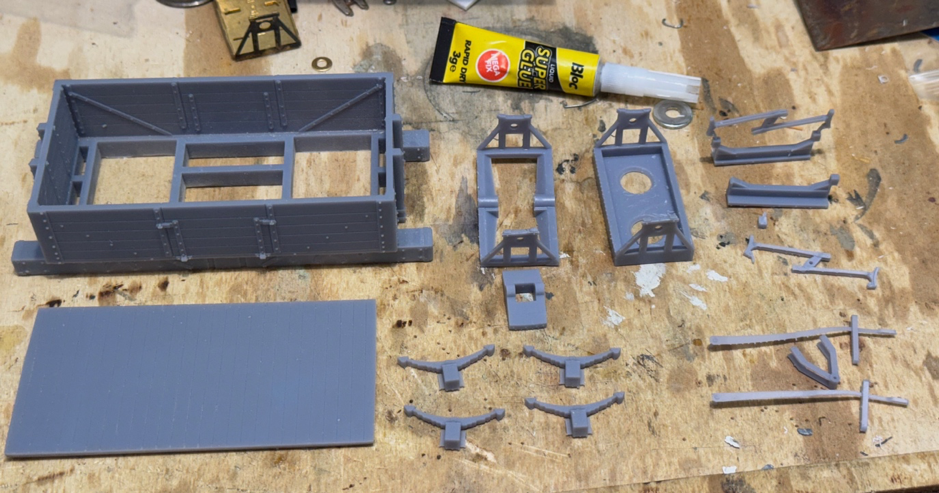
On opening the cardboard box that the kit was sent in, this is what I found.
A kit specifically designed for ScaleSeven, but equally suitable for various versions of 0-gauge finescale.
The floor and rocking W-irons are recent additions to the PHFmodels repertoire, and this means that you buy a complete, shake-the-box kit with all components provided apart from wheels, which makes sense, because I know that not everybody works to ScaleSeven, bearings and couplings. Thus, without any modifications. one can own a compensated wagon in around an hour.
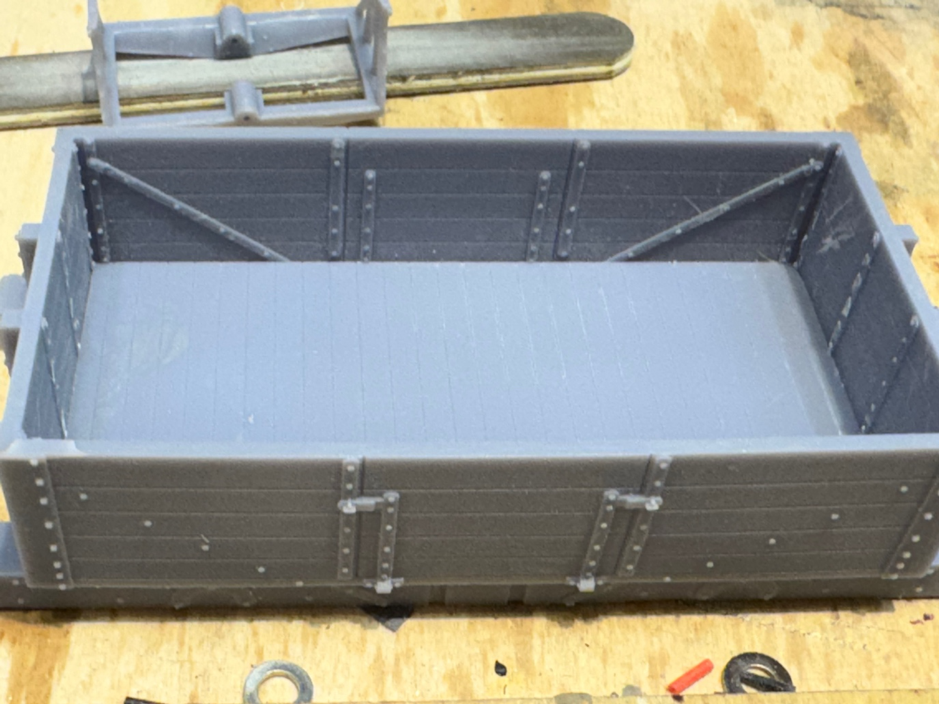
The floor did receive a little filing, or, better for 3D-prints, emery board, to get a good fit.
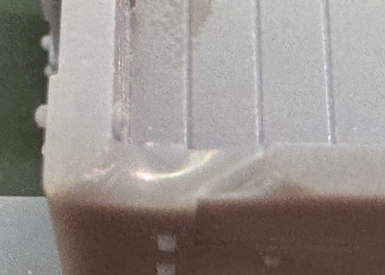
Looking at the prints one can immediately see a few faults: one of the brake rod assemblies broke in transit and a little nick was found on the top plank near one end. The broken brake rod assembly is a trivial matter as my prototype (and probably most other similar dumb-buffered wagons too) had brakes acting on two wheels, not four.
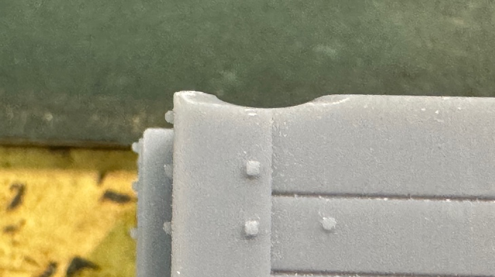
The nick in the top plank could pass for damage incurred in traffic, so I declined the offer of a replacement.
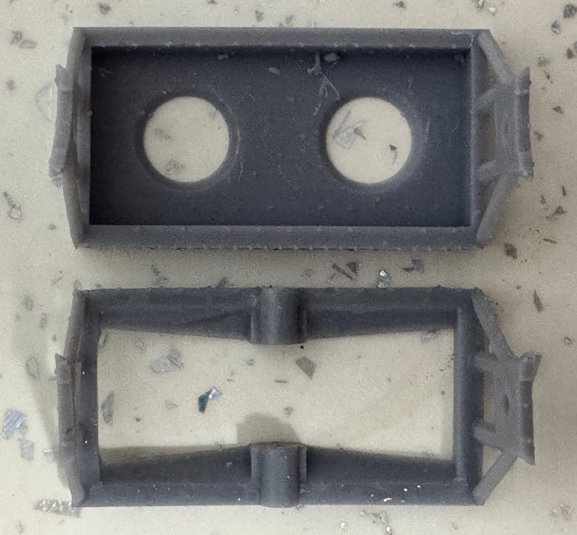
The W-irons did need a few moments in hot water to soften them sufficiently to remove the warp. Don’t be scared, even heavy-handed me didn’t wreck them!
The W-irons had to be reamed out slightly to accept the bearings (and that’s OK, oversize holes are a pain).
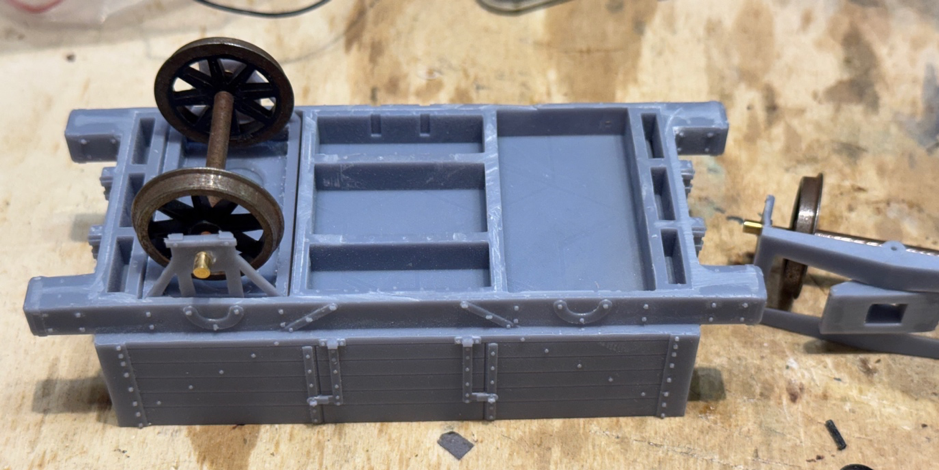
The W-irons slipped in well, gaps sufficient to allow the (other) W-iron to rock but tight enough to get the W-iron units parallel.
Note these are placeholder 0-gauge wheels, for use during assembly, these will be swapped for Scale7 wheels later.
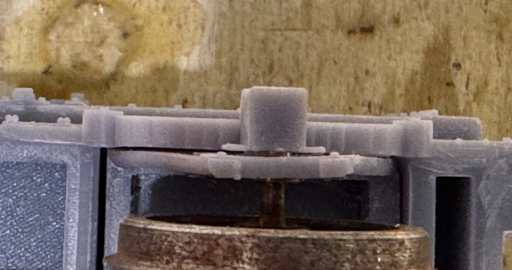
You can see here that the bearing spring shoes are proud of the solebar, they should, of course, lie directly under the solebar.
This is area where I think the compromise chosen isn’t necessarily the best one. It looks as if Andrew has reduced the thickness of the solebar to allow W-irons to rock. Perhaps if the width of W-iron units could be reduced slightly, the bearing spring shoes could sit properly under the solebar.
I placed two 5BA washers on the axle outside each wheel to reduce slop and keep the wagon straight, so there may well be space available.
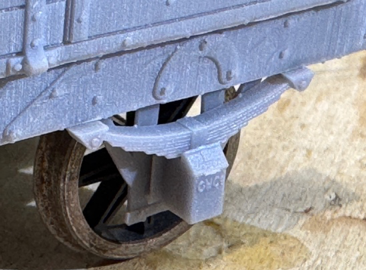
I could have reduced the thickness of the spring, but I think it would have looked too wimpy, and I would have lost the flanges on the inside of the axleboxes. Yer pays yer money…
In order to allow the pivoting end to, well, pivot, I cut the spring from the axlebox on that end and glued the spring to the solebar and the axlebox onto the Slater’s bearing, careful not to flood the kit with cyanoacrylate.
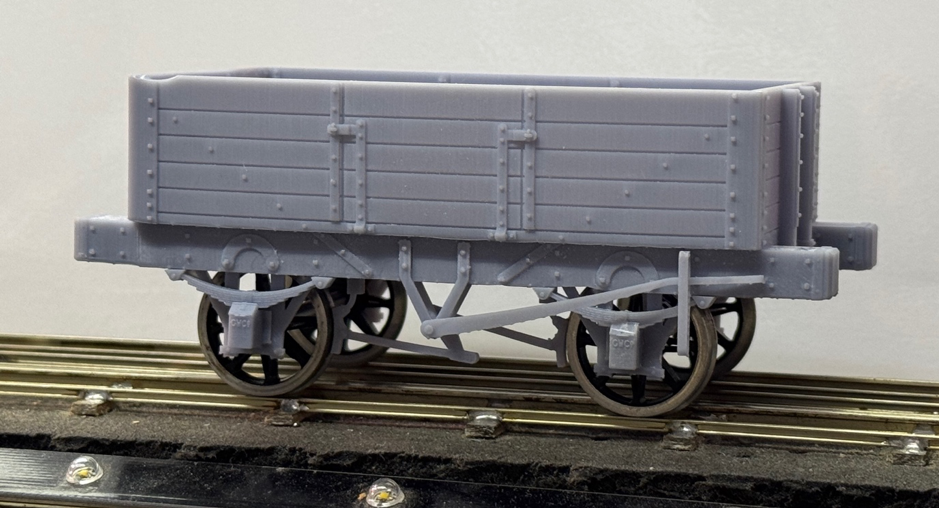
The wagon as it is now. There are a couple of things I need to sort out apart from decoration – a short piece of wire to join the lever to the brake rocker and thin down the brake blocks slightly so that they aren’t permanently on. I’d rather remove material here than have the huge gaps you see on some kits.
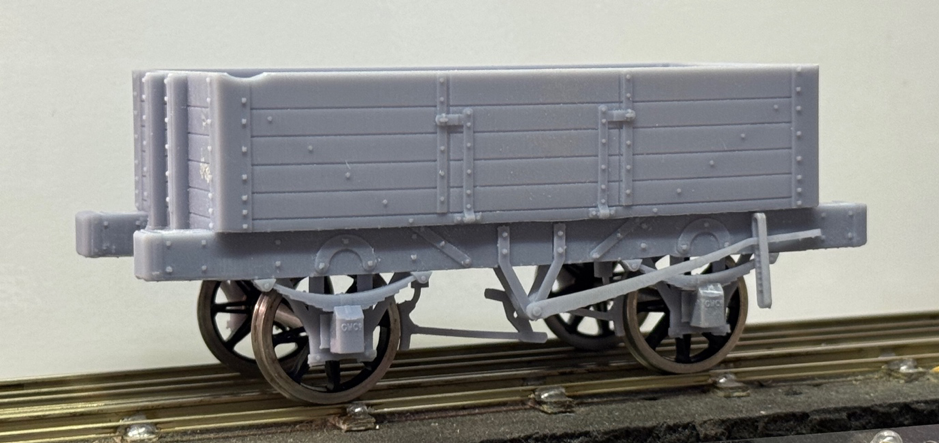
Looking afresh at the wagon the mislocated bearing spring shoes don’t look so bad! Neither do I think that the gap between the axlebox and the springs, is too awful. Some people decline to use various types of flexible suspension because of this perceived problem.
I’m posting this without Andrew having seen the text – he bravely declined my offer to show him first.
And, yes, it took me a lot longer to write this than assemble the kit.
These kits, and others, are currently (March'25) available via PHFmodels eBay webshop. PHFmodels
Andrew Smith the PHFmodels proprietor replied to Rod's comments on the build.
Many thanks for that review Rod.
While I have to acknowledge responsibility for the design of the wagon I offer the thought that I have always worked in 2mm and had never as much as held a 7mm model until Rod's prod to have a go at some of the very short wheelbase stock used on early Welsh railways. The approach being employed across a small range of the more modern stock is based on guesswork and ideas culled from others. By modern I mean, of course, 1880 to 1900.
It is gratifying that it went together pretty much as intended - more down to Rod's patience than integrity of design.
A few thoughts from me in no particular order:
W-irons All designwork was initially predicated on builders using etched W irons so I wasn't sure about the rocking W iron idea and dimensions used were juggled from some sketches Rod had sent of etched examples versus what I considered acceptable compromises for a working model. He had suggested they might work based on a preliminary sample so I included them in the kit. If it is practicable to reduce the width while still accommodating Slater's wheels then I'd happily take any guidance that the forum might offer re max width over outer edge. 7mm top hats look pretty long - how much distortion is required to bodge in the wheels? Will things break?
Brake gear I am wary of resin printing vulnerable parts hence most buyers will receive a few spares of the most likely culprits. What Rod thought was a set for 'the other side' was in fact a spare. Good thing too. Resin demands a chunky approach but rear faces are chamfered and look okay when painted. Obviously it would make sense to etch the brake gear but that invites an investment I am unlikely to make. Sales are negligible so print-on-demand is the way to go. Up-front spend on a stock of bespoke brass parts that may or may not be used doesn't make sense at this stage.
Breakage of parts Maybe there was a flaw in the printing that caused the brake gear to shatter in transit. Rod highlighted a chip on the wagon body but, ahem, the pic posted of the parts as received laid out on his work bench does suggest it arrived okay BUT was clearly vulnerable to breakage in handling. His second pic suggests an initial flaking and then the loss of the chip. I use an 'ABS-like resin' which is pretty good for 7mm but, as above, I'll take the advice of the forum if there is a consensus that a different resin would be preferable.
Axle boxes/springs. It is just about possible to model a grease axle box to scale in 7mm but wall thicknesses end up pretty thin if using commercial bearings. That invites print failures and frustration. As a consequence the box is overscale on width. These wagons were never intended to grace the pages of MRJ so I am okay with the bodge. Ideally they will whizz past in 100-wagon rakes where absolute fidelity to prototype detail won't be missed.
Shake-the-box-ability. I have made an awful lot of etched kits in 2mm (never get round to painting them though) and have always looked over the fence at 4mm and 7mm offerings - a lot of 2mm kits are shot down which reveals the additional detail possible in the senior scales. For wagons I am increasingly convinced that resin is the way ahead simply because the manufacturing process allows for simpler tools, fixing and painting. Had I designed this kit as an etch in 2mm it would have resulted in something requiring probably ten hours to assemble. In 7mm I suspect that time scale could be doubled??? Rod reckoned he completed the kit in under an hour. Of course if you want super detailed 7mm wagons then etching or scratchbuilding is essential. For 100-wagon rakes buy these. I cannot stress that point too much. Where is W. S. Norris when you need him?
Thanks again to Rod for the encouragement. I'll add a few more items to the roster in the coming month and set up a website as an adjunct to ebay which has recently added a stealth charge to all purchases.
Andrew
Top
Tanat Valley 3 by Peter Drost

John Borkowski converts Accurascale hopper wagons to S7

The Story of Reeth by Simon Caygill
For further information on the ScaleSeven Group, or if you have any questions: